Sixteen months after moving into this shop, we’ve nearly tripled our 3D printer count, hired employees, built a studio, and started putting some grown-up processes in place. The machines are exciting. But the systems are what’s making this place work better.
This is about 3,000 square feet of leased commercial space where we manufacture products with a 3D print farm, develop new products, and create content. Before moving in, I cleaned up the building and painted pretty much the entire interior to cover some truly unfortunate purple paint.
Now the work is less about making the space usable and more about making it efficient. Here’s how the shop has evolved, what’s working, and what still needs attention.
Key Takeaways
- Kanban cards let employees flag replenishment needs without relying on the owner to notice low stock.
- Dedicated repair and preparation stations keep recurring tasks from disrupting other work.
- Three mobile workbenches make simultaneous product development more flexible than one central table.
- Preboxing consistently selling products helped reduce lead times from weeks to days.
Table of Contents
- Shipping, Receiving, and a Place to Eat Lunch
- Inventory Storage That Actually Tells Us When to Reorder
- A Clean Home for Printer Repairs
- Prototyping With Three Mobile Workbenches
- The Print Farm Has Outgrown Its Room
- Dedicated Part Preparation Keeps Production Moving
- Preboxing Orders Cut Our Lead Times Dramatically
- Offices, Family Space, and a Three-Purpose Studio
- You Can Only Wing It for So Long
- More on Building a 3D Printing Business
Shipping, Receiving, and a Place to Eat Lunch
The front entrance is probably the least changed area in the building. It’s a simple shipping and receiving space, and that’s all it needs to be.
Outgoing packages go into bags in a consistent spot near the door. Our mail carrier knows where to find them each day, so pickup has become a predictable routine rather than another thing we have to coordinate.
One of my biggest requirements when choosing this building was easy pallet access. We receive several pallets of material or equipment every month, and the double doors open wide enough to move a pallet jack in and out without a fight. Deliveries can stay temporarily in the receiving area or move into the main shop.
That doesn’t mean we’ve magically solved storage. There’s still a partial pallet of filament up front because, frankly, we don’t have a better place for it yet. But getting it inside is easy, and that’s a huge improvement.
Just beyond receiving is our makeshift kitchenette. The building didn’t have a kitchen, so we added cabinets, a refrigerator, and a place to prepare food. Nothing fancy.
The surprisingly meaningful upgrade was a table. We went roughly a year without a proper place to sit down and eat, which sounds ridiculous now. Once you have employees, a place to eat lunch or take a break matters.
I originally bought the four-legged FlexiSpot adjustable-height desk to turn it into a workbench. Once it was assembled, it felt too nice for that job. Apparently, what we really needed was a lunch table.
Inventory Storage That Actually Tells Us When to Reorder
The storage room used to be a dumping ground. Renovation supplies, painting equipment, and miscellaneous stuff all ended up here. It was technically storage, but finding and managing anything was another story.
Over the past six months, I’ve been focusing on processes that will let the business keep growing. This room is one of the clearest examples of that change.
A Dedicated Reorder Point
One rack now represents our reorder point. Pulling material from that rack triggers a replenishment order. The quantity stored there is intended to keep us operating normally while the replacement material is being produced or shipped.
That distinction matters. The signal to reorder shouldn’t be an empty shelf. It should happen while there’s still enough material left to cover the wait for more.
Adding Kanban Cards
We’re taking that basic setup further with Kanban cards. I’ve visited factories in several industries and seen how well these systems can work. When they’re implemented properly, they’re a beautiful thing.
Our version is straightforward:
- Material gets used until we reach its designated reorder point.
- A card provides a clear replenishment signal.
- An employee scans the card’s QR code.
- The reorder need is entered into the system so I know what needs purchasing.
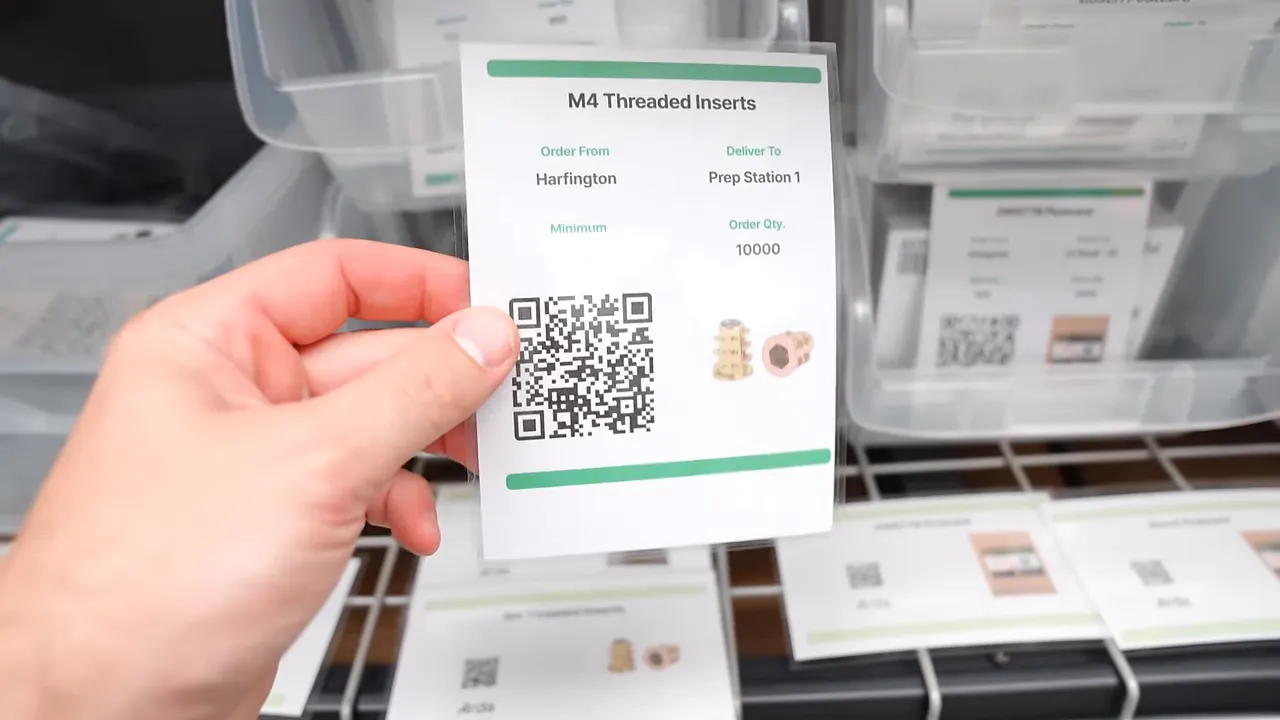
We’re using the Arda Kanban inventory system for this. The important part isn’t just having neat cards on bins. It’s that an employee can flag a reorder without needing me standing beside the shelf.
That’s a big deal. I don’t have to personally notice every low-stock item for the system to work.
For more background on the underlying method, the Lean Enterprise Institute has a useful explanation of Kanban. In our shop, the practical goal is simple: make replenishment visible and repeatable instead of relying on somebody’s memory.
A Clean Home for Printer Repairs
The next room serves two purposes: printer maintenance and a small extension of the production farm.
A 3D printer is a machine, and machines need maintenance. Before this room existed, we repaired printers wherever we could find an open surface. That wasn’t efficient, and parts of the main shop get dusty. Dust, dirt, and electronics aren’t exactly a dream team.
Now we have a dedicated rolling workbench with the tools and spare parts needed to disassemble printers, replace components, and get machines back into service.
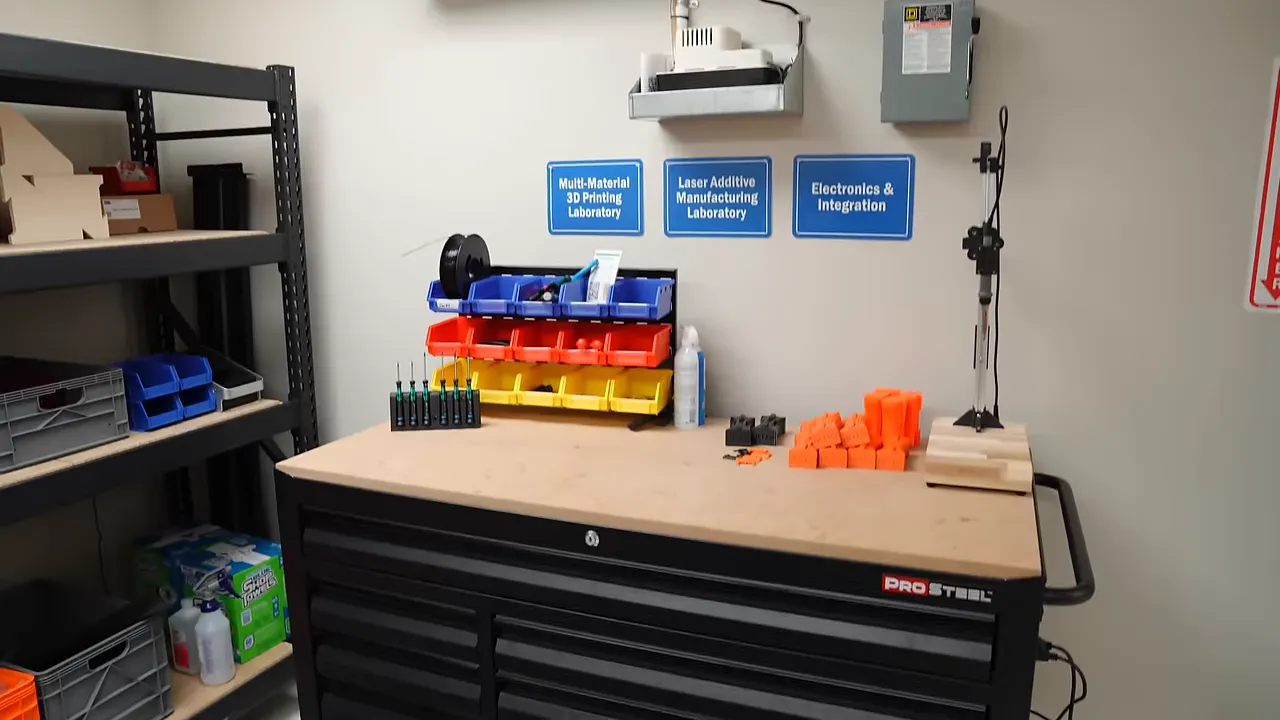
The drawers are still a work in progress. We’ve started adding Gridfinity organizers, but there’s more sorting to do. Extending the Kanban system to spare parts should also help us avoid discovering we’re out of something halfway through a repair.
Along the other wall are six production printers. The top three are Bambu Lab P1S machines, with one-kilogram filament spools stored nearby. These six machines handle more specialized parts that don’t typically run in the other production areas.
Having a dedicated repair area hasn’t eliminated maintenance. It’s just made maintenance much less disruptive.
Prototyping With Three Mobile Workbenches
The main shop is divided broadly between prototyping and part preparation. The prototyping layout has gone through a couple of iterations, and this version feels like the one that will stick.
The biggest change was replacing one central table with three mobile workbenches. Developing multiple products at the same time is much easier when each project can have its own surface.
If I need a big table, I can push the benches together. If I need to keep projects separate, I can spread them out. That flexibility has been more useful than one permanent, oversized work surface.
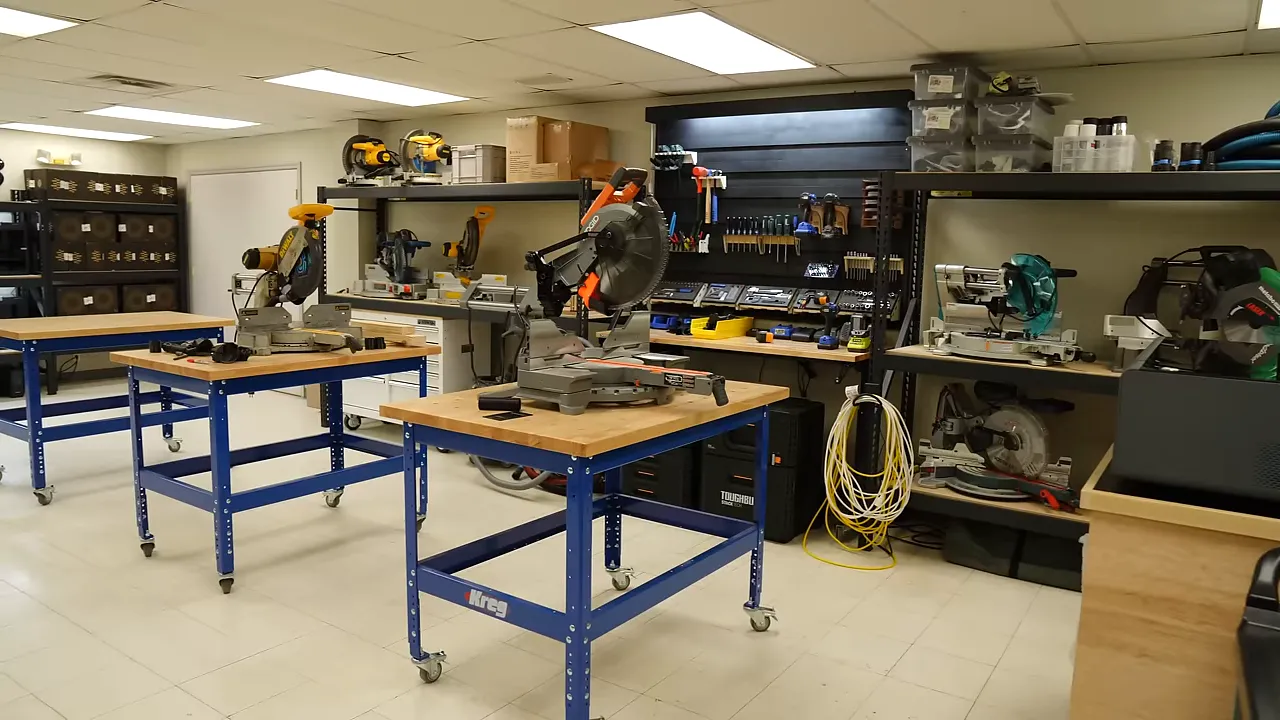
I used Kreg workbench components for these. Yes, I could have built the bases myself. But sometimes assembling something sturdy and getting back to work is the better choice. The point was to improve product development, not create another project before product development could happen.
The laser also has its own cart now. That was a fun build, but the real benefit is keeping the machine and its supporting stuff organized.
The unsolved problem in this area is miter saw storage. Developing dust collection products means keeping a lot of big, bulky saws around. Two long racks flank the tool wall, and I’m already running out of room. There’s definitely another storage solution in my future.
Even with that limitation, this layout makes it easier to work on products and get them out faster.
The Print Farm Has Outgrown Its Room
The newest addition to the farm is a group of 12 Bambu Lab P1S printers in the main shop. The original print farm room is full, so expansion has officially spilled out into the rest of the building.
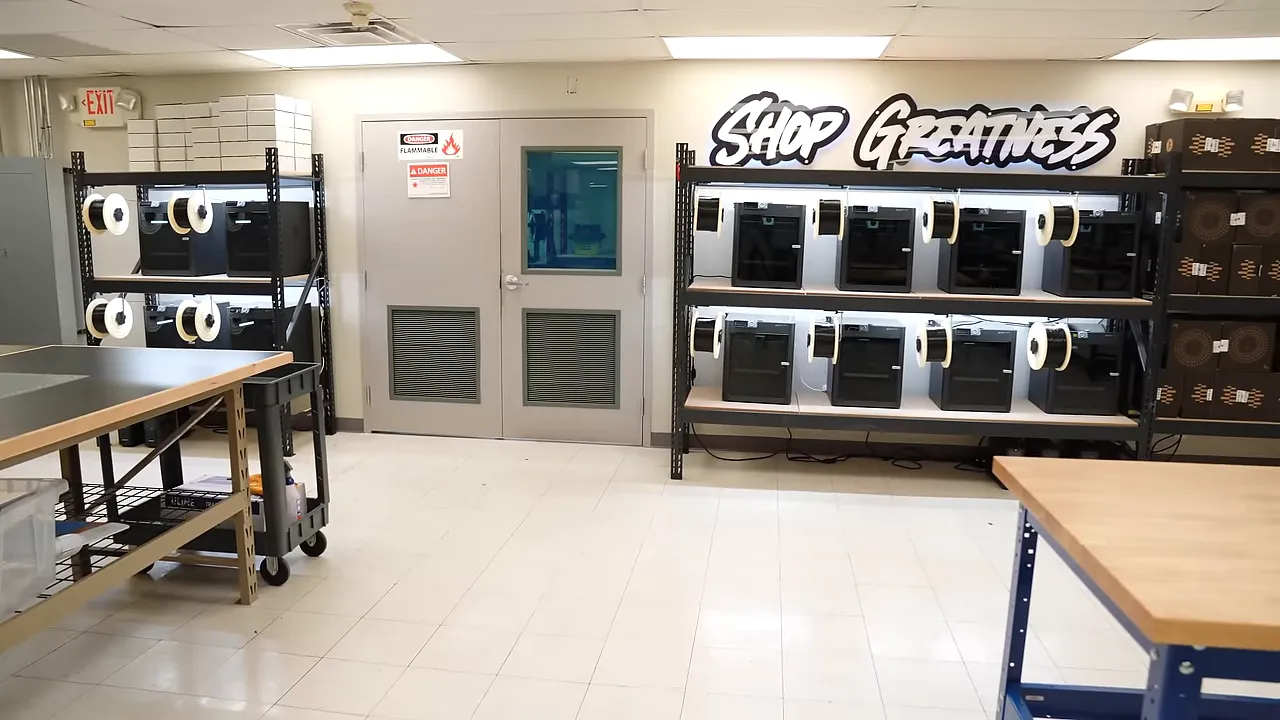
The extra capacity supports growth, but it also addresses a specific problem: product launches. Historically, those first waves of orders have left us with long lead times. Adding machines is intended to give us more capacity when demand jumps.
And yes, I spent some time making the racks look nice. If I’m going to stare at a wall of printers every day, it might as well be a good-looking wall of printers.
Inside the Main Production Room
The original print farm room contains:
- 30 Prusa MK3S+ printers
- 12 Bambu Lab P1P printers
Between that room, the new main-shop expansion, and the six machines in the repair room, production is spread across three areas.
The main room is packed. It’s also loud and gets extremely hot when all the printers are operating, so a room full of machines brings challenges beyond simply finding enough shelf space.
Standardizing Filament and Managing Supply
Keeping the right amount of filament on hand is one of the biggest ongoing challenges in a 3D printing business. A lot of production capacity doesn’t help much if the material it needs isn’t available.
That’s another place where I’m excited to use Kanban cards. We’re extending the same replenishment approach to filament so we can get better at avoiding stockouts.
We’re also trying to standardize wherever practical. For the majority of our printing, we’ve settled on Proto-pasta filament.
There are exceptions. I bought three pallets of black PETG from a company that wanted to move it at a very attractive price. That was roughly 1,500 pounds of material, which explains some of the black filament boxes scattered around the facility. A good bulk deal still needs somewhere to live.
Dedicated Part Preparation Keeps Production Moving
Freshly printed parts don’t necessarily go straight into a shipping box. We have preparation work, hardware installation, and subassemblies to complete first.
One new station is dedicated to preparing the flat material used in many of our dust chute products. We do that work often enough now that borrowing space elsewhere was getting in the way.
Everything needed for the task stays at that station. Prepared components then move into inventory rather than lingering on whatever table happened to be available.
The other part preparation area consists of two tables that receive parts directly from the print farm. This is where we:
- Remove supports and perform other post-processing.
- Add the hardware needed for the next stage.
- Build final subassemblies for fulfillment.
There’s a lot of hardware in this area, so the Kanban system is being used here too. The same idea keeps showing up throughout the shop: put supplies where the work happens, and make replenishment obvious.
Preboxing Orders Cut Our Lead Times Dramatically
Fulfillment is another area where we’ve spent a lot of time improving the process. The biggest shift is moving away from pulling all the parts and building each order only after it arrives.
One of the attractive things about 3D printing is that you don’t have to carry huge inventories. You can print what you need as you need it. That’s useful, but our business has grown to the point where certain products sell consistently enough to prepare them ahead of time.
We now build inventory of that predictable product mix and prebox complete products. This creates a buffer between the print farm and fulfillment.
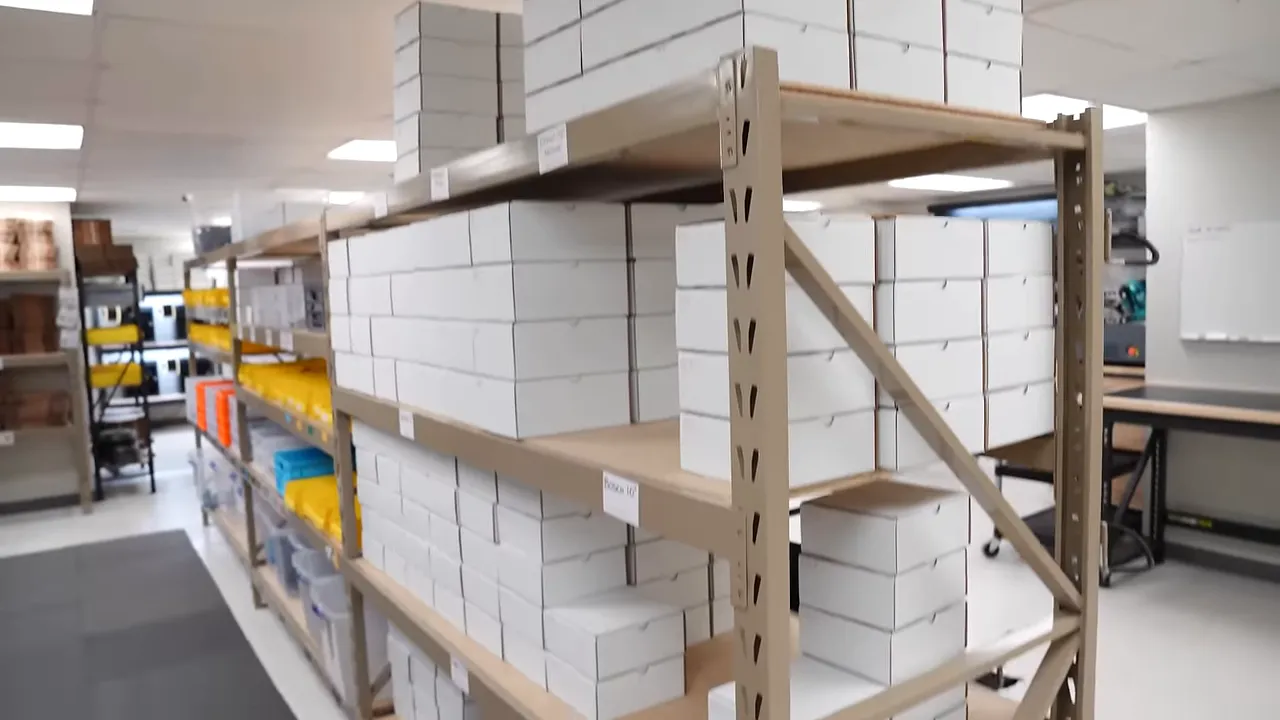
The result has been a reduction in lead times from one or two weeks to one or two days.
That’s a much more meaningful improvement than simply making the packing bench look organized.
The Packing Workflow
Order fulfillment follows a straightforward path through the station:
- Print the paperwork. Packing slips and shipping labels start at the computer, alongside our upgraded label printer.
- Gather and lay out the order. The long work surface provides room to organize the shipment.
- Package everything. Supplies stay within reach as the order moves down the bench.
- Seal the box. The tape machine sits at the end of the station and might be the most important machine in the building. Mostly kidding.
- Stage it for pickup. Finished packages go into bags by the front door.
The goal is to make each step flow naturally into the next without constant trips across the shop.
Offices, Family Space, and a Three-Purpose Studio
About 500 square feet of the building is office space. The first room has a spare desk for my wife when she’s here helping with the business, along with a place for the kids to hang out.
We added another FlexiSpot standing desk and a C7 ergonomic chair. I’ve owned several standing desks, and the sturdiness of these has stood out. They don’t have that unsettling wobble that makes everything on the desktop feel ready to fall over.
The room also has a couch, a television, and a small table where the kids can do homework. A shop that works for our family needs a little more than printers and packing supplies.
The back room serves three jobs:
- Office: My desk and regular computer workspace.
- Prototyping: A separate group of machines for development work.
- Studio: A controlled space for recording content.
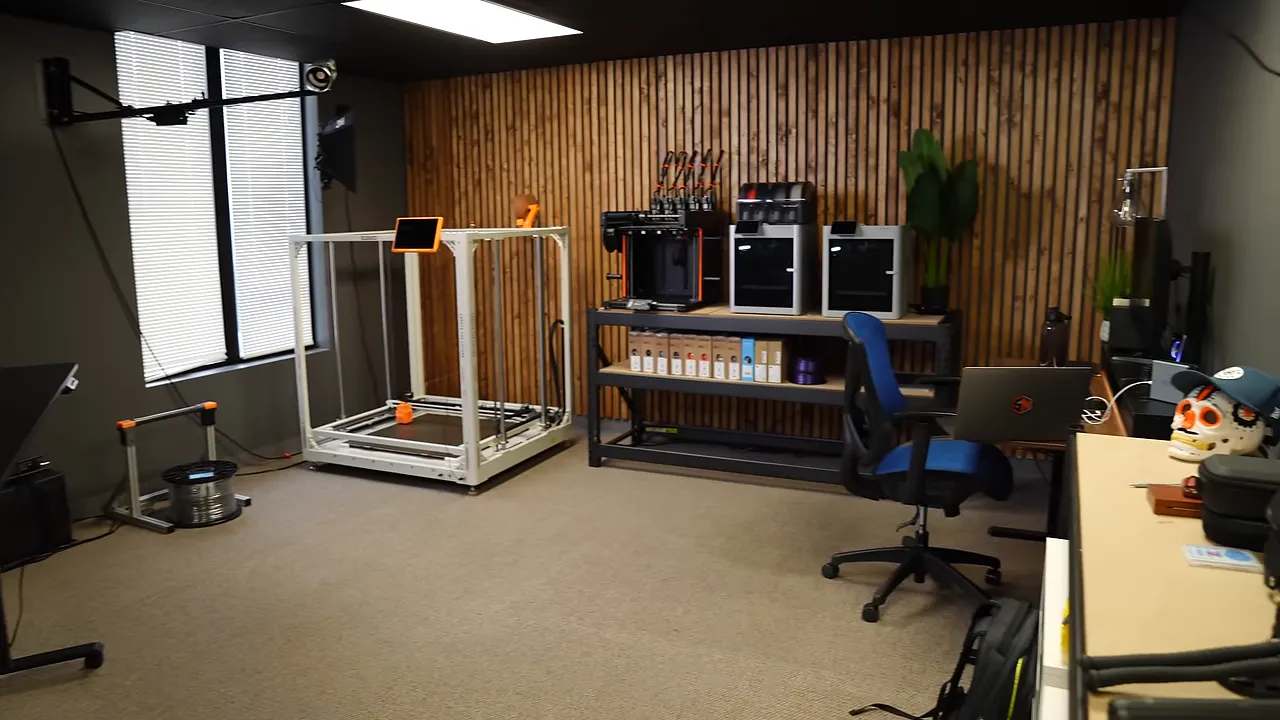
The room looks very different under its normal overhead lights than it does with the studio lighting dialed in. Lighting does a tremendous amount of the work.
My friend Drew Witt helped build it, and we documented the studio build process for anyone interested in how the space came together.
There’s also an enormous Elegoo OrangeStorm Giga sitting in the corner, with a build area roughly three feet by three feet by four feet. I’m still figuring out exactly what to do with it. For now, it’s here, and it is not subtle.
You Can Only Wing It for So Long
The biggest lesson from these 16 months isn’t that more printers solve everything. It’s that a growing operation eventually runs into the limits of informal habits.
When repairs happen anywhere, materials depend on memory, and every order requires a fresh scramble for parts, the business becomes harder to grow. Dedicated work areas, reorder signals, standard materials, and a sensible inventory buffer make the whole operation less dependent on me being everywhere at once.
This shop is absolutely not finished. The repair drawers need work. Miter saw storage needs a better answer. Filament is still taking up space near the entrance. But we’re moving in the right direction.
And none of this only applies to making products for sale. A more efficient hobby shop means less time moving things around and more time creating things. That’s shop greatness worth pursuing.
More on Building a 3D Printing Business
I’m separating the two sides of what I do: Shop Nation will stay focused on shop optimization and projects, while Print Farm Academy will focus on 3D printing businesses. That includes a more detailed production-farm tour and a course planned for later in the year on starting or growing a 3D printing business.
|