The dream is pretty simple: start a project and finish it without hunting for a fastener or making a 30-minute hardware store run. Nothing kills that hard-earned flow state quite like discovering you’re out of the exact 2-inch, #10 Torx drive wood screws you need.
My solution was to bring the hardware store home. Neat rows of small parts, everything easy to find, and enough backup stock to keep a project moving.
But the bins aren’t the important part. I’ve organized hardware before, and I’m guessing you have, too. It looks fantastic for a month. Then new stuff arrives, old bins empty out, and somehow we’re back to digging through a drawer full of threaded rabbits that apparently multiplied overnight.
Most hardware organization fails because there’s no process to go with the storage system. Fix that, and even Grandpa’s coffee can starts to make a little more sense.
Key Takeaways
- Hardware storage stays organized when a simple process handles new items, leftovers, and replenishment.
- Plan for twice your current storage needs and prioritize convenient access for frequently used hardware.
- A visible return bin catches loose hardware until you can identify it and put it away.
- Keep reserve stock of critical fasteners and trigger a reorder whenever you use that backup.
Table of Contents
- Why a Perfectly Organized Shop Falls Apart
- The Manufacturing Lesson: Give Your Storage a Process
- Step 1: Choose Hardware Storage With Room to Grow
- Step 2: Gather, Consolidate, and Organize
- Step 3: Add a Return Bin for Leftover Hardware
- Keep Reserve Stock for the Hardware You Cannot Run Out Of
- How I Divided My Shop Into Three Hardware Storage Areas
- Stress-Test Both Finding and Returning Parts
- The Goal Is Uninterrupted Shop Time
- Sponsor Note: Creating 3D Models With Hi3D
Why a Perfectly Organized Shop Falls Apart
Clear parts drawers, Gridfinity, drawer dividers, portable organizers with removable cups: these are all solid options. None of them automatically answers the questions that show up after the big organizing day:
- Where does a new type of hardware go?
- What happens to the leftovers after a project?
- How do you know when to reorder something?
- What happens when every compartment is already full?
Usually, frustration finally gets high enough that we stop a project, collect every box of hardware in the shop, consolidate similar parts, and put everything away. It feels incredible.
Then we keep working exactly the way we did before. New purchases land in random drawers. Loose screws stay on the bench. Nobody replaces the last box of a favorite fastener. The storage wasn’t necessarily wrong. It just never had a way to handle change.
The Manufacturing Lesson: Give Your Storage a Process
Running a manufacturing business has taught me that processes can make life a whole lot easier. That doesn’t mean writing a formal procedure nobody will ever read. A process is simply an intentional way of handling a situation.
At my 3D printing farm, running out of hardware, magnets, or printed cards can mean missing a customer’s shipping window. We use a two-bin inventory system to help prevent that.
- Pull from the front bin. This holds the stock used for normal replenishment in the manufacturing space.
- Switch to the reserve bin when the front bin empties. The second bin sits behind the first and contains our minimum inventory.
- Move the Kanban card to the reorder box. Accessing reserve stock triggers a new order.
- Reset everything when the shipment arrives. Refill the reserve quantity shown on the card, return the card, and fill the front bin.
The reserve has to last until replacement stock arrives. An item with a longer lead time needs a larger minimum inventory. The system only works when those levels are set appropriately.
A Kanban signal makes the need for replenishment visible. If you want to use physical cards, these Kanban card templates provide a starting point.
Am I suggesting every home shop needs two bins for every washer? Probably not. The useful lesson is that storage needs a trigger and a response.
The Three Parts of a Simple Process
- Understanding: Hardware and small parts have an easy-to-find home so work can continue without interruption.
- Trigger: Something changes, such as receiving a new item or reaching the point where supplies need replenishing.
- Action: Put the new item away, assign it a location, or buy replacement stock.
A good process shouldn’t depend on memorizing a bunch of rules. It should be simple, visual, and obvious enough to work with how you actually use your shop.
Step 1: Choose Hardware Storage With Room to Grow
Use the storage system you like and that fits your space. Off-the-shelf clear drawers, mobile parts organizers, divided drawers, and interlocking small-parts bins can all work.
There is, however, one rule I feel pretty strongly about:
Get at least twice as much storage capacity as you currently need.
If your hardware fills two portable organizers, plan for four. Sizing storage for exactly what you own today is one of the easiest ways to guarantee that the next purchase ends up homeless.
I may have taken this advice a little too seriously. After ordering a substantial quantity of stackable parts bins, unboxing them, and hauling them home in the truck, I’m probably set for a while. Apparently, ordering organizers while short on sleep has consequences.
Build Around Your Workflow, Not a Photograph
I have an upstairs area with room for a large organizer near my 3D printing setup. To hold the plastic drawer units neatly, I built basic cabinet boxes with thin backs. Nothing fancy. The job was to support the organizers, not turn the cabinet itself into a complicated project.
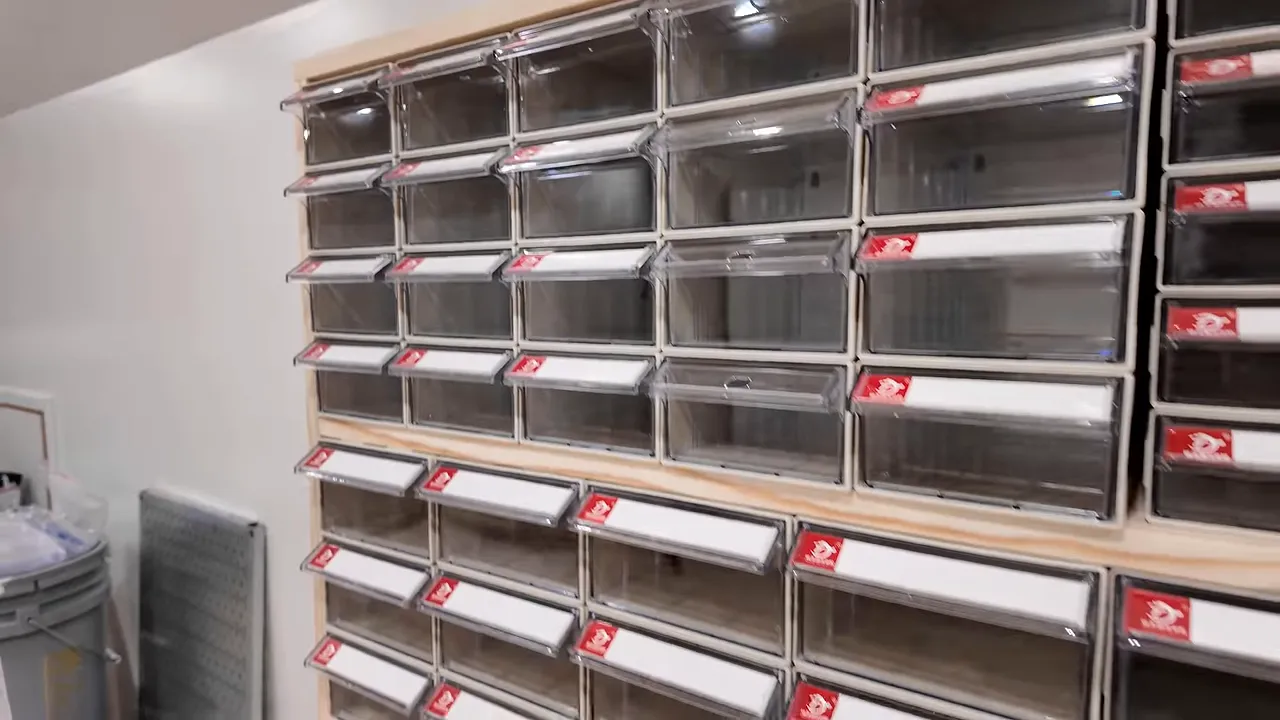
But walking upstairs every time I need a common screw would get old fast. That large organizer is better suited to less frequently used hardware. Smaller organizers can live strategically around the shop.
The bins built into my workbench needed a rethink, too. Over time, wall hangers, generic bolts, and springs had worked their way into them. At that bench, I’m usually reaching for screws, brad nails, or finish nails. Those are the items that deserve that premium location.
You do not need one giant wall containing every fastener you own. It would look cool. It would also consume a pile of wall space and might be less convenient than a few smaller storage areas.
Step 2: Gather, Consolidate, and Organize
Before deciding where everything belongs, find out what you actually have. I call this the purge.
Root through the entire shop like a truffle pig. Open the drawers. Check the shelves. Find those half-empty boxes you forgot you bought, then collect everything in one place.
Once it’s all visible, group similar items by the characteristics that matter to you, such as type, size, and length. Consolidate duplicates, get rid of things you’ll never realistically need, and put the keepers into your chosen containers.
Your workflow should decide how much space each category gets and where it lives:
- High-use hardware gets more capacity. Don’t squeeze a heavily used fastener into a compartment that is constantly empty.
- Frequently used items get easy access. Save the convenient spots for things you actually reach for.
- Occasional-use parts can live farther away. That odd assortment you might need someday doesn’t deserve the best spot in the shop.
- Store parts near their point of use when practical. In a very small shop, distance matters less, but convenience still counts.
There’s no prize for making your layout match mine. Organize it so your decisions make sense when you’re in the middle of building something.
Step 3: Add a Return Bin for Leftover Hardware
This is where most organizing projects stop too soon. Everything is put away, so we declare victory. But we still haven’t handled what happens after the next project.
That’s why the return bin might be the most important piece of the whole setup.
A return bin is a temporary home for loose hardware, not its final resting place. Its job is to catch leftovers instead of letting them disappear into random drawers or get thrown away during cleanup.
It can be a coffee can, a small container, or a purpose-built bin. I used a 3D printed wall-mounted return bin with a removable mount and placed a couple around the shop.
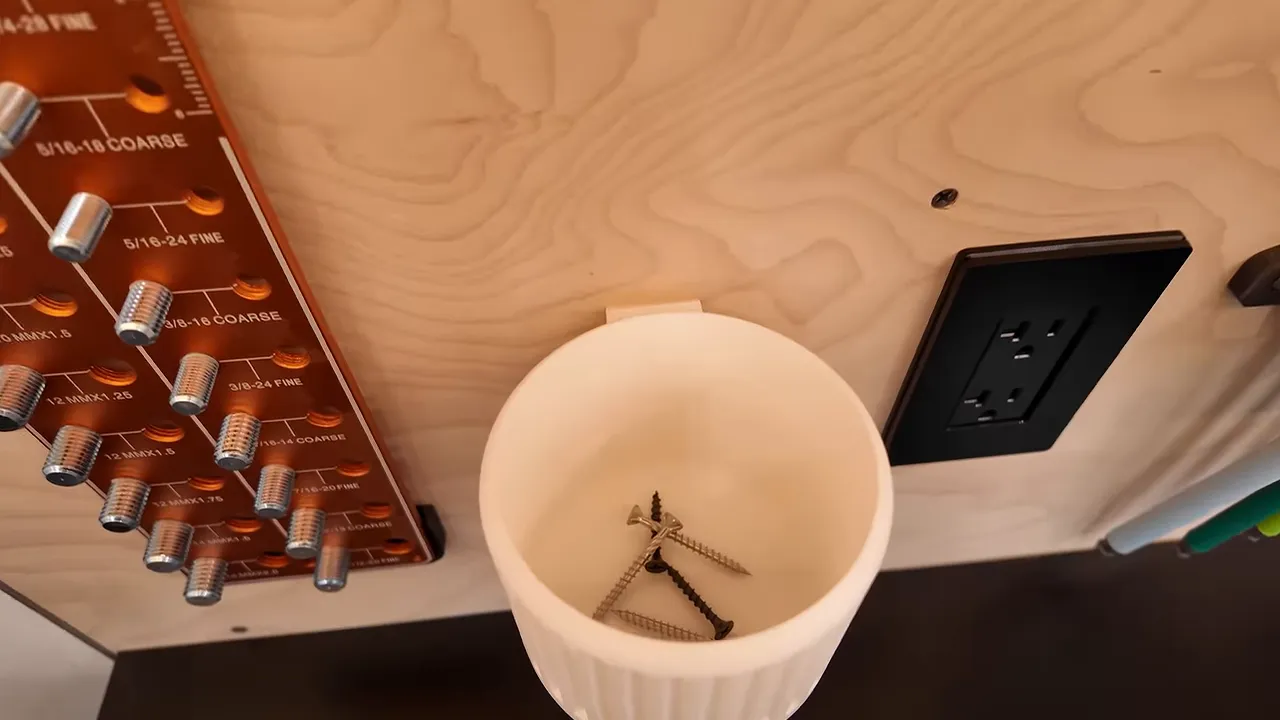
Label it, make it obvious, and put it somewhere you’ll actually use it. We all know that in the heat of a build, neatly returning every leftover screw isn’t always going to happen. My bench usually looks like a bomb went off by the time I’m finished.
Once the literal dust settles, the process is simple:
- Collect the return bins.
- Identify the loose hardware.
- Return existing items to their assigned homes.
- Assign a location to anything new.
- Put the empty return bins back in position.
Do this periodically as part of putting the shop back together. The coffee can becomes useful when it feeds the storage system instead of replacing it.
Use Gauges Instead of Guessing
Some leftovers are obvious because you just pulled them out of an organizer. Others are a mystery. That’s where a thread gauge earns its keep.
I hated guessing nut and bolt threads enough that we started selling a shop thread gauge. The one I use helps identify metric and imperial threads, with sizes up to 1/2 inch in diameter.
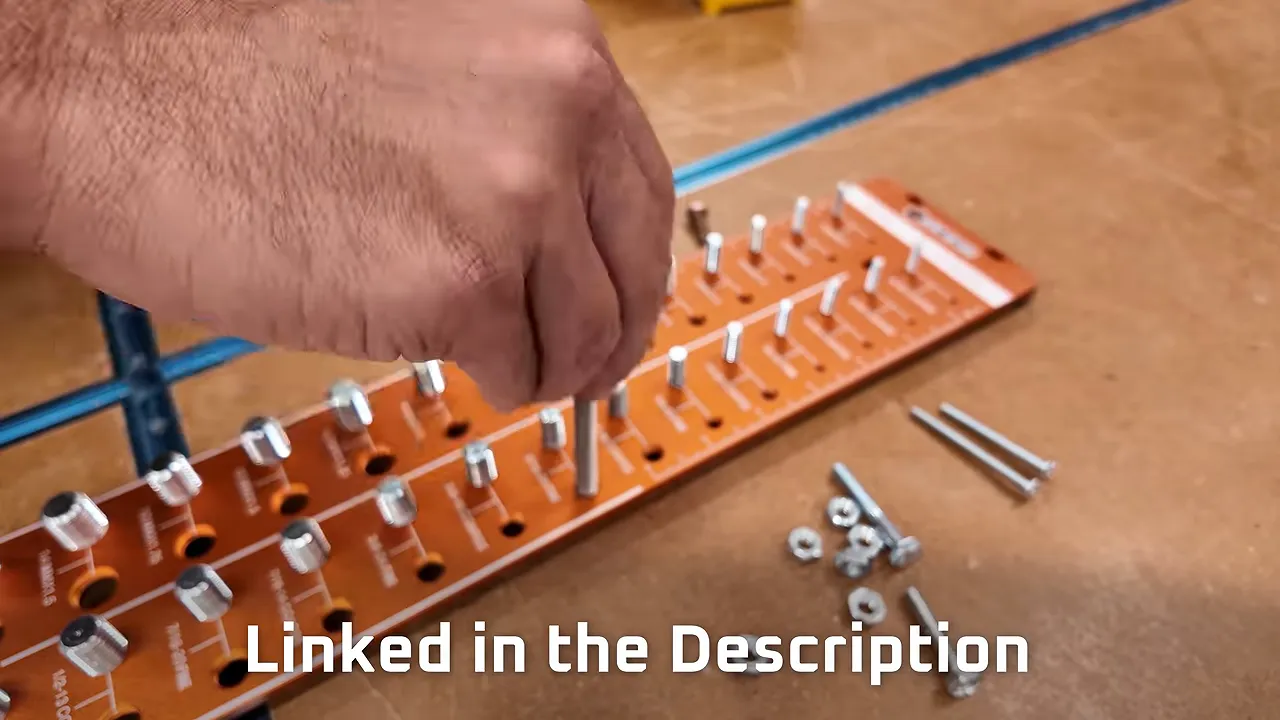
A thread gauge doesn’t solve wood-screw identification. For those, I use a small 3D printed jig that helps identify Torx drive size and measure length. Between those tools and a visual comparison, I can sort most of what turns up.
Calipers, screw gauges, and other 3D printed sorting tools can help, too. Use whatever removes the guesswork from your particular hardware collection.
Make the Contents Visible From the Outside
One of the best improvements I’ve made is also ridiculously simple: hot-glue an example of the contents to the outside of the bin.
It isn’t practical for every item, but it makes finding and returning unusual parts much easier. Even clear drawers benefit from an unmistakable physical example on the front.
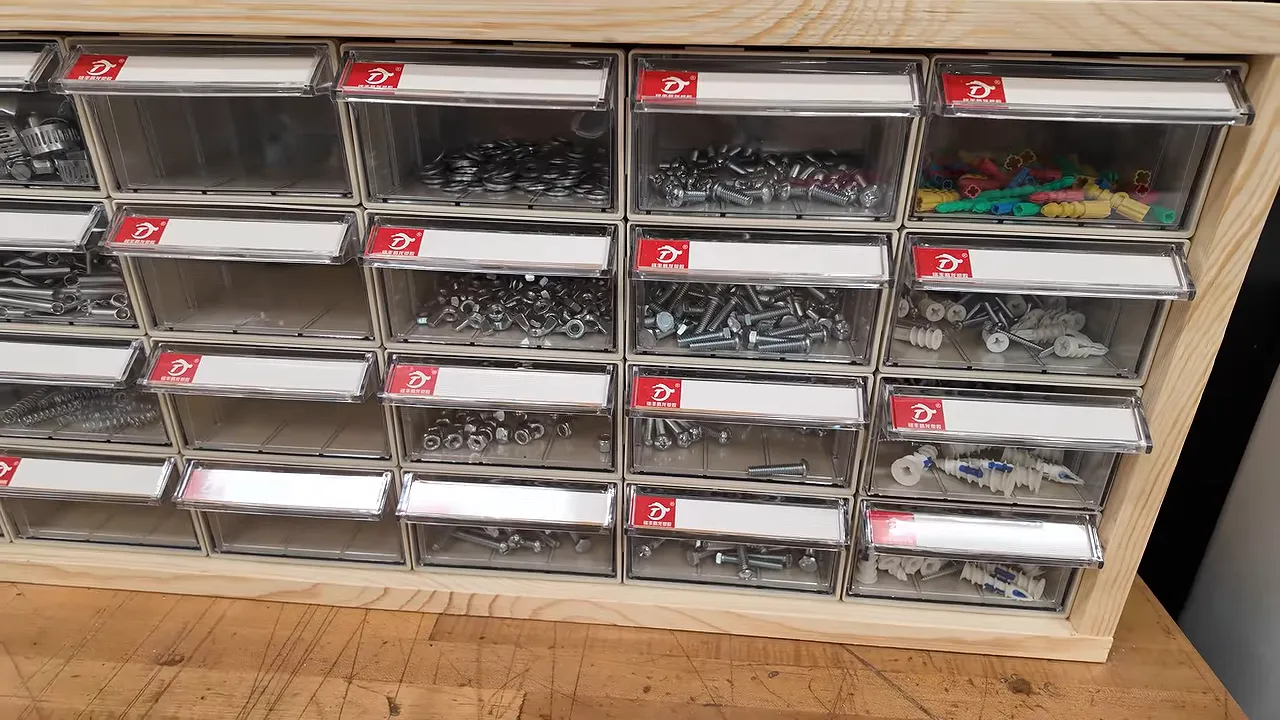
Labels tell you what belongs there. A sample helps you recognize it immediately. More visibility means less searching in both directions.
Keep Reserve Stock for the Hardware You Cannot Run Out Of
Finding hardware quickly only solves half the problem. The other half is making sure there’s still something in the bin when you need it.
You don’t need a full manufacturing inventory system. Start with the essential hardware that would stop a project if you ran out.
For me, a simplified two-bin system means keeping an extra box of favorite screws in a designated emergency-stock drawer. That box isn’t normal working stock. It’s the break-glass-and-grab-the-fire-axe supply.
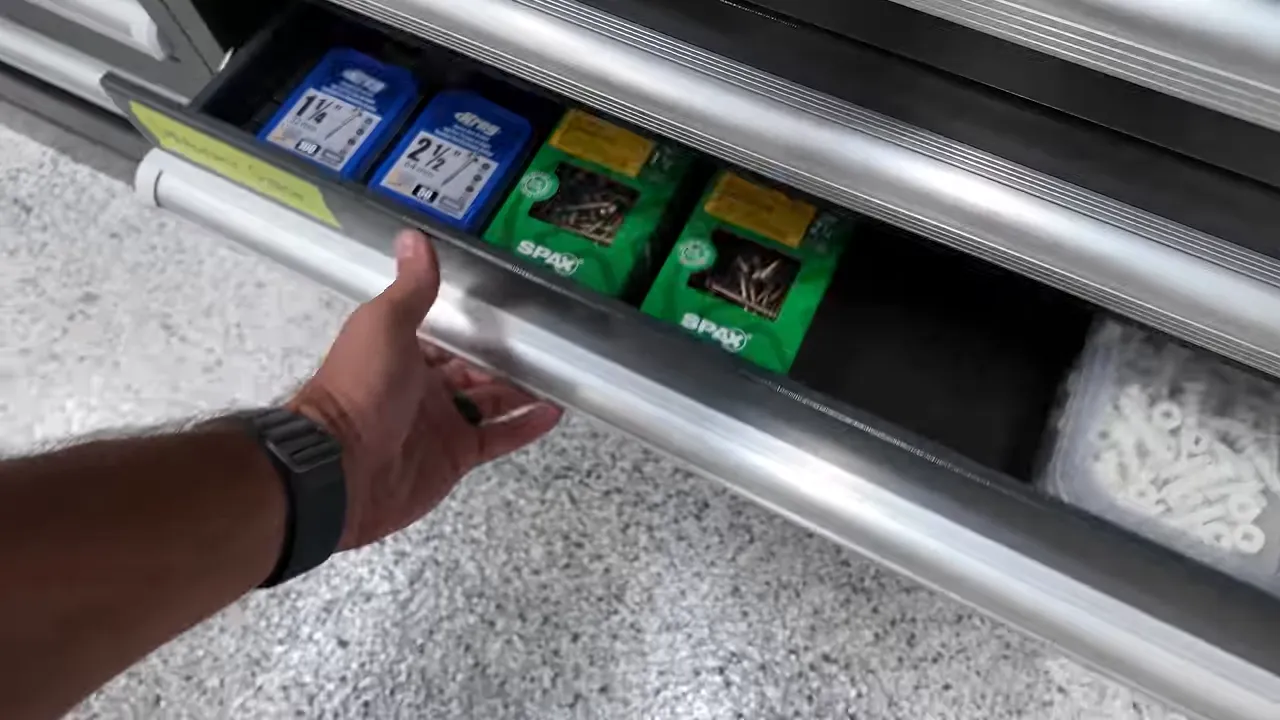
When an active bin empties, use the reserve to keep working. But taking that reserve must trigger a reminder to replace it.
- Write it on a small dry-erase board.
- Add it to a shopping note on your phone.
- Put a sticky note on the shop door where you’ll see it before leaving.
I like a dry-erase board because it doubles as a place to sketch ideas and maintain a running shopping list. Your method can be different. What matters is that the reminder happens when you take the backup, not whenever you happen to remember later.
The cycle is not complete until the emergency stock is refilled. Without that last action, you’ve only postponed the hardware store trip.
How I Divided My Shop Into Three Hardware Storage Areas
After spending a week putting the collected hardware away, I landed on three main locations. Each one serves a different level of use.
1. The Workbench: Everyday Woodworking Fasteners
The portable organizers in my workbench now hold the things I use most:
- Common wood screws
- Finish screws, cabinet screws, and flathead screws
- Brad nails, finish nails, and staples
- Loose tenons
- Pocket-hole screws
- Outdoor screws, with room left for expansion
The point wasn’t simply to fit more in the bench. It was to remove the stuff that didn’t belong there and give everyday supplies a more useful home.
2. A Smaller Bench Organizer: Frequent Small Parts
The second location sits on a smaller workbench and holds electrical supplies, wooden dowels, wall anchors, and my commonly used 1/4-20 bolt hardware.
If I’m building something with a bolted connection, 1/4-20 is often the size I choose. M6 is roughly comparable in diameter, though it is a different thread system, not an interchangeable substitute.
These are all things I’ve had to dig for in the past. Now they’re together in an accessible location.
3. The Upstairs Organizer: Less Frequent Hardware and Future Growth
The large mobile cabinet upstairs is farthest from where I normally work, so it holds items I don’t expect to need constantly: self-tapping screws, nails, concrete screws, lag screws, other threaded hardware from #8-32 through 1/2 inch, some metric hardware, and assorted oddities collected over the years.
Just as important as what’s in it is what isn’t: there’s plenty of empty space. New discoveries and future purchases have somewhere to go.
The cabinet is on casters, so I can move it out of the way upstairs. There’s also space to add more storage if I ever need it. Hopefully not immediately, given how many bins I already bought.
Stress-Test Both Finding and Returning Parts
A neat organizer looks good when nobody is using it. The real question is whether it works under pressure.
For that, I brought in one of nature’s most effective stress tests: children.
First, my kids called out hardware from a list, and I had to find it. The requests included an M6 bolt, Torx wood screws, springs, large red wire nuts, #8-32 nuts, and Cortex screws. That sent me between the workbench, the smaller organizer, and the upstairs cabinet.
The retrieval test worked pretty well, but finding parts is only half the equation. For the second test, the kids selected an assortment of hardware and deposited it in the return bin. I then had to identify the pieces and put them back.
Their estimate for how long I’d need? An hour. Very encouraging.
It took considerably less than that, and the exercise showed that the return process was workable. It also exposed opportunities to improve it:
- Add more physical samples. A few odd-looking items would be faster to recognize with an example on the drawer front.
- Consider color-coded labels. Different label colors could help narrow the search before reading individual descriptions.
- Test putting things away, not just taking them out. A system that is easy to search but annoying to maintain still has a problem.
That’s a much more useful test than standing back and admiring the rows.
The Goal Is Uninterrupted Shop Time
The point of hardware organization isn’t to win a tiny-drawer beauty contest. It’s to spend more time making things and less time searching, rebuying, and driving.
Choose storage that fits your workflow. Leave room to grow. Put commonly used hardware within easy reach. Catch leftovers in a return bin, identify them without guessing, and put them back. Keep reserves of critical supplies and replace those reserves when you use them.
That’s how a collection of bins starts behaving like a hardware store.
Then Saturday morning can look a little more like the dream: turn on some music, get to work, and stay in that flow state because the hardware is already where it needs to be.
Now, where the hell did I put that tape measure?
Sponsor Note: Creating 3D Models With Hi3D
Hi3D sponsored this project. Separate from the return-bin design, which I created in CAD, I used its AI 3D creation tools to turn images of a custom character, Farmer Bill, into a printable model.
The workflow started with images I created with help from ChatGPT. Hi3D generated the digital model, which I exported as an STL, scaled in my slicer, and printed as a single-color test. The resulting figure had some impressive detail.
The platform accepts images or text prompts and also offers tools for splitting models into parts, adding connectors, and choosing print orientations. It supports automatic color mapping for multicolor workflows and had recently added 8K texture generation when I tested it.
Possible uses include custom tabletop miniatures, personalized pet models, or even drawer pulls with your own face on them, if that’s the direction your shop needs to go. The promotion offered up to 60% off a monthly plan, with an extra 200 credits for the first 200 new users signing up through the promotional link.


