3D printing is easy to ignore until somebody uses it to make something genuinely useful. Then suddenly you’re interested, you start researching, and about ten minutes later you’re buried in printers, filament, slicers, and whatever the heck a Thingiverse is.
It doesn’t need to be that complicated. If I were starting over with the machines in this comparison, I’d buy the Bambu Lab P1P. The reason isn’t that it has the fanciest screen or the longest feature list. It delivers the things a beginner actually needs without making the printer itself a second hobby.
But the printer is only half the equation. The other half is knowing how to go from a machine sitting on your desk to a tool that solves real problems in your shop.
Key Takeaways
- Prioritize reliable printing and approachable software over headline speed or the lowest purchase price.
- The P1P earned my original beginner recommendation by retaining useful capabilities without the X1’s premium extras.
- Build confidence with existing models before taking on custom designs.
- Custom parts require a model, but you can hire a designer instead of learning CAD immediately.
Table of Contents
- Buy a Tool, Not a Troubleshooting Project
- Prusa vs. Bambu Lab: The Corolla and the Tesla
- The Beginner Features That Actually Matter
- Why I’d Choose the Bambu Lab P1P
- You Bought a Printer. Now What?
- How to Make Custom Parts Without Learning CAD First
- The First Useful Fix Is What Makes It Click
Buy a Tool, Not a Troubleshooting Project
I’ve spent roughly five years printing almost nonstop in a professional engineering environment, working with everything from expensive industrial machines to pretty lousy desktop printers. At the time of this comparison, my production print farm consisted of about 40 printers with tens of thousands of accumulated print hours.
So yes, I’m a 3D printing dork. But my interest is mostly in functional parts, not filling a desk with figurines. Printing goofy stuff can absolutely be fun. Solving a problem with a part you made yourself is where this technology really earns its place.
That experience has made my first buying criterion pretty simple: the printer needs to work reliably without demanding constant attention.
You can save a lot of money with a cheaper machine, such as an Ender 3. But there’s an important distinction between getting into 3D printing and getting into working on 3D printers.
If you enjoy tinkering, modifying hardware, and troubleshooting, that can be part of the fun. If you just want to make useful things, manually leveling a bed and adding third-party components to get consistent results can kill your enthusiasm before you’ve accomplished much.
There’s plenty of time to become a printer mechanic later. Your first machine should help you get some successful prints under your belt.
Prusa vs. Bambu Lab: The Corolla and the Tesla
The two machines that frame this comparison are the Prusa MK4 and the Bambu Lab X1. Think of the Prusa as a beige Toyota Corolla with cloth seats. It isn’t going to win a drag race, but you trust it to get you to work.
The Bambu is more like a Tesla Model S: sleek, fast, and loaded with clever technology, but without the same long track record at the time I tested it.
Both were excellent hobbyist options, including for complete beginners. I purchased the machines myself, and neither printer company sponsored this comparison.
Why Prusa Earned My Trust
My print farm ran Prusa MK3S+ machines because reliability matters when printers are production equipment. Their open-source design and parts availability also make them relatively straightforward to service.
Prusa has been developing, manufacturing, and supporting printers since 2012. The first one I bought in 2018 was still going strong when I made this comparison. That kind of experience means more to me than a flashy specification sheet.
It’s not just whether a machine works when you unpack it. It’s whether you can keep it working when something eventually wears out.
Why Bambu Lab Changed the Conversation
Bambu Lab brought features associated with expensive industrial printers into a much more accessible consumer machine. Those features weren’t necessarily new to the industrial world, but putting them together at this price level was a big deal.
A lot of that progress comes from clever software, not simply faster motors.
One example is input shaping. When a print head accelerates, the printer’s structure reacts and vibrates. Input shaping accounts for the machine’s resonance and adjusts its movement commands to reduce those vibrations.
In plain English, the printer anticipates some of the shaking its own movements would create and compensates for it. That helps it move faster while controlling the effects of vibration.
In my experience with these machines and their software at the time, the Bambu could complete some prints up to four times faster than the Prusa. Across my printing, roughly twice as fast was a more typical result. That is still a considerable difference.
There’s an important historical detail here: the MK4 had just launched, and its hardware supported input shaping, but the feature wasn’t yet available in its release software. My speed comparison reflects that period, not a permanent performance gap across every later firmware version.
The Beginner Features That Actually Matter
Speed is nice. Getting the damn thing to work without thinking about it is more important when you’re new.
The MK4 and X1 both offered automation and software that removed a lot of the friction associated with older or more basic machines.
Automatic Bed Leveling
The first layer of plastic needs to stick properly to the print bed. If that goes wrong, the rest of the print usually isn’t going to improve matters.
Both machines run a bed-leveling process before printing. Letting the printer handle that setup is a huge benefit compared with repeatedly adjusting the bed yourself. It takes one common source of failure out of your hands.
A Good Slicer
A 3D model isn’t the same thing as a set of printer instructions. To bridge that gap, you use a program called a slicer.
The slicer takes the model, divides it into thin layers, and generates the G-code instructions the printer follows. You don’t need to understand G-code to get started. You just need to understand that the slicer prepares your model for your specific printer and gives you settings that affect how the part is made.
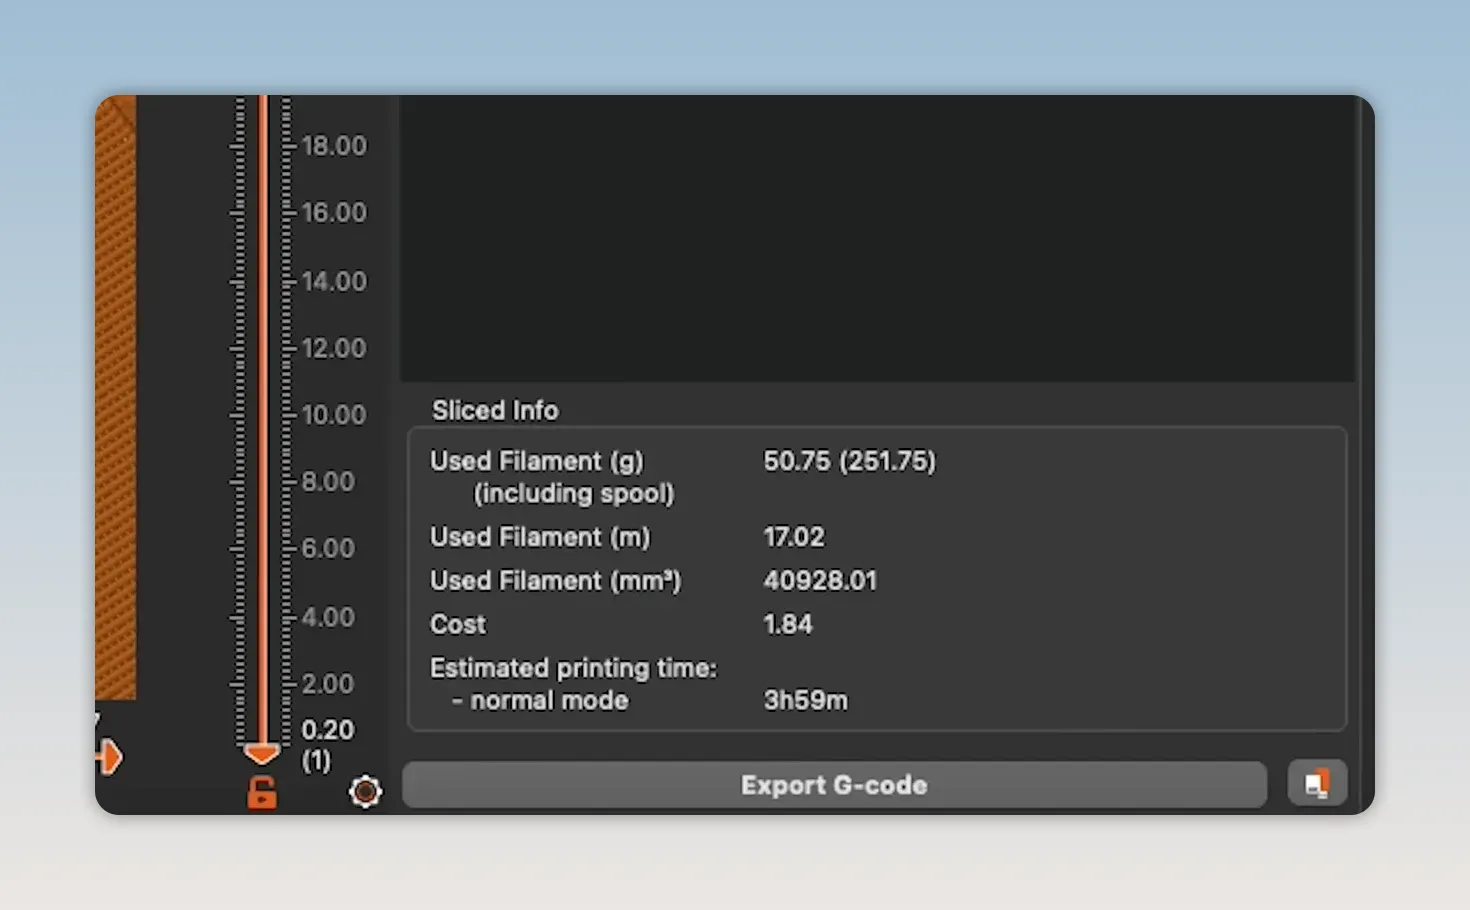
Prusa developed PrusaSlicer, which is excellent software. Bambu Lab built its own software on that open-source foundation. The practical benefit is that both ecosystems start with capable, approachable tools rather than leaving you to figure everything out from scratch.
Useful Controls and Wireless Connectivity
The MK4 and X1 both have clear color displays and support wireless connectivity. Sending a prepared file from your computer is much more convenient than shuttling a USB stick or SD card back and forth.
Ask me how I know.
These are convenience features, but convenience matters when you’re trying to build a habit of actually using a tool.
Room to Explore Materials
Both machines also have capable hot ends and extruders, the components that feed, melt, and push plastic through the nozzle. That gives you room to explore a range of materials as your needs grow, rather than immediately running into the limits of a very basic machine.
Why I’d Choose the Bambu Lab P1P
After all that praise for the MK4 and X1, my beginner pick is neither one.
It’s the P1P, the stripped-down, less flashy alternative to the X1.
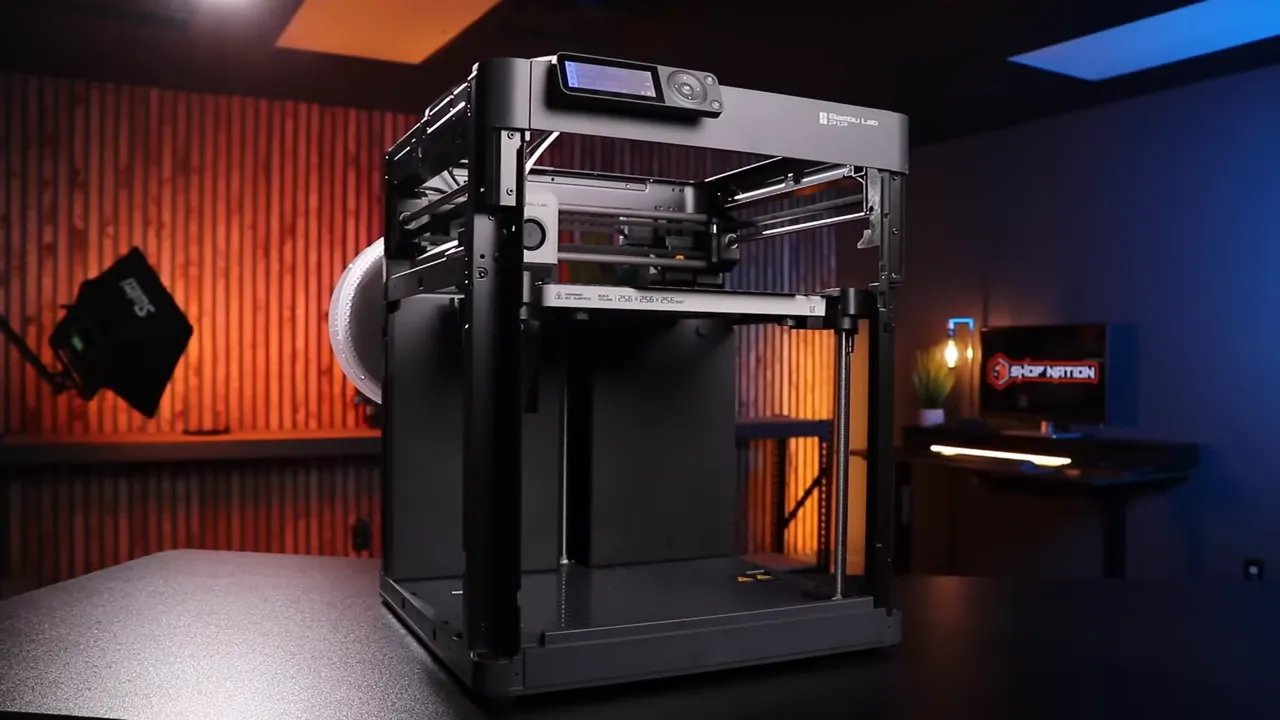
At the time of this comparison, the P1P was about $500 cheaper than the X1, with a displayed price of $699. You gave up the side panels, the fancy touchscreen, and some sensors. What remained was still a seriously capable printer that checked the important boxes for getting started.
My default recommendation used to be Prusa. After testing Bambu Lab’s machines, the P1P earned the nod because it delivered so much of the useful printing experience without the premium price of the X1.
The Alternative: A Prusa MK3S+ Kit
If you’re more of a Toyota person, I get it. Reliability, repairability, and a proven track record are good reasons to choose a machine.
In that case, my alternative was the discounted Prusa MK3S+ kit, rather than the newly released MK4. At the time, the kit was roughly the same price as the P1P. The trade-offs were less speed, a simpler display, and no comparable built-in wireless workflow.
The kit format has its own advantage: you build the printer yourself.
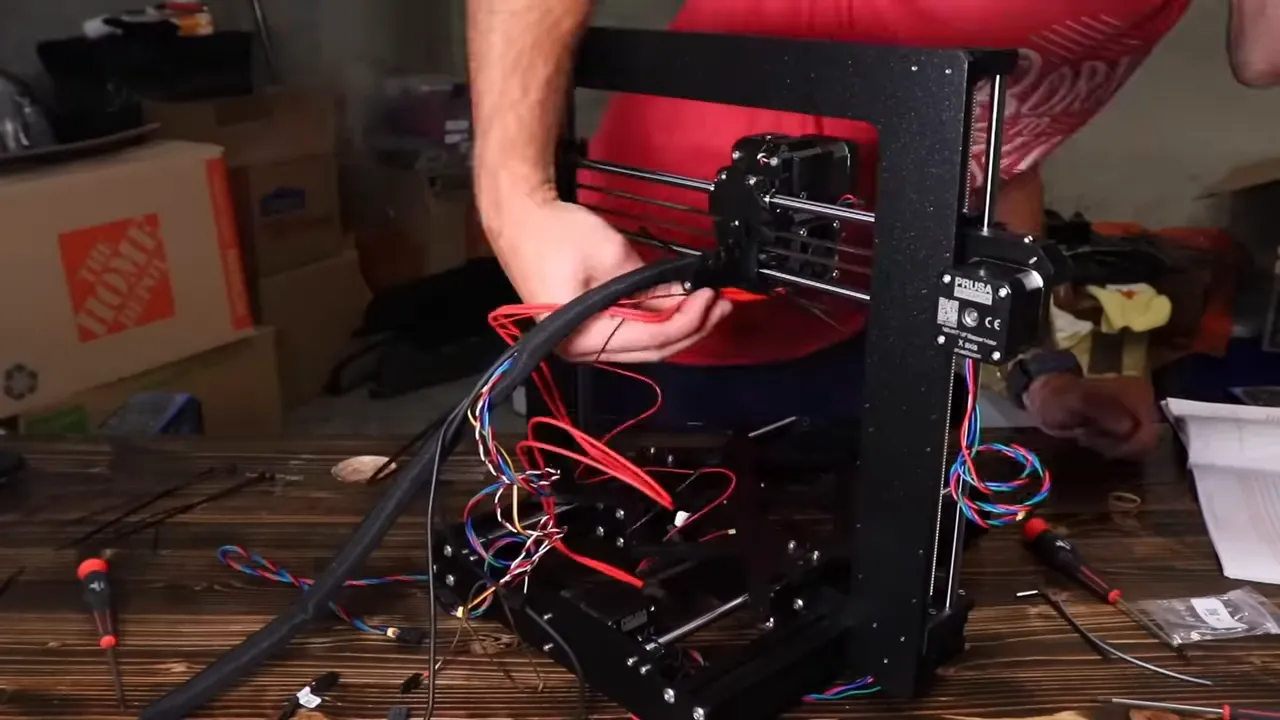
I assembled my first couple of Prusas and genuinely enjoyed the process. More importantly, I learned how the machines went together. That familiarity pays off when a component needs replacing down the road.
Serviceability was one of my concerns with the newer Bambu machines. At the time, repairing or replacing certain components didn’t appear nearly as user-friendly as it was on a Prusa. That’s a real trade-off, even if the Bambu experience is more convenient in other ways.
Between those two choices, I still gave the P1P the edge. But either could get you into useful 3D printing.
Buying context: Those prices and comparisons belong to the original MK4 launch period. My updated 2025 recommendations list the Bambu Lab P1S as the preferred workhorse, with the P1P still listed as a good option. The budget category includes the A1 Mini and larger A1. For more ownership context, I also put together a one-year Bambu Lab update.
You Bought a Printer. Now What?
This is where a lot of people get stuck. A printer sounds interesting, but what would you actually use it for?
That’s hard to answer before you’ve experienced what it can do. It’s a little like trying to explain the appeal of a microwave to somebody who already owns an oven. Until the convenience becomes part of your routine, it just looks like another thing to learn.
My advice is to stop trying to identify the perfect life-changing project and get some repetitions in.
- Find an existing model. Start with something somebody else has already designed.
- Prepare it in your slicer. Get familiar with the basic process of turning a model into a print job.
- Print it. Go through the workflow and see the physical result.
- Repeat. Make a few mistakes, solve them, and build confidence.
You do not need to learn 3D modeling before doing any of this.
Start With Free 3D Models
Thingiverse and Printables have enormous libraries of downloadable models, including plenty of free parts, gadgets, and shop projects.
Search for something that interests you. There’s a decent chance somebody has already modeled it.
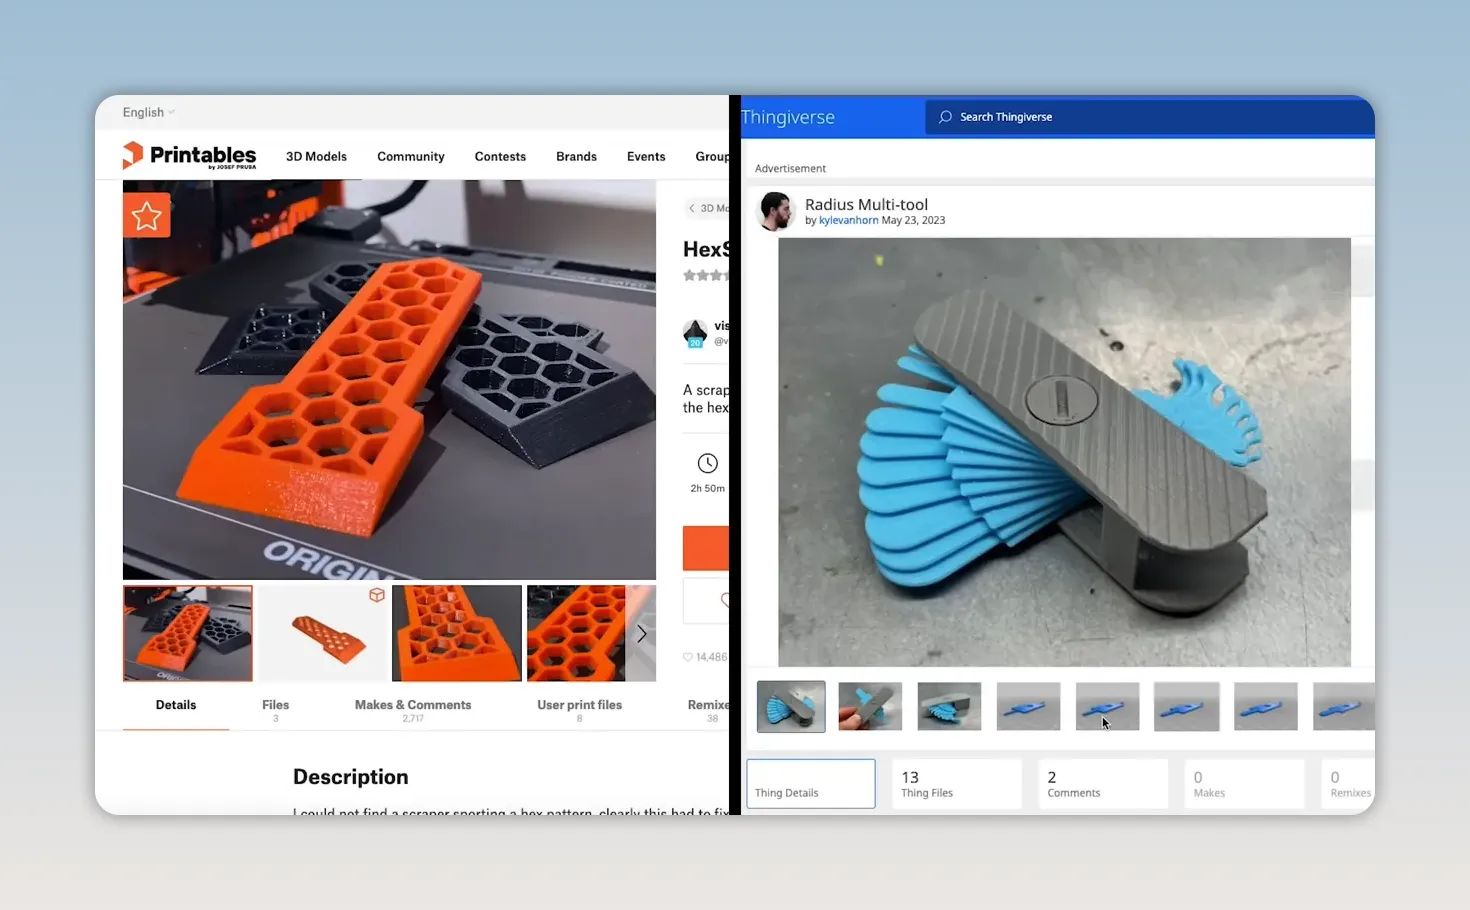
The goal at this stage isn’t to become an expert. It’s to become comfortable taking a digital part and making it real. Pick a few projects, get your hands dirty, and accept that some attempts will teach you more than others.
When you get stuck, there are plenty of tutorials available to help with the specific issue. A little practical experience makes those explanations much easier to understand.
How to Make Custom Parts Without Learning CAD First
Once you’ve printed a few things, the obvious next question is: what about a part that solves a problem specific to my shop?
At some point, that part needs a 3D model. If nobody has already made it, somebody has to create it.
That somebody does not have to be you.
Learning modeling software can be intimidating, and becoming proficient takes time. But you can hire skilled modelers through Fiverr or Upwork.
For a simple part, I’ve seen offers as low as five dollars with a one-day turnaround. That isn’t a promise for every project, but it illustrates the point: outsourcing a model can be much more accessible than people assume.
Some freelancers also design specifically for 3D printing. That distinction matters. You don’t just need a shape that looks right on a screen. You need a part designed with the manufacturing process in mind.
I know people who run 3D printing businesses without doing their own modeling. They rely on contracted designers. So don’t let the idea of learning CAD become the thing that prevents you from using a printer.
If You Want to Learn Modeling, It’s Worthwhile
Outsourcing is an option, not an argument against learning.
My personal favorite modeling tool is Fusion 360. If you want to learn it, Product Design Online offers a well-structured, self-paced learning path from complete beginner toward competent user.
I much prefer that kind of organized progression to cobbling together a pile of unrelated tutorials and hoping they eventually connect.
Learning to model is a worthwhile investment. It just doesn’t need to be the admission price for getting started.
The First Useful Fix Is What Makes It Click
The real turning point isn’t buying the printer or finishing a practice model. It’s making something that fixes an actual annoyance in your shop.
That’s when this mysterious machine wrapped in nerd culture starts looking like what it really is: a capable tool.
I use 3D printing for shop problems such as dust collection and jigs. Those are practical applications, not technology demonstrations.
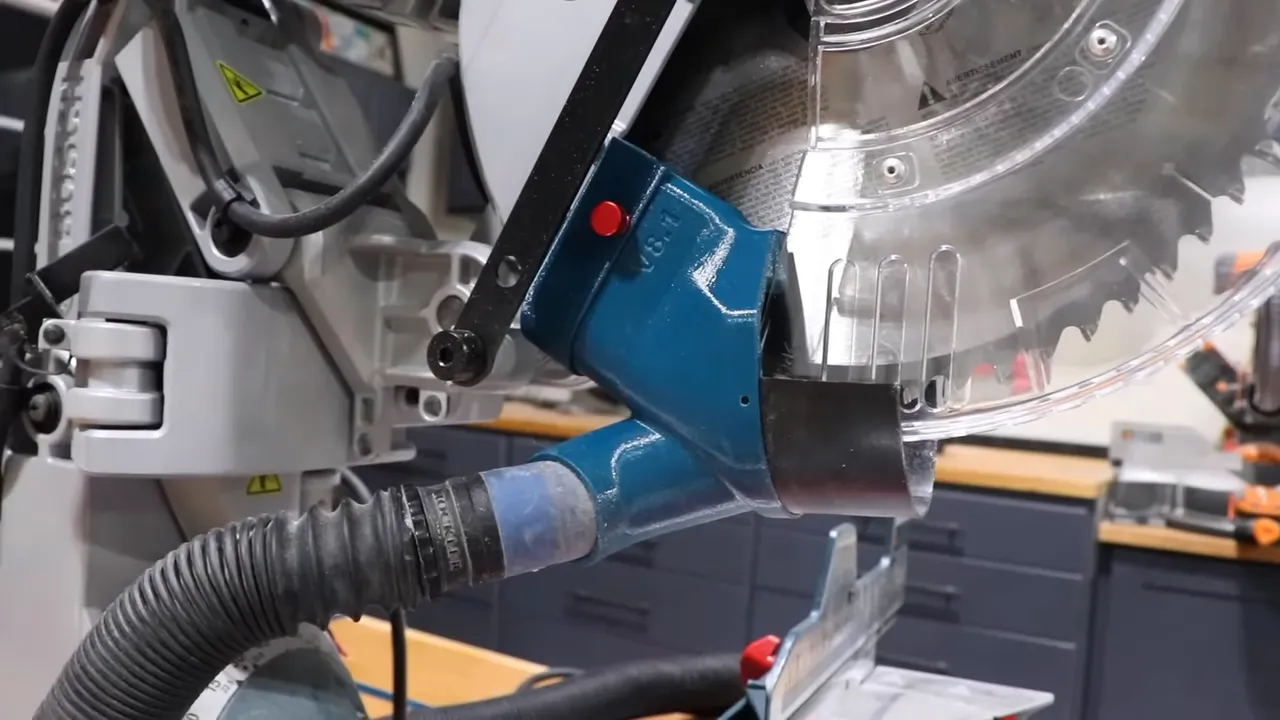
And those applications are only the beginning. As with CNC routers and laser cutters, a tool that once seemed like a niche interest can become a normal part of how a shop gets things done.
My advice is simple: choose a printer that removes unnecessary friction, learn the workflow with existing models, and then tackle one problem that matters to you. Learn CAD if you want to, or hire someone if you don’t.
You don’t need to master the entire 3D printing world. You need to make your first useful thing. That’s usually enough to set the hook.


