A 3D printer is not just a toy, a gimmick, or another hobby that eats up an entire workbench. It is a tool. And in 2026, it might be the most versatile tool you can add to your house or shop.
I use 3D printing almost every day, both to make products for my business and to solve ordinary problems. Once you experience the ability to make the exact little part you need, you start seeing things differently. Suddenly, that annoying mounting problem looks less like a shopping trip and more like an opportunity.
The good news is that getting started has become much easier. You do not need to understand every setting, become a printer repair technician, or even own a computer to make your first useful parts.
If I were starting today, my all-around pick would be the Bambu Lab X2D. The P2S is a close second, the A1 Mini is my budget recommendation, and the H2S is the option I would choose if I needed more space for bigger prints. But the machine is only part of the decision. Here is how I would approach the whole thing, from buying a printer to designing my own parts.
Table of Contents
- Key Takeaways
- Why a 3D Printer Belongs in Your Toolbox
- Why I Recommend the Bambu Lab Ecosystem for Beginners
- X2D vs. P2S: Which One Would I Buy?
- Do You Need an AMS for Multicolor Printing?
- Two Other Printers Worth Considering
- Get to Know What Your 3D Printer Actually Does
- Your First Prints: Start With PLA and Keep It Simple
- When You Need a Computer: Models, Slicing, and G-code
- The Real Superpower: Designing Your Own Parts
- Could It Turn Into a Business?
- What I Would Buy and Do First
- Sponsor: Protecting the Shop With SimpliSafe
Key Takeaways
- The X2D is my all-around beginner pick, while the P2S suits everyday printing at a lower price.
- Start with PLA and Bambu Handy to make your first prints without a computer.
- An AMS adds automatic multicolor printing, but it is optional when learning the basics.
- Learning CAD unlocks custom brackets, adapters, organizers, and other parts tailored to your needs.
Why a 3D Printer Belongs in Your Toolbox
Most people first encounter 3D printing through flexible dragons, superhero helmets, or little things that sit on a shelf. There is nothing wrong with any of that. Making something simply because it makes you or someone else smile is a perfectly legitimate use of a printer.
My kids' school even prints little prizes for good behavior. Kids with printers at home make things to share with friends, and some start little businesses in the process. That is a pretty great introduction to making things and entrepreneurship.
Personally, I lean toward the practical side: fixing things around the house, improving the shop, organizing tools, and making parts for my business. But occasionally I veer off course and print something completely unnecessary, like a 4-foot T. rex skull.
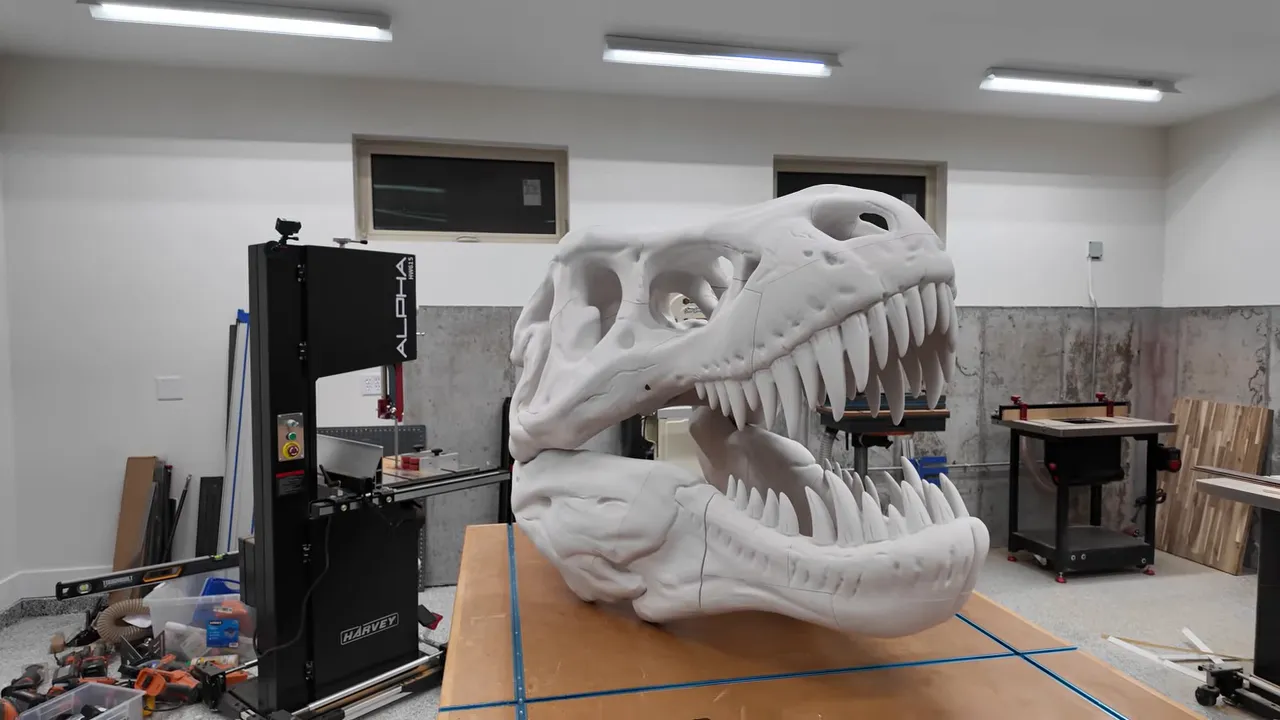
Then I get back to making useful stuff. That is the appeal: the same machine can produce a silly gift, a desk organizer, a custom bracket, or a product someone will pay for.
Why I Recommend the Bambu Lab Ecosystem for Beginners
I am not recommending a printer based on a spec sheet alone. The experience around the printer matters, especially when you are learning. Four things make Bambu Lab my recommendation.
1. Reliability and ease of use
The most important feature of a 3D printer is that it works when you need it.
That sounds obvious, but historically, getting into 3D printing often meant becoming a part-time expert in assembly, calibration, and troubleshooting. For people who enjoy tinkering with machines, that can be part of the fun. For everyone else, it is a chore standing between an idea and a finished part.
Modern machines have removed a lot of that friction. Setup and automatic calibration are much more approachable. There are still instructions to follow and things to learn, but you no longer need to make printer maintenance your personality before printing something useful.
2. Hardware that has improved through real use
I have around 60 first-generation Bambu Lab machines in my print farm, with a combined total of hundreds of thousands of print hours. I have also encountered plenty of ways those machines can fail.
That is why the details in the newer machines matter to me. Bambu Lab has addressed not only obvious issues, but also smaller headaches that become noticeable when you run printers for production. The first-generation machines were excellent. The newer designs improve on a lot of the things I deal with every day.
3. Software, parts, and filament that work together
The printer does not exist in isolation. You also need software, consumables, and eventually replacement parts.
Bambu Lab offers connected software across phones and computers, including Mac and Windows, along with easy access to replacement components and its own filament. As a beginner, being able to get everything in one place removes a lot of guesswork.
Think of the ecosystem as a warm blanket while you learn. You can venture into the wilderness of other materials and workflows later. You do not have to start there.
4. Bambu Handy and its built-in learning resources
The Bambu Handy app is the reason you can get started without a computer. You can find models, start compatible prints, monitor progress, and access troubleshooting resources from your phone.
It also provides access to Bambu Lab Academy. Select your machine and work through beginner, intermediate, and advanced lessons, with pictures and videos explaining the concepts.
That includes topics such as filament types, which can get confusing fast. If the ecosystem is the warm blanket, the app is the hot chocolate, and the free lessons are the little marshmallows.
X2D vs. P2S: Which One Would I Buy?
These are my two main recommendations for someone who wants a capable, enclosed beginner 3D printer without immediately feeling the need to upgrade.
At the time of filming, the P2S was $549 and the X2D was $649, without an AMS. Prices can change, but that $100 difference is the reason my recommendation leans toward the X2D.
My top pick: Bambu Lab X2D
The Bambu Lab X2D has an extra nozzle, a heated chamber, and more capability for engineering materials, including nylon, ASA, and carbon fiber reinforced filaments.
Here is the important part: you do not need to use those advanced features when you start.
I would buy it for room to grow. Begin with ordinary PLA, learn the basics, and ignore the second nozzle until you have a reason to use it. Later, that extra nozzle opens up options such as dedicated support material for more complex models.
If you eventually get interested in functional parts and more demanding materials, the additional capability is already there. For $100 more at the quoted prices, I think that is a lot of value.
The close second: Bambu Lab P2S
The Bambu Lab P2S is still a very solid choice.
Most people print basic materials such as PLA and PETG. If you expect to make organizers, gifts, toys, and everyday parts without getting deep into engineering materials, saving the $100 is completely reasonable.
My decision would look like this:
- Choose the X2D if you want more material capability and room to experiment later.
- Choose the P2S if your interests are mainly everyday PLA and PETG printing.
Both sit in what I consider a sweet spot for a beginner: a useful size, an enclosure, a large color touchscreen, and a lot of convenience built into the experience.
A quick disclosure about my recommendations
Bambu Lab supplied the X2D for me to test. There is no agreement requiring me to recommend it. Some product links are affiliate links, which means I may earn a small commission if you buy through them.
My preference comes from using these machines extensively. I previously ran a room full of Prusa printers and replaced them with Bambu Lab machines using my own money because they were a better fit for my operation.
There are cheaper printers, larger printers, and more capable printers. These are simply the options I would recommend based on my experience and what I think matters most when starting out.
Do You Need an AMS for Multicolor Printing?
An AMS, or Automatic Material System, holds up to four spools and feeds filament into the printer. During a compatible print, the software handles material or color changes automatically.
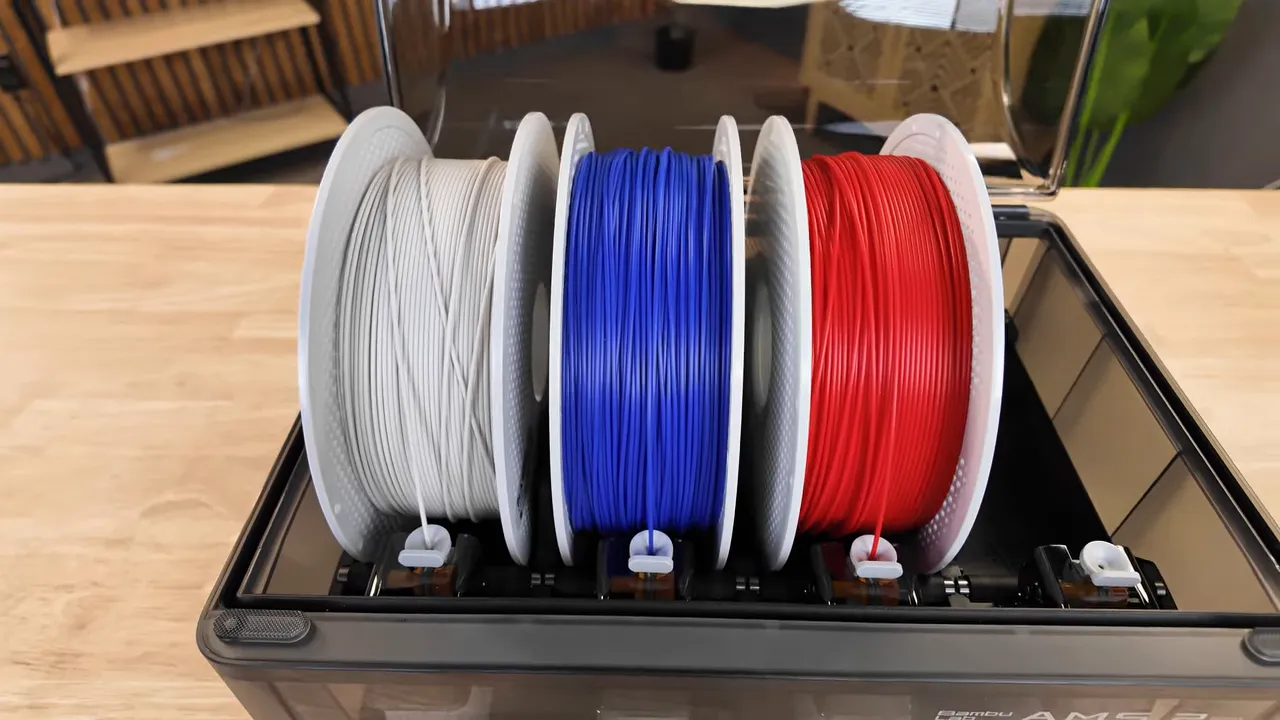
There has been a huge increase in readily available models designed for multiple colors. If that is what attracted you to 3D printing, an AMS makes those projects possible without manually changing every color yourself.
But I put it firmly in the nice-to-have, not necessary category. In fact, I think learning with one color first is a good idea. Both recommended printers include an external spool holder for that purpose.
If you already know you want multicolor printing, a printer-and-AMS bundle can make sense. At the time of filming, buying them together saved roughly $50 compared with purchasing separately. Otherwise, leave it off and keep your starting setup simple.
Two Other Printers Worth Considering
For a tight budget: Bambu Lab A1 Mini
If spending more than $500 on a first printer is not realistic, the Bambu Lab A1 Mini is my budget pick at about $200 at the time of filming.
I have had one in my office for a couple of years, and it has been extremely reliable for me. You get the same ecosystem in a smaller machine that is excellent to learn on.
The trade-offs are its smaller print capacity and limitations with more demanding materials. If those are not immediate concerns, it is a fantastic place to start.
For bigger projects: Bambu Lab H2S
If you already know you need a larger build volume, I would look at the Bambu Lab H2S.
It combines a much larger printing area with capability for engineering materials down the road. The quoted price was approximately $1,249, almost twice the X2D's price.
That is a big jump, so I would buy it because I needed the size, not because bigger automatically means better for a beginner.
Get to Know What Your 3D Printer Actually Does
You do not need to memorize every component, but a basic understanding makes the machine much less mysterious. At its core, a filament printer is a very precise hot glue gun that builds objects one layer at a time.
Motion: X, Y, and Z
The printer positions the nozzle relative to the part in three dimensions:
- X: side-to-side movement.
- Y: front-to-back movement.
- Z: up-and-down movement.
In the CoreXY machines discussed here, coordinated motors and belts move the print head across the X and Y plane, while the build platform moves vertically.
A common alternative is a bed-slinger design, such as the A1 Mini. Its bed moves forward and backward, while the print head moves across the machine and rises as the print grows.
The extruder, hot end, and nozzle
The extruder uses gripping gears to push filament into the hot end. A heating element melts the thermoplastic so it can be squeezed through the nozzle.
The printer coordinates that material flow with its movements, laying down thin lines of plastic and stacking them into a finished object.
A common nozzle diameter is 0.4 mm, with other sizes typically ranging from about 0.2 mm to 1 mm. You do not need to start swapping nozzles immediately. Just understand that the opening is one of the details that affects how the printer lays down material.
The heated bed and removable print sheet
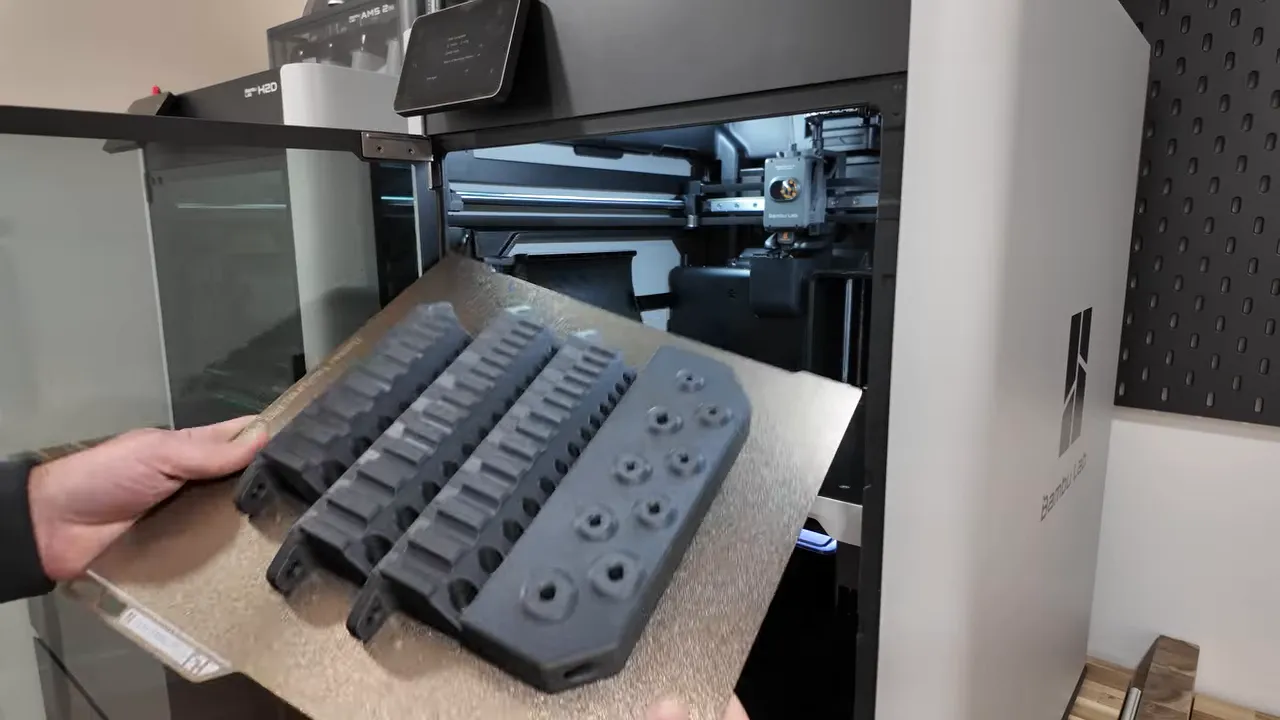
The build platform is heated, with the temperature selected for the material being printed. On top sits a removable print sheet, commonly made from magnetic spring steel.
That flexible sheet is a small feature you will appreciate constantly. Remove it and flex it, and the printed part will often release without a fight.
Fans, sensors, and the rest of the machine
There is more packed into the print head and enclosure than you might expect:
- Part-cooling fans help newly deposited plastic harden so the next layer can be added.
- A hot-end cooling fan moves air across the heat sink to help manage heat above the melt zone.
- Sensors monitor things such as temperature and filament presence.
- Rails, bearings, belts, and stepper motors position the print head precisely.
- A nozzle wiper and discharge chute handle nozzle cleaning and purged filament.
- Lights and cameras help you check progress and, depending on the machine, capture time-lapses or detect possible failures.
Camera-based failure detection is especially useful. Instead of discovering a giant nest of wasted filament later, a supported machine may stop or alert you when something looks wrong.
The touchscreen provides controls for starting and stopping prints, loading material, troubleshooting, and manually moving the machine. Around the back are the power connection, switch, vents, and, depending on the model, filtration and filament-routing components.
And yes, the printer produces little bits of purged plastic. Your 3D printer poops. You will become familiar with that part pretty quickly.
Your First Prints: Start With PLA and Keep It Simple
Step 1: Get a couple of good spools of PLA
Filament is the printer's food. It generally comes on 1 kg spools, and the material I recommend for beginners is PLA, or polylactic acid.
It is common, easy to use, and relatively inexpensive. Expect roughly $20 to $25 per spool at the prices discussed here. One spool can make quite a lot of stuff.
You can buy filament from many suppliers, but I would start with Bambu Lab filament for your first couple of rolls. That removes one variable while you learn. My experience with bargain filament has been that it can introduce print-quality issues a beginner is not yet ready to diagnose.
Step 2: Print a built-in model
These printers include files you can print directly from the machine. Start with one of those rather than immediately hunting down a complicated project.
A common first choice is a Benchy, the little boat designed to help assess printer performance. Load the PLA, choose the file, and start the print.
This introduces you to the normal startup routine: nozzle cleaning, bed leveling, calibration, and then the actual printing process. You finish with a tiny plastic boat, but more importantly, you learn what normal operation looks like.
Step 3: Find something useful in Bambu Handy
Next, open the app and explore MakerWorld through the Models section.
You can browse suggestions or search for a specific need. Examples include a zip-tie holder for the shop, a microSD card holder, a desk organizer, or a place to keep your pens.
For a compatible prepared model, the basic workflow is straightforward:
- Choose the model you want to make.
- Select the Prepare to Print option.
- Follow the prompts and choose your printer.
- Send the print.
No computer or separate desktop software required. When you are getting started, I would actually recommend doing your early printing this way.
Each project teaches you a little more without requiring you to learn everything at once.
When You Need a Computer: Models, Slicing, and G-code
MakerWorld is not the only source of printable models. Printables and Thingiverse are two other places I recommend exploring for community-created designs.
This is where a computer becomes useful. A downloaded 3D model describes geometry, but geometry alone is not a set of instructions your printer can execute.
A slicer turns that model into thin layers and generates the machine instructions, commonly called G-code, that control movement and material deposition.
For these printers, the free software is Bambu Studio. The basic process is:
- Import the model you downloaded.
- Select your printer.
- Select the material you will use.
- Slice the model and review the result.
- Send the print to the machine over Wi-Fi.
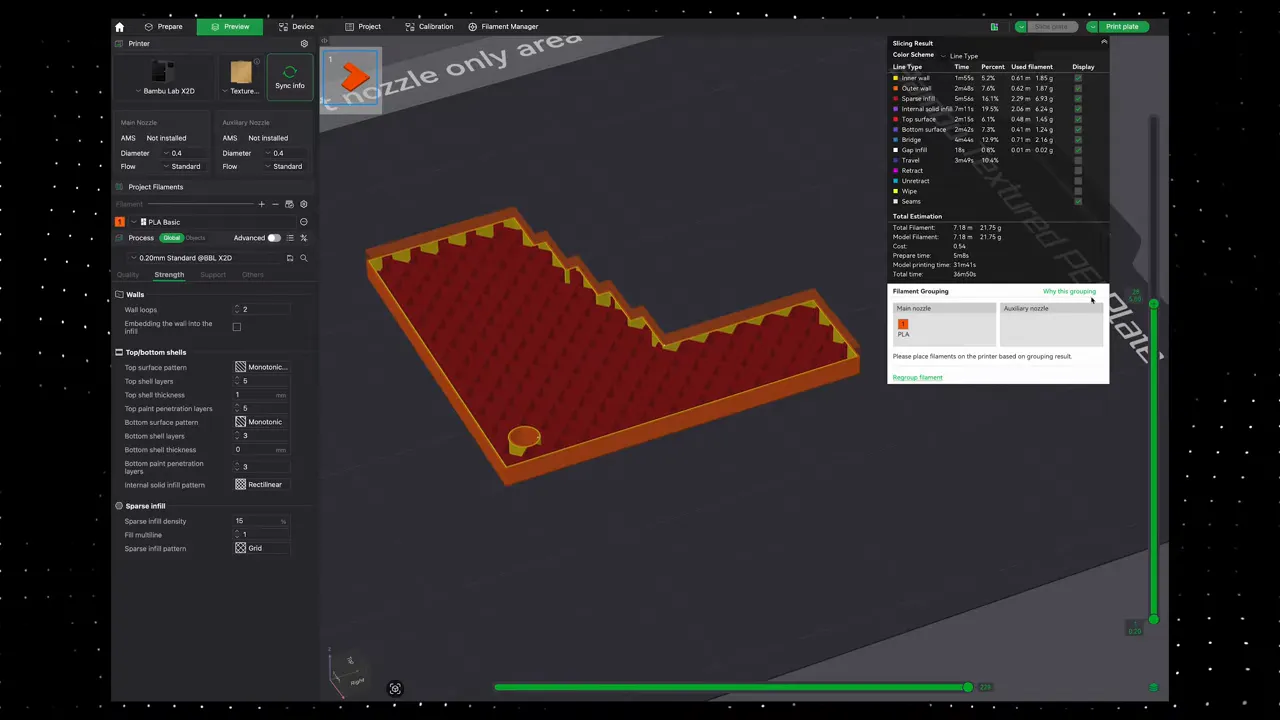
That is the core workflow. You can learn more through Bambu Lab Academy, then explore settings, different materials, and support options as your projects demand them.
You do not have to master all of that before making your first useful thing.
The Real Superpower: Designing Your Own Parts
Printing an existing model is great. Creating a part that did not exist until you needed it is where this tool really starts to feel like witchcraft.
Maybe you need a custom bracket, an adapter, or a mount that fits a specific space. That is where CAD, or computer-aided design, comes in.
I have used several CAD programs over the years, including Fusion 360 for the past five or six. More recently, I have been using Shapr3D, and I find it particularly approachable. I especially like being able to model on an iPad.
You still need to spend time learning. But instead of treating CAD as an enormous roadblock, think of it as a skill you can start building over a couple of weekends.
The workflow becomes:
- Identify a problem.
- Model a part that solves it.
- Bring the model into your slicer.
- Send it to the printer.
- Hold the physical version of your idea.
That last step is the one that changes how you think. An idea in your head becomes a model, then a real object you can use.
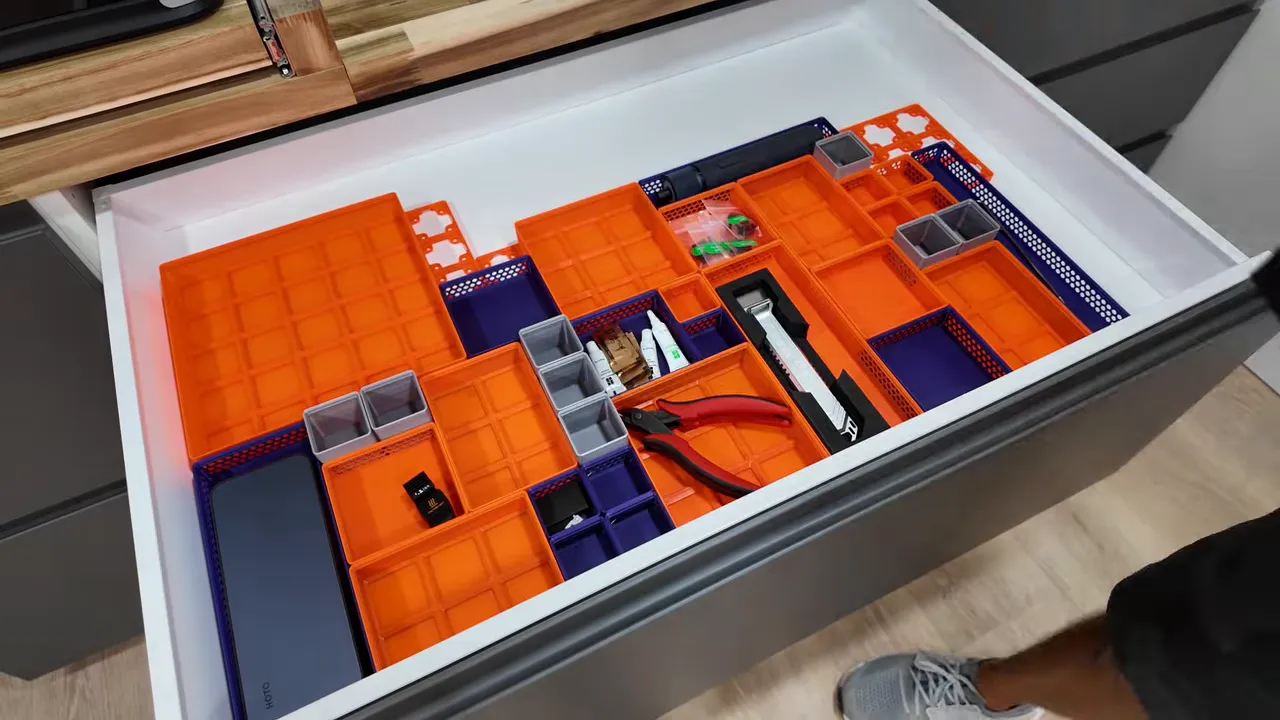
I hear from people well into their 80s who are thrilled about their new printers and the possibilities. You do not need to be an engineer or grow up using CAD to benefit from this stuff.
Could It Turn Into a Business?
It can. That is not a requirement, and it should not become pressure attached to a new interest. But the possibility is real.
I am moving into a new print farm building with space planned for up to 100 machines producing products we sell. When I call these machines tools, I mean it.
You do not need to jump from one printer to a building full of them. You might simply discover a niche, develop a useful product, and earn some side income. I also run Print Farm Academy, a course focused on guiding people through that process.
For now, though, learning to make good parts is plenty. The business rabbit hole will still be there if you decide to explore it later.
What I Would Buy and Do First
If I were starting from zero today, I would keep the plan simple:
- Best all-around choice: X2D, around $649 at the quoted price, for its capability and room to grow.
- Close second: P2S, around $549, if everyday materials cover your needs.
- Budget choice: A1 Mini, around $200, to learn without a large upfront investment.
- Larger choice: H2S, approximately $1,249, if your projects genuinely need the extra build volume.
Then I would buy a couple of spools of PLA, install Bambu Handy, print a built-in test model, and find something useful to make through the app. The AMS, engineering materials, advanced settings, and CAD can come later.
You might end up with a useful new hobby. You might find yourself designing custom parts for everything around you. Or you might take the slightly less healthy route and end up with 100 printers like me.
Whatever happens, start by thinking of it as a tool. The point is not to know everything about 3D printing. The point is to gain the ability to make something you could not make before.
Sponsor: Protecting the Shop With SimpliSafe
With valuable tools and printers in the shop, security matters to me. SimpliSafe sponsored this guide, and I installed its DIY system to help protect the space.
The system starts with a base station and can be expanded with entry, motion, and glass-break sensors, along with cameras, smart locks, and smoke and carbon monoxide detection. App access lets me check the system remotely, and professional monitoring is also available. SimpliSafe offers DIY installation, described as taking about 30 minutes or less, with professional installation available if you prefer.
The promoted offer is 50% off a system and the first month free when signing up for a professional monitoring plan. Check the offer page for current terms.


