The built-in router table in my workbench needed two final upgrades: an accessible paddle power switch and a proper router fence with dust collection. One was something I should have installed a long time ago. The other involved machining aluminum on a woodworking router.
Yeah, you read that right.
I could have bought a fence. There are plenty of good options. But I wanted to build something that fit my table, looked the way I wanted, and pushed my skills a little. The finished fence turned out great. Getting there was occasionally sketchy, and this definitely was not a money-saving exercise.
Still, the improvements in workpiece control and dust collection made this a pretty dang satisfying finishing touch.
Table of Contents
- Key Takeaways
- First, Install the Router Table Paddle Switch
- The Custom Router Fence Design
- Lay Out the Aluminum Before Making Chips
- Routing Aluminum: The Part I Was Most Worried About
- Cut the Center Opening With Temporary Fixture Blocks
- Build the Stationary Backing and Adjustable Fence Faces
- Connect Dust Collection Above and Below the Table
- What the Finished Fence Actually Improves
- Would I Build This Aluminum Router Fence Again?
Key Takeaways
- Install an accessible paddle switch early rather than treating it as a finishing detail.
- Machining the aluminum frame was challenging, and a commercial fence avoids that work.
- Threaded inserts and slotted mounting points let the two fence faces adjust independently.
- Combining fence collection with collection below the table greatly reduced visible debris during testing.
First, Install the Router Table Paddle Switch
Before doing anything ambitious with the router, I needed a better way to shut it off. Reaching inside a cabinet to find the router’s power switch is inconvenient during normal use and a whole lot worse when something goes wrong.
The paddle switch was already part of my workbench plans, so there really was no excuse for putting it off.
I removed the cabinet door, protected the painted face with painter’s tape, and laid out the opening. After drilling an access hole, I cut the opening with a jigsaw and test-fitted the switch. It took a couple of rounds to get the fit right.
Instead of mounting the switch housing on the outside of the door as intended, I recessed it from behind using wood mounting blocks. Why? Honestly, I thought it looked better. That was a choice for this particular installation, not a reason to disregard the mounting requirements of another switch.
The cutout left an exposed plywood edge, which bothered me just enough to do something about it. I designed and 3D printed a simple black bezel to cover the edge and make the installation look finished.
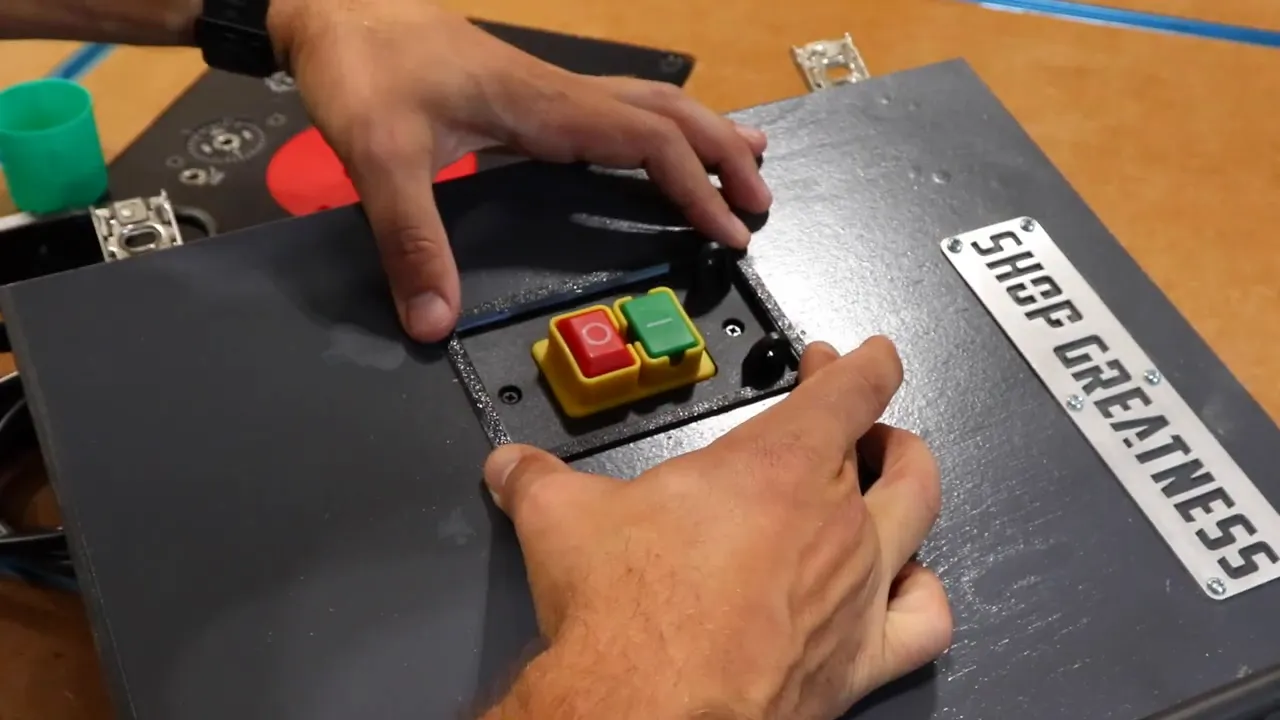
Once the door was back in place, the large red off paddle was accessible from the front of the workbench. Such a small upgrade, but it saves time and removes the stress of hunting for the switch.
An accessible shutoff belongs near the beginning of a router table build, not on the someday list. Use a switch rated for your router and follow its installation instructions. Mine was a 110V safety paddle switch.
The Custom Router Fence Design
The fence starts with a piece of 3-inch by 3-inch aluminum angle with a 0.188-inch wall thickness. I cut it to 30 inches long.
That angle forms the structural frame. The rest of the assembly adds:
- A stationary MDF backing assembly.
- Two independently movable fence faces.
- Slots and knobs for adjusting and locking the faces.
- A central opening and rear dust collection port.
- T-track along the top for accessories such as a stop block.
- Mounting hardware that works with the T-track in the workbench.
It is similar in concept to commercially available router fences. The big advantage of building it myself was customization, both in appearance and in how it fit the existing table.
If machining aluminum is not something you want to tackle, buying a fence is a perfectly good decision. The JessEM router fence and Kreg router fence were two alternatives I identified. Depending on the table, a commercial fence may fit directly or require a change to the T-bolt locations.
Lay Out the Aluminum Before Making Chips
Cutting the angle to length and drilling holes were the straightforward parts. The slots and large center opening required more thought.
Before cutting any of those features, I marked their locations on the aluminum. Here is a simple trick that makes metal layout much easier without buying special layout fluid:
- Color the areas you need to mark with a blue permanent marker.
- Use a ruler or square and a sharp scribe to scratch your layout lines through the ink.
- Center-punch the hole locations before drilling.
The scribe exposes bright aluminum beneath the blue ink, so the lines stand out against the surface. Actual layout bluing exists for exactly this purpose, but a Sharpie works surprisingly well.
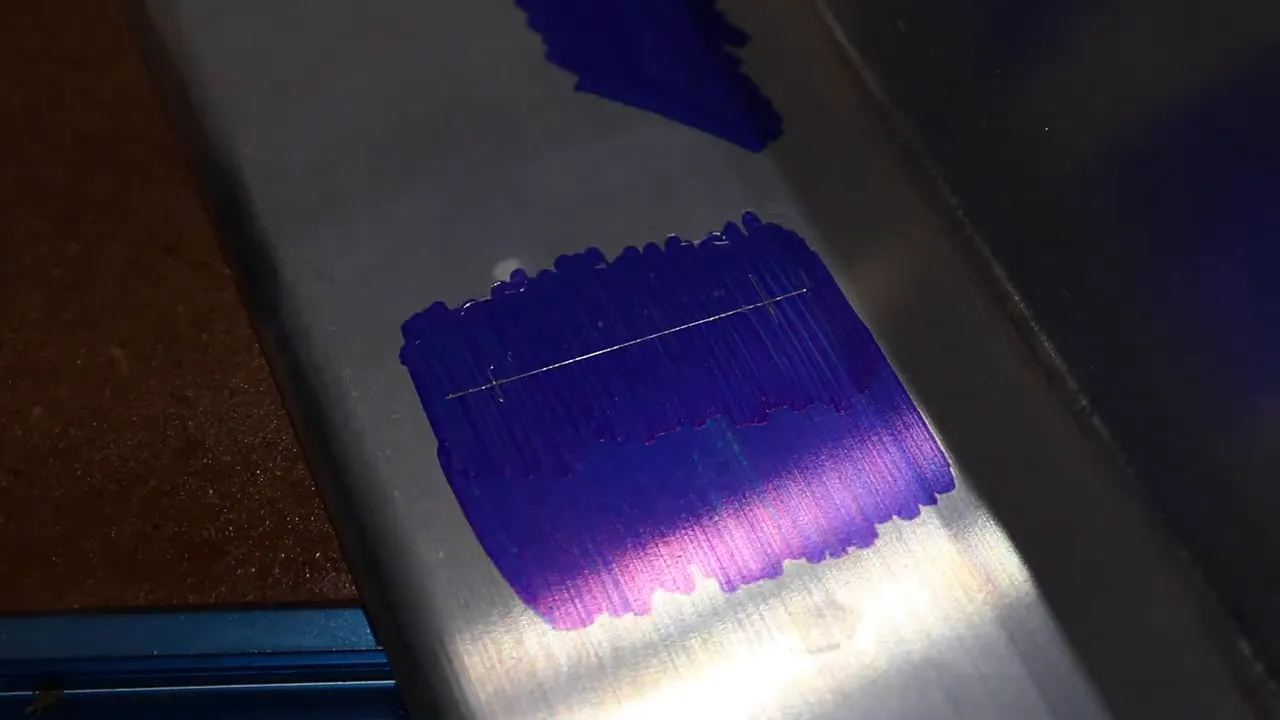
Do not skip the center punch. Drill bits tend to wander on a metal surface, and a small punched indentation helps the bit start where it belongs.
After drilling, I deburred the holes and countersunk the locations that needed flush-fitting screw heads. Those little cleanup steps matter. You do not want sharp burrs around the hardware or a projecting screw head interfering with how the fence sits.
Routing Aluminum: The Part I Was Most Worried About
Aluminum is relatively soft as metals go, but that does not make it behave like wood. I tested a couple of bits before working on the actual fence frame.
In my setup, a conventional straight-sided router bit cut better than the up-cut spiral bit I tried. That is an observation from this particular experiment, not a blanket recommendation that any woodworking bit or router setup is suitable for aluminum.
This was the riskiest part of the build, and buying a fence avoids it entirely. If you choose to machine aluminum, verify that your equipment and cutting tools are suitable, wear eye protection, secure and support the work appropriately, and follow the manufacturers’ guidance.
Small cuts and the correct feed direction
The biggest lessons were to take small bites, move slowly, and avoid climb-cutting.
A climb cut feeds the work in the same direction as the cutter’s motion at the point of contact. In this aluminum setup, that could make the bit grab and kick the part violently. Before each pass, I had to think through which edge of the opening was contacting the cutter and which direction the work needed to move.
I used two temporary fence references. One guided the cut along one side of a slot, and the other guided the opposite side. Switching references let me work on the two slot edges while maintaining the intended feed direction.
That distinction matters more than simply saying “push it this way.” The safe feed relationship depends on where the cutter is engaging the material.
You do not have to route the slots
There is a slower alternative: drill a series of holes through the waste area and connect and smooth the opening with a file. That takes more patience, but it avoids routing the aluminum.
If this part of the project makes you uncomfortable, there is no prize for forcing it. Use a different method or start with a ready-made fence.
Cut the Center Opening With Temporary Fixture Blocks
The dust collection opening needed to extend across the corner of the angle. To finish that cut on the bandsaw, I attached temporary fixture blocks that supported the aluminum at 45 degrees.
This held the part in a useful orientation rather than leaving me trying to balance an awkward angle section on the bandsaw table. The blocks worked like a charm.
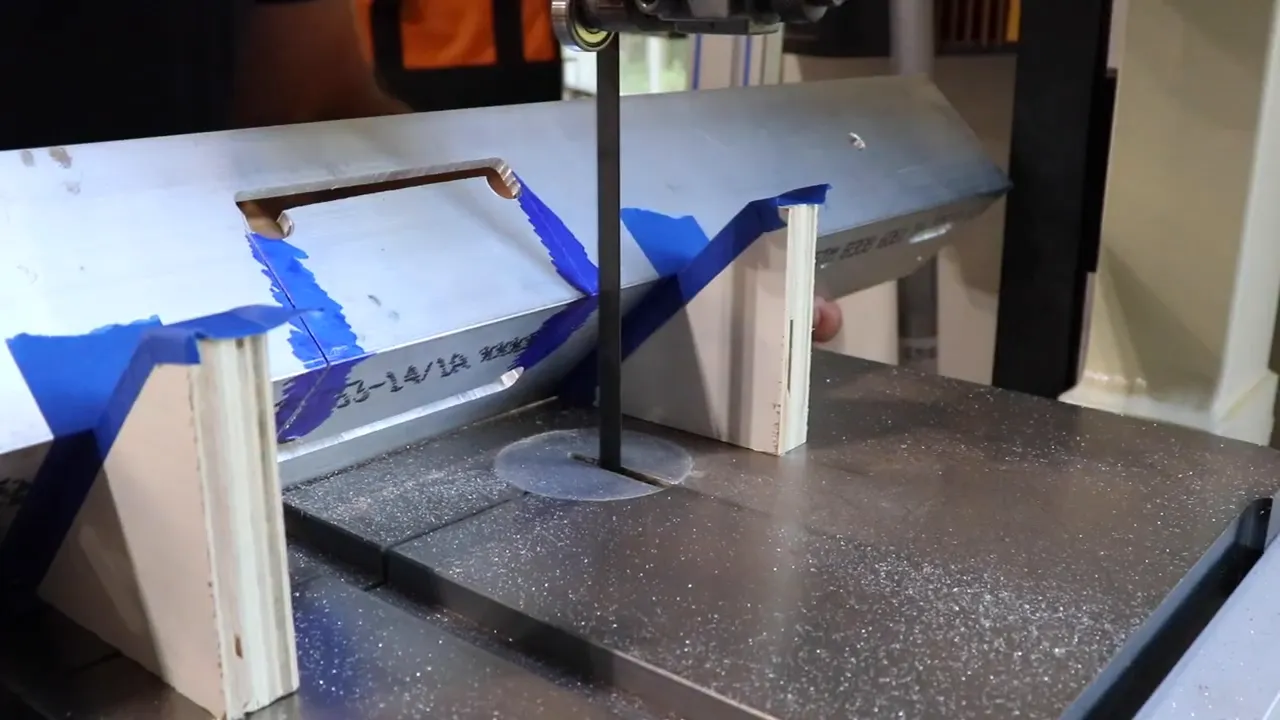
After removing the waste, I filed and cleaned up the opening and the remaining edges. With the holes, slots, and center window complete, the most nerve-racking part of the project was behind me.
I was really happy with the result. I was also happy to move on to material that belonged more comfortably in a woodworking project.
Build the Stationary Backing and Adjustable Fence Faces
My original plan was to use plywood or regular MDF. Either would have fit the basic idea.
Then my usual need to take a shop project one step further kicked in, and I ordered colored MDF instead.
I used blue material for the stationary backing and dark gray material for the movable faces. At the time of this build, colored MDF was difficult to find in the United States. The supplier I used offered 18-inch by 18-inch and 24-inch by 24-inch panels in several thicknesses, including 1/2 inch and 3/4 inch.
The color was a design choice, not a requirement for the fence to work.
Fit the backing and transfer the hardware locations
I cut the MDF components to size, fitted the stationary pieces to the aluminum, and used the frame to transfer the relevant hole and opening locations. That helped keep the wooden parts matched to the metalwork I had just finished.
The stationary pieces also needed clearance slots for the face-adjustment hardware. These slots did not have to be machined to the same standard as a guiding surface. They simply needed enough clearance for the adjustment mechanism to move.
Install threaded inserts in blind holes
The movable faces receive threaded inserts from the back. I drilled blind holes, meaning the holes stop before breaking through the front surface, then installed 1/4-20 threaded inserts.
That leaves the working faces uninterrupted while providing metal threads for the adjustment knobs.
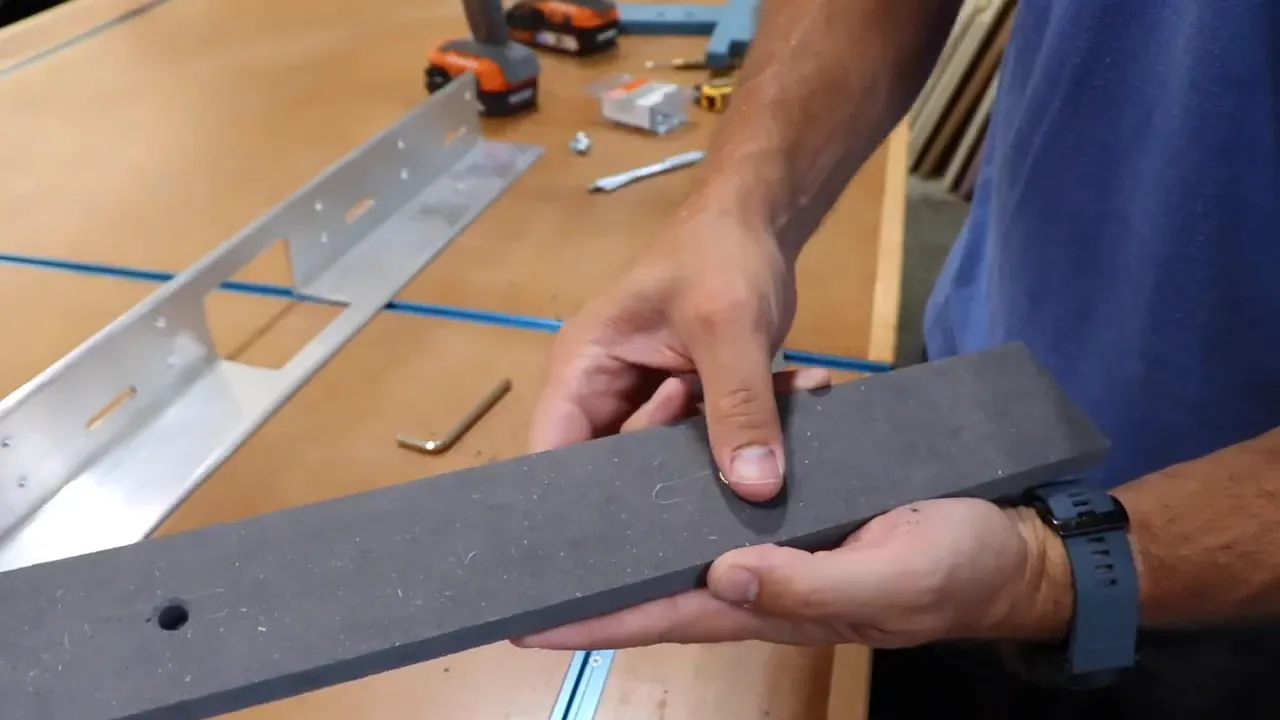
The knobs pass through the clearance slots and screw into those inserts. Loosen the knobs to slide the faces, then tighten them to lock the setting. Each face adjusts independently, allowing the center gap to suit the router bit.
Add the top T-track
I installed black T-track along the top of the stationary face assembly. That gives me an attachment point for accessories such as a stop block later.
With the movable faces fitted and the knobs installed, the fence finally looked like a finished piece of shop equipment instead of an aluminum machining experiment.
Connect Dust Collection Above and Below the Table
The fence uses a rear-mounted router fence dust port over the center opening. A hose connects that port to the auxiliary connection on my workbench’s built-in central vacuum system.
The important detail is that this is not the only collection point. While the router table is running, I have two paths open:
- Below the table: collection through the router lift cavity.
- At the fence: collection through the center opening and rear hose.
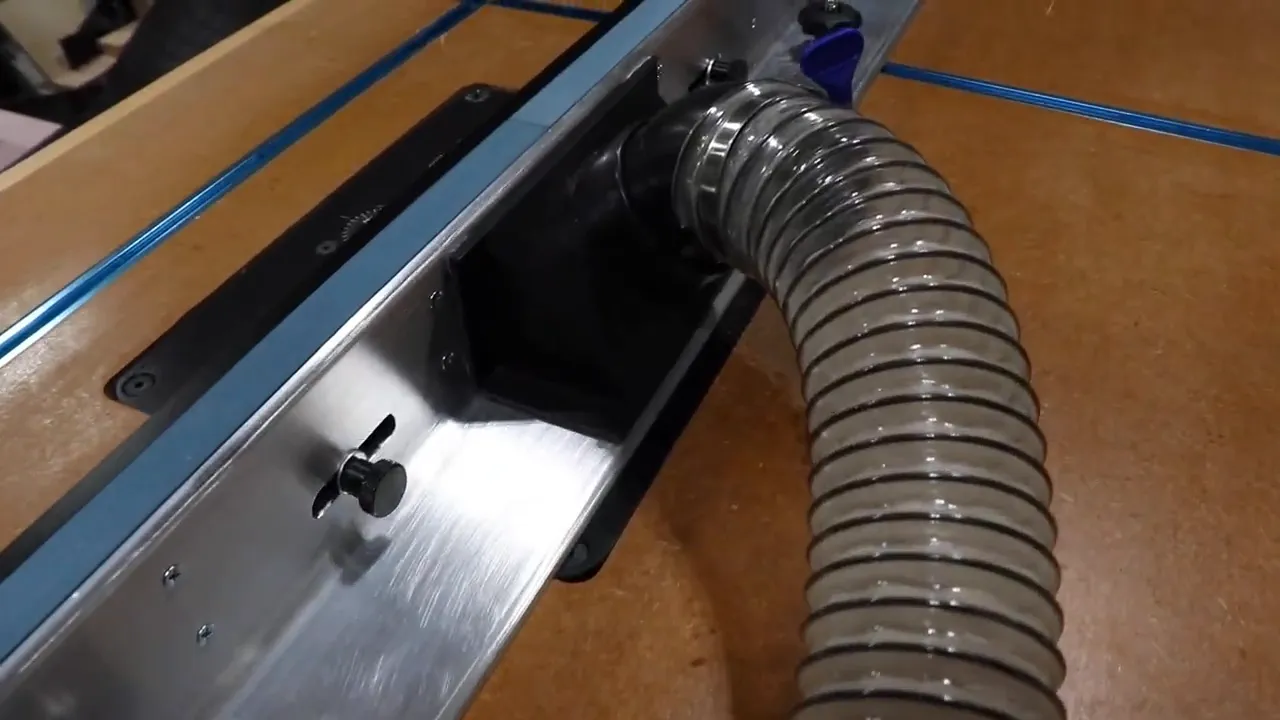
The difference was huge. I had gotten used to assuming that using the router meant covering the workbench, and probably a good portion of the shop, in dust. With both collection paths operating, there was very little visible debris left during my test cuts.
That is an observation about cleanup, not a measurement of airborne dust. For broader guidance on exposure and collection, OSHA’s wood dust resources are worth consulting.
What the Finished Fence Actually Improves
The paddle switch is a major convenience, but the fence makes the biggest change to using the table.
First, it provides a reference surface for guiding suitable workpieces. I am no longer relying only on following a bit’s bearing, when there is one. The fence also gives me more options for using featherboards to help keep stock supported against the table and fence.
Second, the dust port captures debris right behind the cut. Combined with collection below the table, it makes the router station far less messy.
The independently adjustable faces and top T-track add flexibility, but those two practical improvements, workpiece control and dust collection, are the real payoff.
Would I Build This Aluminum Router Fence Again?
I am pretty sure I spent about as much making this fence as I would have spent buying one. Add in the time spent laying out, machining, fitting, and refining everything, and it is hard to make a cost-saving argument.
But saving money was never really the point.
This was an exercise in creativity and finding out whether I could make the idea work. I learned more about machining aluminum, came away with a fence customized to my workbench, and finished the router table with features I should have had from the start.
Would I recommend the aluminum-routing portion to everybody? Absolutely not. Some of it was uncomfortable enough that I would seriously consider a different approach next time.
Am I glad I made my own? Absolutely. The workbench is more functional, the router is easier to shut off, and dust collection is dramatically better. That is a pretty good result for the final details of a shop project.


