Apparently, my strategy for keeping the camp house shed project relatable was to stop halfway through, get distracted by a couple of other projects, and come back two months later. Very authentic DIY behavior.
But now it is time to get this thing ready for paint and the final finish. That means completing the siding, wrapping the dormer, building cedar roof supports, and dealing with the remaining metal roof trim. There is even some actual woodworking involved. With pocket holes, of course.
Most of those details went pretty well. The ladder work, unfortunately, came with a fairly serious reminder that getting a project finished is not a good reason to rush.
Finishing the Lap Siding
The back wall still needed siding, and the biggest help here was a pair of PacTool Gecko Gauge siding clamps. Even with another person helping, these things make the process much easier. They support the next board and help maintain the spacing while you get it positioned.
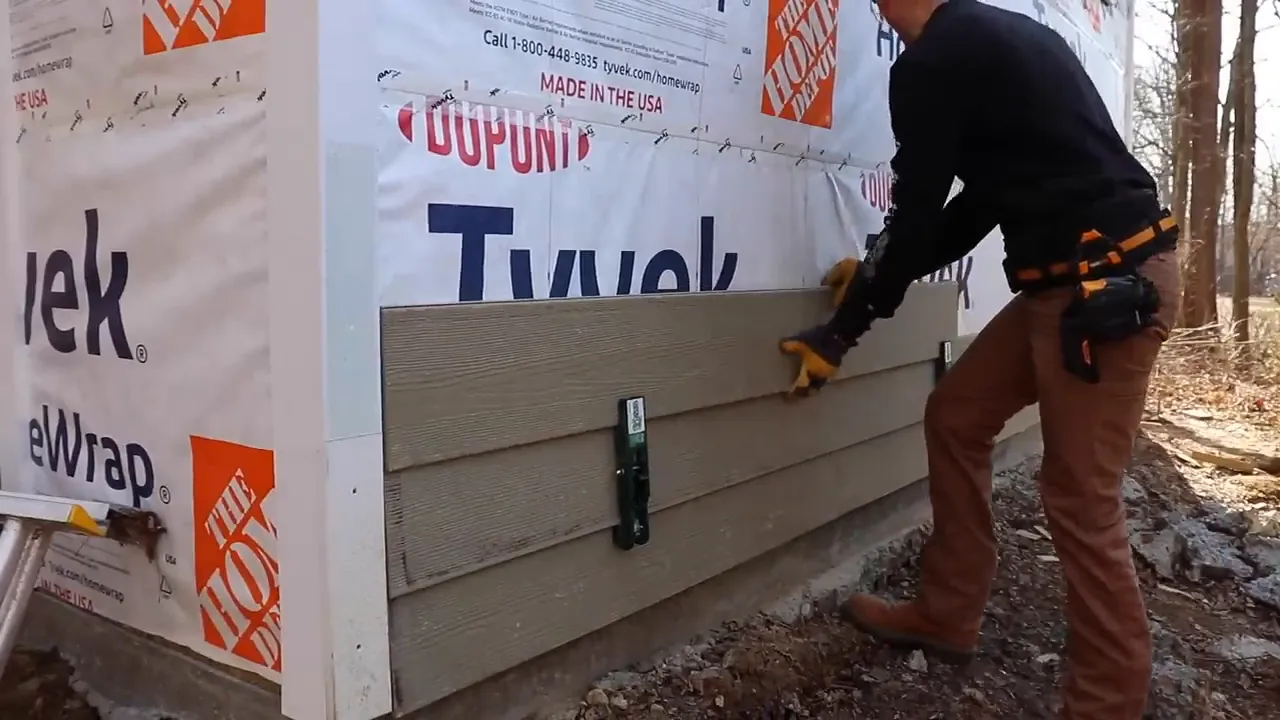
The wall spans 16 feet, so each course required two pieces of siding. That meant thinking about seam placement rather than simply stacking every joint in the same spot.
I staggered the seams and repeated the pattern every four courses. Visually, that worked for me. I am not claiming that pattern is an installation standard, though. It was the layout I chose for this wall, not a substitute for the siding manufacturer’s instructions.
The encouraging part was how much better the work looked compared with my first attempt. After doing just one other wall, my seams were tighter and the overall fit was noticeably better. Apparently, practice works. Who knew?
The Foundation Is Not a Reliable Reference
The less encouraging part was dealing with my budget foundation.
Ideally, the siding courses would line up neatly as they wrap around the corners. Mine do not match perfectly, and the uneven slab is a big part of what I am working around. Along one wall, the siding’s bottom edge is roughly even with the slab at one end. At the other end, it overlaps the slab by about 2 to 2½ inches.
That is the kind of issue that follows you through the rest of a build. A foundation problem does not politely stay down at foundation level.
For the two narrow walls beside the roll-up door, I used a green laser level to establish a common starting elevation. I did not use the slab as my reference. Both sides needed to begin on the same plane so that, when I reached the top of the opening, the siding would line up across the door.
That paid off when I installed the board bridging the opening. Instead of trying to reconcile two different heights, the piece connected the two sides cleanly. Almost like I knew what I was doing.
Cedar First, Then the Remaining Gable Siding
Before closing in the upper wall, I needed to finish the soffit transition and install the cedar pieces that the siding would meet. The cedar is still one of my favorite details on this shed, so getting that intersection right mattered.
After that came the angled siding up the gable. I would love to report that I developed a brilliant system for measuring those pieces accurately the first time.
I did not.
Instead, I made a lot of trips up and down the ladder, trimming pieces until they fit. Eventually, the last little piece went into the peak, and the main walls were finally sided.
Wrapping the Dormer in Shake Siding
The dormer was the last area still waiting for siding. I used the same shake-style panels as the front of the shed to keep the exterior consistent.
Before the panels could go on, I installed sidewall flashing where each dormer wall meets the metal roof. The transition into the lower roof slope was tricky, and I was not especially confident in how I handled it. That detail is not something I would present as a model installation.
With the flashing in place, I added the corner trim and started fitting the shake panels around the two windows.
The broad sequence was straightforward:
- Trim the panels to fit around the window openings.
- Use smaller pieces and scraps to complete the shake pattern across the front.
- Carry the siding courses around the corners onto the angled sidewalls.
- Prime exposed cut edges before installing the remaining pieces.
The actual fitting took more patience than that list suggests. For small adjustments, an oscillating multi-tool saved a lot of trips back to the ground. A little trimming in place was much faster than climbing down for every minor correction.
The narrow dormer sidewalls were easily the hardest part. Nothing about those pieces felt square or convenient. I had to fit the roof angles while keeping the siding courses level and maintaining the same course heights around the corners.
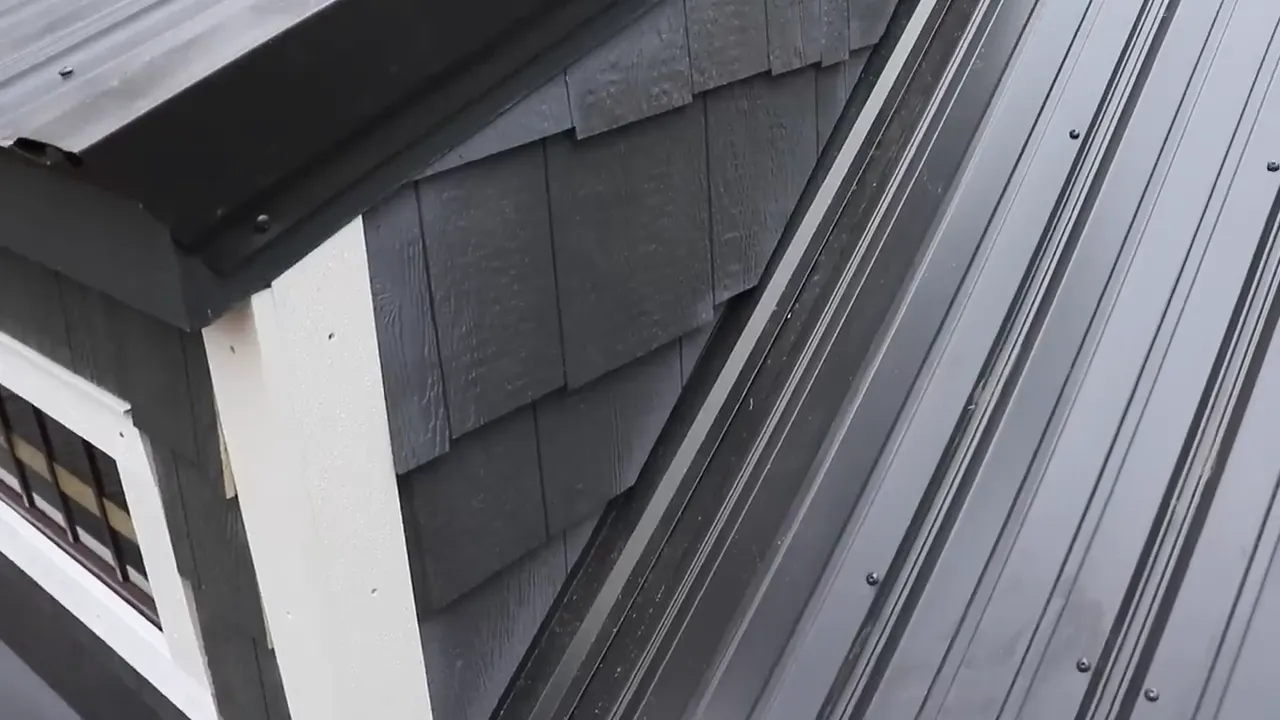
I also primed the exposed cut edges, especially the downward-facing cuts along the roofline. Those little finishing steps are easy to overlook when you are excited to install the last piece.
With the dormer wrapped, all the siding and trim were finally up. That alone made the shed feel a lot closer to finished.
Building Cedar Supports for the Roof Overhangs
There are two small roof overhangs, one on each end of the shed. One will shelter the firewood for the fire pit. The plan had always been to add supports underneath because the overhangs had more flex than I wanted.
I had already reinforced the attachment areas near the ends of those overhangs earlier in the build. Now I needed to turn some rough-sawn 4x4 cedar into four support assemblies.
The First Design Did Not Survive the Mockup
My original idea was a fairly simple corbel-style support. I built a mockup, carried it outside, and discovered two problems.
First, I had the angle wrong. Fixable.
Second, my wife did not like how it looked. Back to the drawing board. Literally.
The revised design involved enough odd angles that I decided to draw the assembly out on paper instead of trying to calculate every cut. I transferred measurements from the shed, sketched the individual parts, and made master templates.
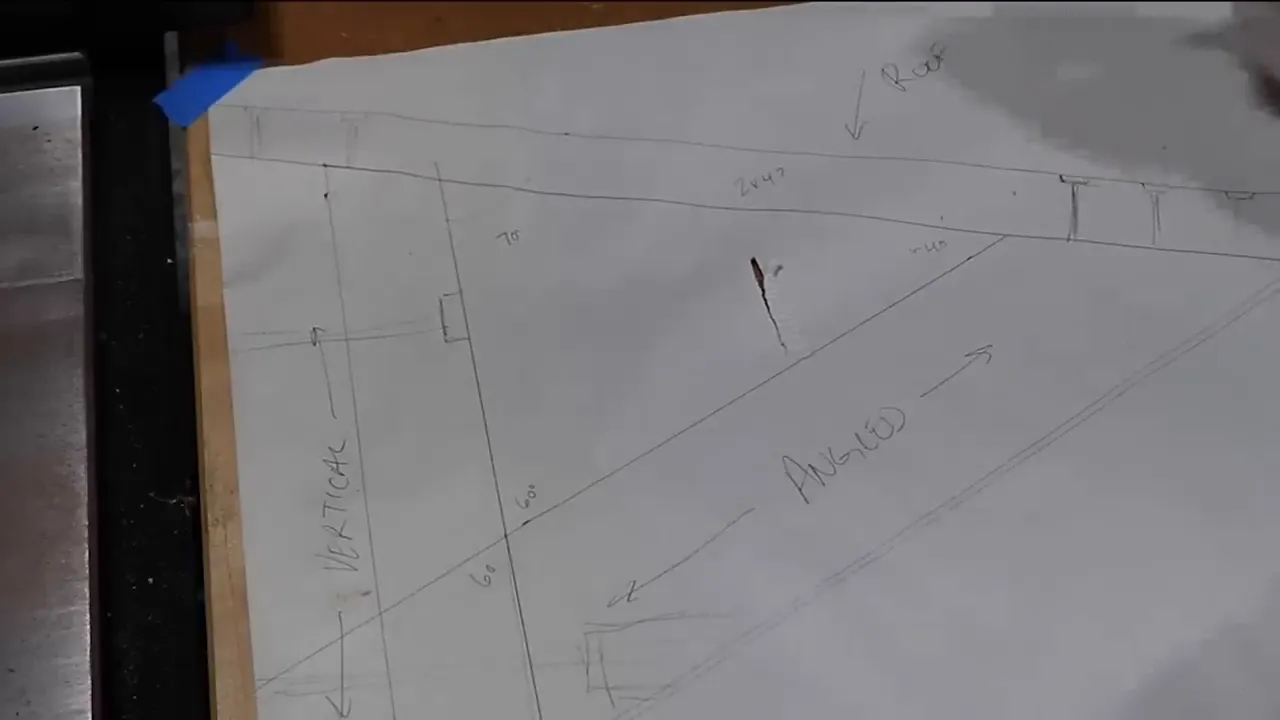
The templates turned one awkward layout problem into a repeatable process. Once I had the shapes worked out, I could use them to produce the parts for all four supports rather than solve the same geometry four times.
Drilling, Pocket Holes, and Assembly
The supports needed recessed mounting holes for the large lag screws that would eventually secure them to the shed.
I used a Forstner bit to create the larger recesses, including the angled holes, then followed with a smaller bit for the through-holes. That gave the fasteners a recessed location while leaving a smaller passage through the rest of the cedar.
For the pocket-hole connections, I used a Kreg Pocket-Hole Jig XL. This is the oversized version intended for larger stock such as 4x4s, with appropriately large screws. Normal pocket holes apparently were not quite enough pocket holes for this shed.
After drilling, I sanded the parts on all sides to clean them up, then assembled the supports.
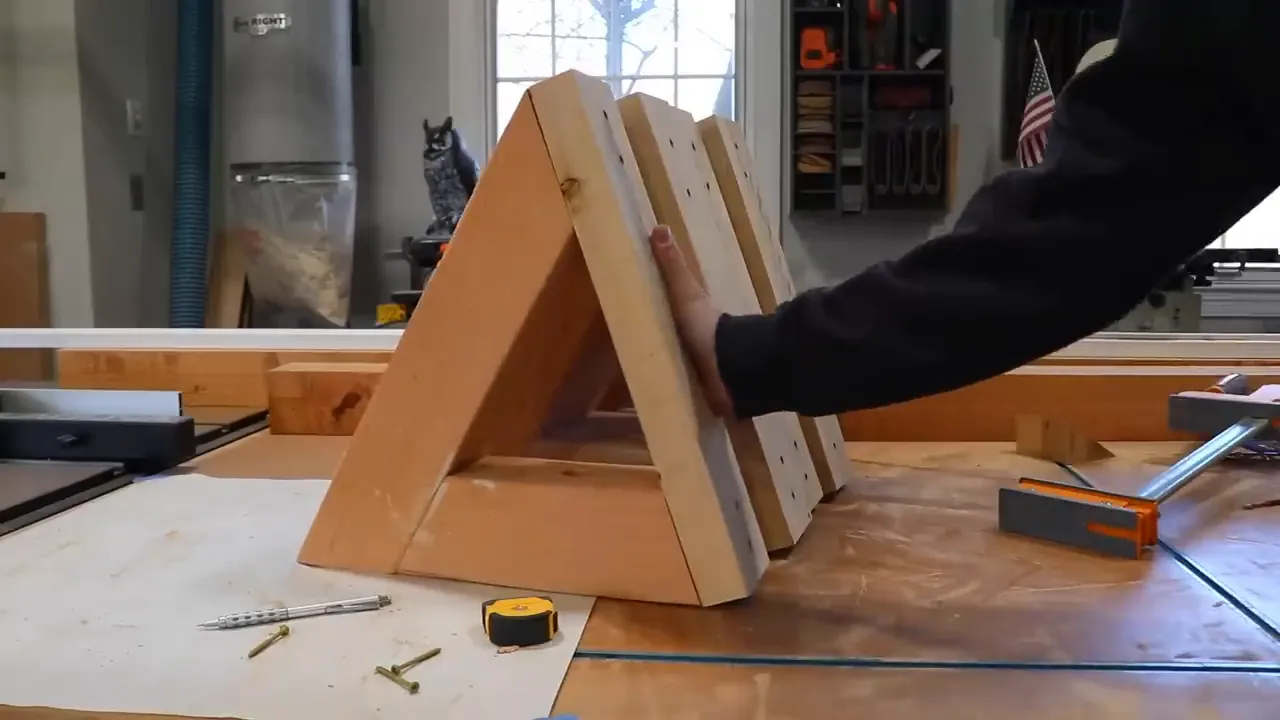
Somewhere in that process, I got into enough of a groove to forget to connect the dust collection. I turned around and realized I had coated the garage in dust.
Not my finest shop-management moment. Connecting the hose before making the mess would have been considerably more useful than noticing afterward.
Giving the Supports a Flat Mounting Surface
The next problem was getting those supports to sit properly against lap siding. The overlapping boards do not provide a flat surface for a bracket.
My solution was to mark out a rectangular area at each mounting location, cut away the siding, and replace it with a flat piece of siding material. That created an even surface for each support to sit against.
Yes, cutting into brand-new siding felt completely wrong. I had just finished putting it up. But for this build, I preferred fitting those mounting pieces afterward to trying to install all the lap siding around them from the beginning.
The flat pieces addressed the surface shape. The support attachment still depended on the reinforced locations prepared earlier, and I still needed to predrill the lag-screw holes.
I test-fitted a support to check the result, but held off on the final installation. The shed needs paint first, then the cedar supports can go up. There was no reason to make painting around those assemblies harder than necessary.
Finishing the Metal Roof Details
With the support work ready, I moved back to the roof. And yes, I know the roof should have been finished already. The remaining list included gable trim along the sloping edges, ridge-cap trim at the peak, and a few flashing pieces.
Every exposed side edge needed gable trim cut to suit its location. That included an angled cut where the trim meets the lower roof edge, plus additional fitting wherever the roof geometry got interesting.
For the gable trim I was installing, the process involved cutting and fitting the metal, carrying it into position, sealing the upper edge with butyl tape, and fastening it with self-sealing roofing screws.
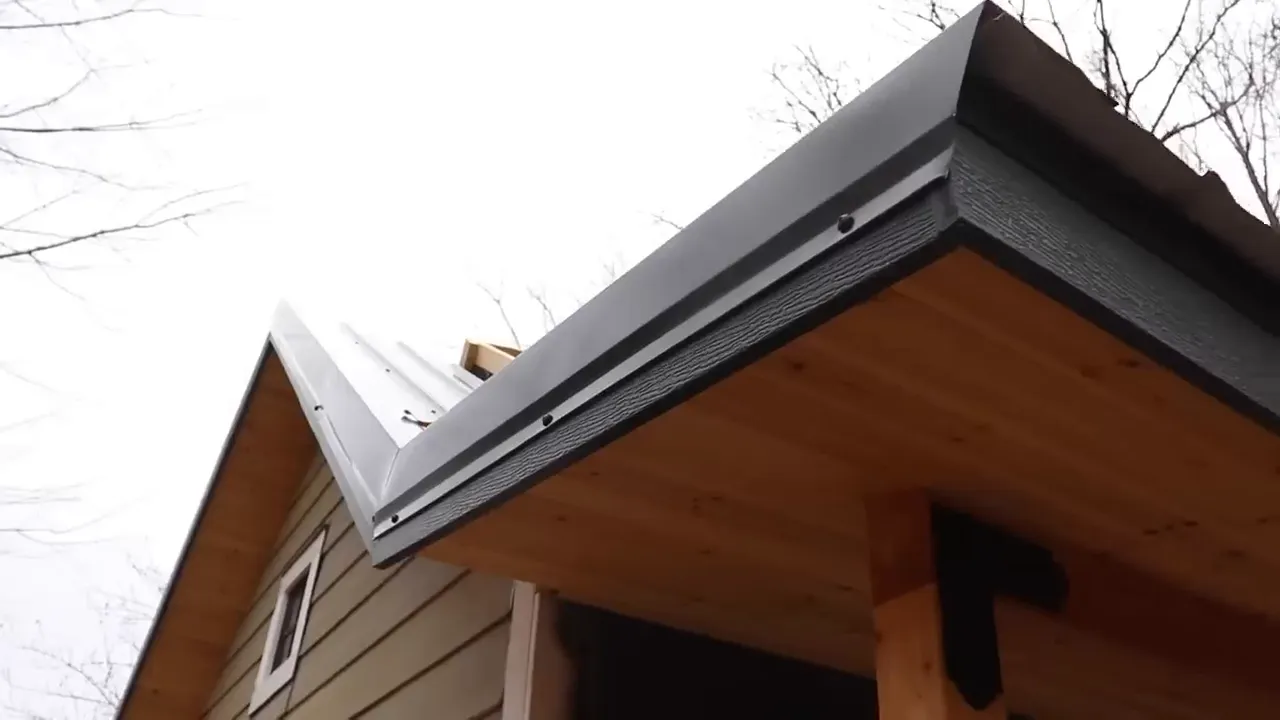
The shorter sections were manageable. The long gable pieces were another story. Their length made them awkward to handle, and reaching the fastening locations required moving the ladder repeatedly.
That is where I let the deadline start making decisions for me.
The Most Important Step Was Stopping
It was late in the day, rain was expected the next day, and I wanted to finish the roof trim. That combination has become a little too familiar on this project.
I secured the lower part of a long trim piece, moved the ladder, and shoved a 2x4 cutoff under one foot in an attempt to stabilize it.
That was a bad setup. I climbed anyway, and I fell off.
The mistake was not some mysterious construction problem. I was rushing and did not take enough care with where I placed the ladder. The weather forecast did not make that setup acceptable, and neither did wanting to finish the job.
For a proper reference rather than my example of what not to do, OSHA’s ladder safety guidance is worth reviewing before working at height.
I stopped for the day instead of trying to push through the remaining work. The roof details could wait. So could paint, the interior build-out, and the final reveal.
Am I going too far with this shed? Maybe on the cedar details. Definitely not far enough on taking my time with ladder placement.
The siding is complete, the dormer is wrapped, and the supports are ready for installation after paint. That is good progress. It does not need to come at the expense of getting home in one piece.
The Jacket That Helped Through the Changing Weather
Timberland PRO sponsored this stage of the project, and I have been working with them for a couple of years. Considering this shed has started to feel like a four-season build, I have had plenty of opportunity to appreciate comfortable work clothing.
The Trailwind jacket has been a useful outer layer for this outdoor work. It is windproof and rain-repellent, with stretchy material that lets me move without feeling bound up. I can wear it as a light layer or add warmer clothing underneath as temperatures change.
My favorite features are the stretch and the hood, which comes up high around the lower face when needed. I also appreciate the breathability when the work gets more physical.


