Dust collection is something every woodworking shop needs, yet it somehow manages to be one of the most confusing parts of setting up a shop. There is plenty of advice out there. The hard part is figuring out which advice applies to your tools, your space, and your budget.
After spending the last few years engineering miter saw dust collection products, I have gone pretty far down this rabbit hole. And the same questions keep coming up: Why does a big dust collector struggle with a small tool? Does bigger ducting help or hurt? Is a shop vac good enough?
The answers start with a simple idea: effective dust collection means matching the way your machine moves air to the resistance of the tool and everything connecting them. You do not need a fluid dynamics degree to make that happen. You just need to understand a few concepts and avoid some common mismatches.
Key Takeaways
- Match large tool ports to high-flow collectors and small restrictive ports to high-pressure vacuums.
- Effective collection requires airflow, transport velocity, pressure capability, and fine dust filtration working together.
- Short, smooth, sealed duct runs preserve performance by reducing unnecessary system resistance.
- Check filters, unused blast gates, leaks, and separators before replacing an underperforming collector.
Table of Contents
- Why Dust Collection Matters Beyond a Clean Floor
- Chips and Fine Dust Need Different Capture Methods
- The Three Dust Collection Concepts That Matter
- Dust Collector vs. Shop Vac: Two Different Jobs
- Choose the System by Looking at the Tool’s Dust Port
- How I Installed My Central Dust Collection System
- Why Hoses, Pipes, and Fittings Reduce Performance
- How to Reduce Dust Collection Restrictions
- Six More Ways to Improve Dust Collection
- What Dust Collection Setup Does a Shop Actually Need?
- Shop Vac vs. Dust Extractor: What Does the Extra Money Buy?
- Get the Match Right Before Buying More Equipment
Why Dust Collection Matters Beyond a Clean Floor
A cleaner shop is nice. But dust collection earns its place for four much more important reasons:
- Your health. Fine airborne wood dust can irritate your respiratory system and contribute to serious long-term illness. Some of the particles you most need to capture are too small to see.
- Tool performance. Sawdust buildup can accelerate wear on lubricated surfaces and bearings, clog cutting areas, and contribute to burning wood.
- Fire risk. Accumulated sawdust provides combustible fuel. Under the right conditions, airborne combustible dust can also create an explosion hazard.
- Accuracy. Dust packed against a fence or into a corner can keep a workpiece from sitting flat or square. A dirty reference surface is not much of a reference surface.
I have not always been great about respiratory protection in my own shop. That is something to improve, not a reason to treat dust collection as a replacement for appropriate PPE. For more background on the health side, OSHA’s wood dust guidance is a useful reference.
Chips and Fine Dust Need Different Capture Methods
We use “sawdust” as though it describes one thing. In practice, it helps to separate it into two groups.
Heavy chips and coarse sawdust
These are the chunky particles you can easily see. Drop a handful and they fall quickly. Gravity has a pretty obvious effect on where they end up.
A cyclone or separator is good at removing this material from an airstream. As the air spins and changes direction, heavier particles separate, slow down, and drop into a collection bin.
Fine airborne dust
Sanders, routers, track saws, and miter saws can generate plenty of fine dust. Larger tools make it too. Some is visible, but the finest material can remain airborne without being obvious.
Air movement has a much greater influence on these tiny particles, so they do not settle as readily as chips. They are also harder to remove with a separator. The fine material that gets through needs an appropriate filter.
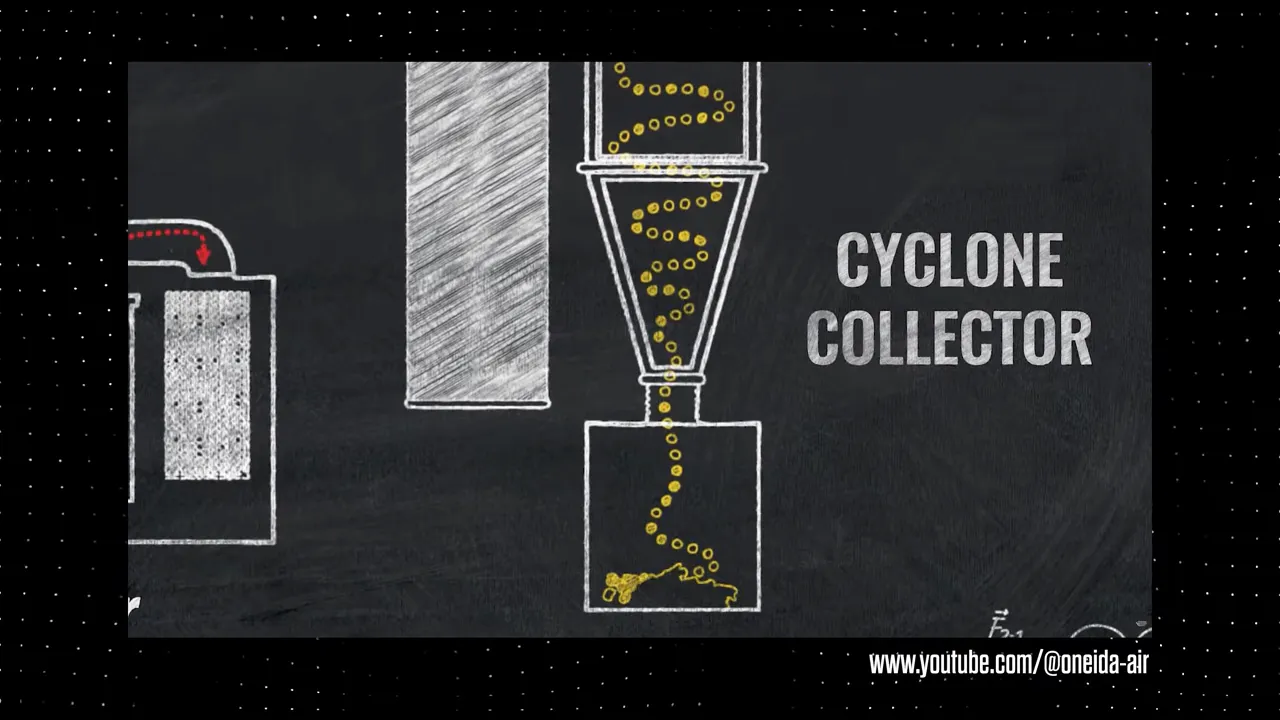
This is why separation and filtration work so well together. The separator keeps much of the bulk material out of the filter, and the filter handles the fine particles that remain. One does not eliminate the need for the other.
The Three Dust Collection Concepts That Matter
1. Airflow: How much air moves
Airflow is usually measured in CFM, or cubic feet per minute. Picture a stream of invisible boxes of air, each measuring one foot on every side. CFM describes how many of those boxes move through the system in a minute.
It is volume over time, much like gallons per minute describes water moving through a pipe.
2. Velocity: How fast the air moves
Velocity is the speed of that air, commonly expressed in feet per minute, or FPM.
This matters because moving air has to keep the sawdust suspended while carrying it through hoses and ducting. If the air moves too slowly, particles settle. Enough settled material eventually becomes a blockage.
A gentle breeze barely changes the path of falling chips. A leaf blower sends them across the shop. Same basic idea, very different air velocity.
Airflow and velocity are related, but they are not interchangeable. If the same volume of air passes through a smaller pipe, it has to move faster. Halve the pipe diameter while holding airflow constant, and the air travels four times as fast.
No calculations required. Just remember that changing duct diameter has a big effect on air speed.
There is an important practical catch: a reducer does not create extra airflow. It also adds resistance, which can lower the amount of air your blower actually moves. In a continuous, sealed duct section, the same volume passes through each part; branches and leaks change how that volume is distributed.
3. Static pressure: The ability to overcome resistance
Think of static pressure capability as the system’s muscle. It is what allows the machine to move air through restrictions such as small tool passages, hoses, elbows, separators, and filters.
Try pulling air through a narrow coffee straw. It takes a lot of effort to move a little air. Breathe through an open window, and moving much more air takes far less effort.
Different blowers are designed around different combinations of airflow and pressure. A conventional dust collector moves a large volume of air but has relatively limited pressure capability. A vacuum moves less air but can pull much harder through a restriction.
That distinction explains a whole lot of disappointing dust collection setups.
Dust Collector vs. Shop Vac: Two Different Jobs
High flow, low pressure: Conventional dust collectors
A high-flow, low-pressure system, or HFLP, is what most woodworkers mean when they say “dust collector.” It uses a large impeller to move lots of air.
The inlet is commonly 4 inches in diameter or larger. These machines work best when the tool and ducting let that air volume move without excessive restriction.
Think of a paddle boat. The big paddle moves a lot of water with each rotation. It wins with volume.
Low flow, high pressure: Shop vacs and dust extractors
A low-flow, high-pressure system, or LFHP, includes shop vacs and dust extractors. Their smaller, faster-spinning impellers are designed to produce much greater suction pressure at a lower airflow.
Their hose connections are usually 2½ inches or smaller. They are much better suited to pulling air through small tool ports and tight internal passages.
These are more like a jet ski: a compact impeller moving water at high speed through a small passage. They win with pressure.
Neither approach is universally better. They solve different problems. A physically larger machine is not automatically the right machine.
Choose the System by Looking at the Tool’s Dust Port
The easiest starting point is to look at the tool’s dust outlet and match it to the appropriate type of collection system.
- A table saw with a 4-inch port: Usually a job for a conventional high-flow dust collector.
- A handheld sander with a tiny port: A job for a shop vac or dust extractor with enough pressure to pull through the restriction.
- A miter saw with a roughly 1½-inch to 2-inch port: Usually best served by a good shop vac or dust extractor at that port.
My Harvey table saw has a 4-inch outlet and produces a substantial amount of sawdust. It needs air volume. My handheld sander has a small outlet and restrictive passages. It needs pressure.
Connecting a large dust collector to a tiny hose does not turn it into a powerful dust extractor. The restriction can prevent it from moving the air you expected.
Miter saws also need better capture at the source
Miter saws are incredibly convenient and incredibly good at spreading sawdust around a shop. The suction source matters, but so does the shape and location of the dust chute.
That is why I design model-specific miter saw dust collection chutes. They are intended to improve collection without building a giant enclosure around the saw. Our advertised improvement is up to 75%, with the correct chute and a suitable collection setup.
Available options depend on your exact saw model. The promoted discount code is SHOPNATION20 for 20% off an order.
|
How I Installed My Central Dust Collection System
For the large-port tools in my new shop, I installed an Oneida V-System 3000. Oneida supplied the collector and ducting and also provided a complete duct layout, which was a big help.
The collector lives in an upstairs room. That location gets the machinery out of the main shop and noticeably reduces the noise downstairs, although the collector itself is definitely not quiet.
Solving the clearance problem
The original floor stand was too tall for the room, so I switched to a wall mount. Even then, the installation sequence mattered: the motor and impeller assembly needed to go on before the collector could be raised into position.
The assembly weighed about 200 pounds. I used a temporary lifting fixture built from 2x4s with a lifting platform to position it, then bolted it to the wall bracket. That was my solution for this installation, not a universal lifting plan.
With the cyclone and 3-horsepower motor installed, I added the large exhaust filter, its lower collection basin, and a bin-level sensor. The cyclone collects the bulk material; the filter catches the fine dust that makes it through.
Planning the duct route
I laid the ducting out on the floor before installing it. The layout starts with 6-inch ducting near the collector and gradually steps down to the 4-inch tool drops.
I also wanted the main run above the windows so it would not block natural light. That meant getting creative with the elbow coming through the ceiling and the mounting arrangement.
Instead of standard metal hanging straps, I used Unistrut with custom 3D-printed clamps and standoffs. That keeps the ducting aligned and gives me flexibility to move clamps or change sections later.
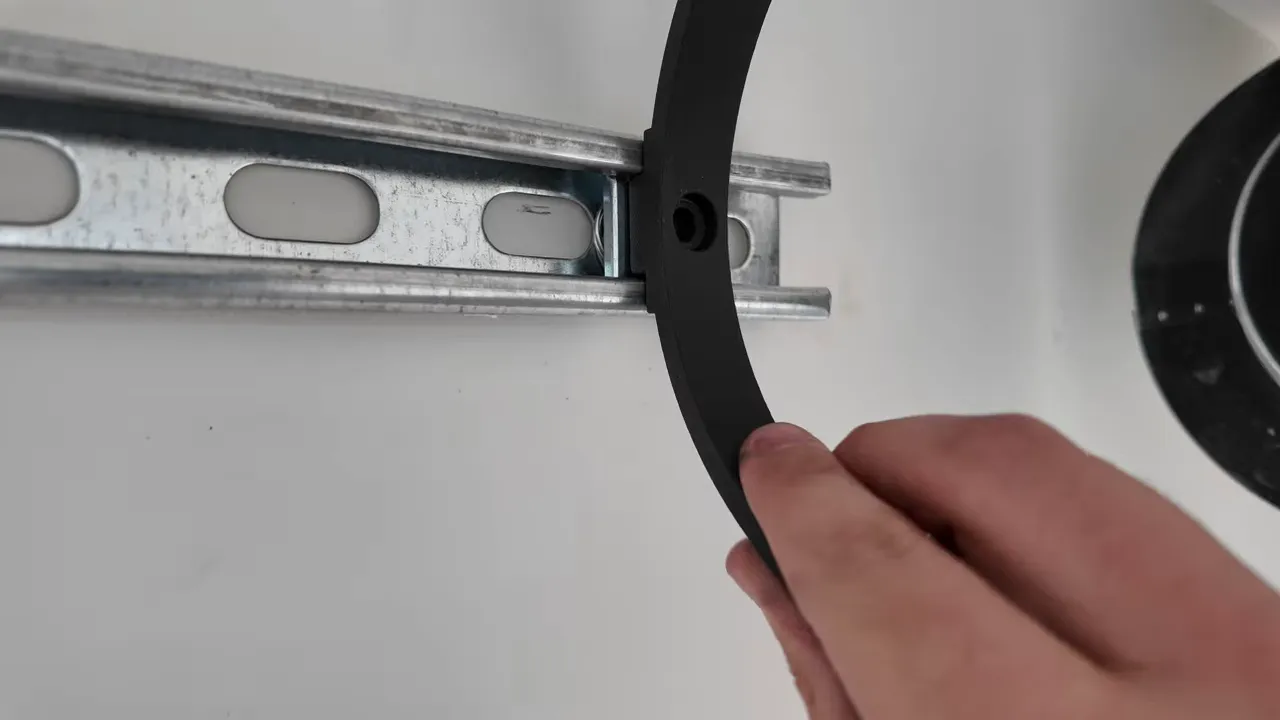
Old photos of the shop framing helped me choose a ceiling penetration that lined up with the attic access. Once the major fittings were in position, I cut the straight sections to length and sealed the joints with metal foil tape.
At the collector inlet, I kept a straight section before the first bend rather than placing an elbow immediately against the inlet. That gives the air a cleaner approach into the collector.
The finished system has drops for the table saw, band saw, and router table, plus a hose reel for cleanup. One logistical detail still matters upstairs: emptying the collection bin. I planned a floor opening and a future lift rather than carrying a full bin down the stairs.
Why Hoses, Pipes, and Fittings Reduce Performance
Every real dust collection system has resistance. Even smooth, straight ducting creates friction as air moves along its walls.
Corrugated hose adds more resistance. Elbows change direction. Wyes, reducers, joints, separators, and filters all contribute to the load the blower has to overcome.
Think of those restrictions as speed bumps. A blower that moves plenty of air with nothing connected can move much less once you add an entire shop’s worth of ducting.
This does not mean velocity drops at every fitting regardless of duct size. Local air speed also depends on the cross-sectional area. The useful takeaway is that more system resistance generally means less delivered airflow, which can leave you short of the transport velocity you need.
A practical air velocity target
For the woodworking dust transport discussed here, a useful target is approximately 3,500 to 4,000 FPM. I would be concerned about tool connections falling below roughly 3,000 FPM, because material may start settling in the ductwork.
These are transport-speed guidelines, not a guarantee that a hood captures every airborne particle. The tool’s capture design and the volume of air moving still matter.
A basic handheld anemometer gives you a practical way to check air speed instead of guessing. Mine cost about $35.
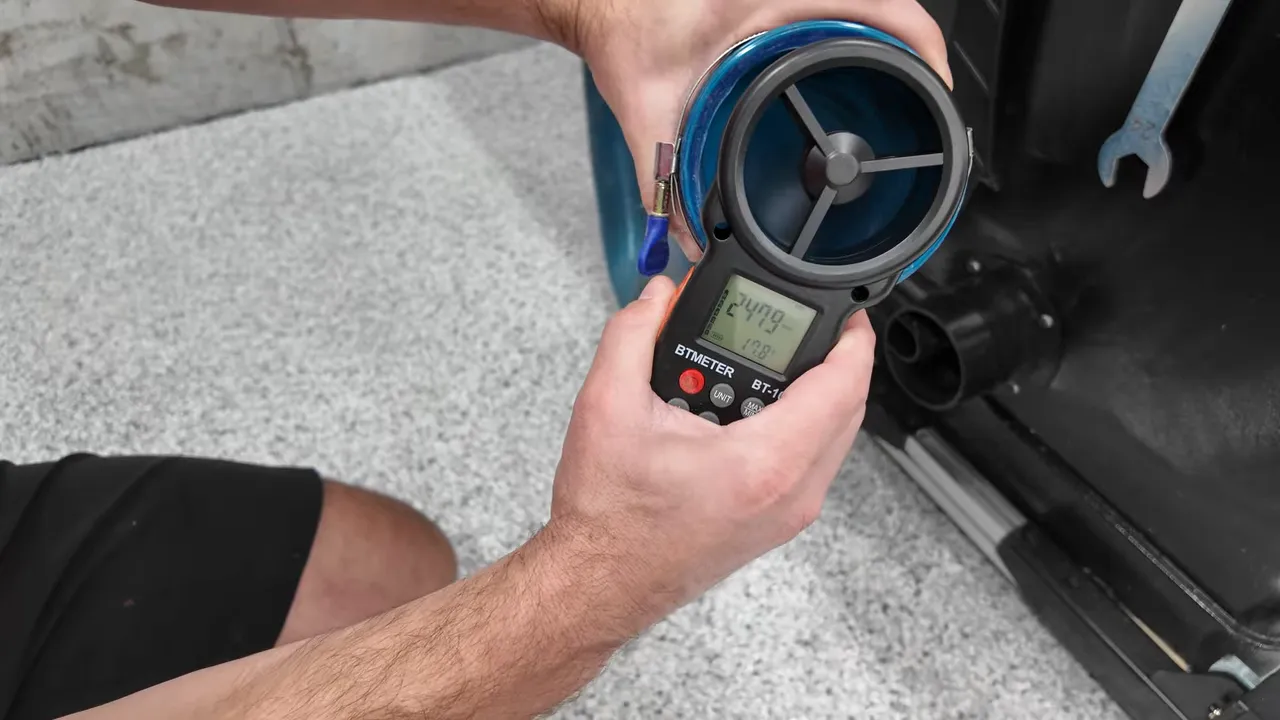
Check different tool locations under comparable operating conditions. You are looking for weak branches and for changes after you remove restrictions, clean a filter, or seal leaks.
How to Reduce Dust Collection Restrictions
The basic rules are straightforward:
- Use smooth ducting where practical. Keep flexible corrugated hose for the sections that actually need flexibility.
- Choose gentle bends. Large-radius curves are preferable to tight, abrupt turns.
- Reduce diameter gradually. Avoid sudden transitions when a gradual reducer will fit.
- Step down toward the tools. My system goes from 6 inches to 5 inches and finally to 4-inch connections.
- Keep the main run appropriately large. Do not reduce to the smallest tool connection right at the collector and run that size across the shop.
- Keep runs short and direct. Every unnecessary length or fitting adds resistance.
Why larger main ducting can improve performance
This is the part that initially sounds backward. If smaller pipe makes air move faster, why not use small pipe everywhere?
Because faster-moving air also makes restrictions more expensive in terms of pressure loss. For a given airflow, pushing air through a long, narrow run demands more from the blower than moving it through an appropriately sized larger run.
Think of the blower’s pressure capability as a limited budget. Spend too much overcoming a restrictive main line, and you have less capability left to deliver useful airflow at the tool.
That is why my system keeps the larger ducting for much of the route, then reduces toward the tool drops. But “larger” does not mean infinitely large: the duct still needs sufficient velocity to transport the material. Duct size, airflow, and transport speed have to work together.
If a tool connection is underperforming, look upstream for unnecessary restrictions or undersized ducting rather than immediately buying a bigger motor.
Six More Ways to Improve Dust Collection
1. Check the exhaust and filter
Do not focus so hard on the suction side that you forget where the air leaves the blower.
A dirty filter or blocked outlet adds resistance to the system and reduces performance. Keep the filter maintained and any exhaust outlet clear. You cannot expect maximum airflow when the machine is struggling to discharge the air it pulls in.
2. Close unused blast gates
If your collector serves multiple branches, close the gates you are not using, unless the system was specifically designed for simultaneous operation.
An extra open branch diverts airflow away from the active tool. The reduction can be substantial. If a branch has no way to shut it off, adding a blast gate is a simple improvement.
3. Reconsider collector placement
A remote collector is convenient until the duct run becomes too much for it.
An undersized machine connected to long hose runs may never deliver the performance you need. Sometimes the realistic choices are a more capable collector or a shorter route.
For a small shop, a mobile dust collector can be an excellent solution. A modest collector connected directly to a tool with a short hose can work very well. Grouping the large-port tools together can also shorten runs without changing the collector.
4. Seal air leaks
Every joint is a potential place for unwanted air to enter. Those small leaks add up, stealing airflow that should be coming from the tool.
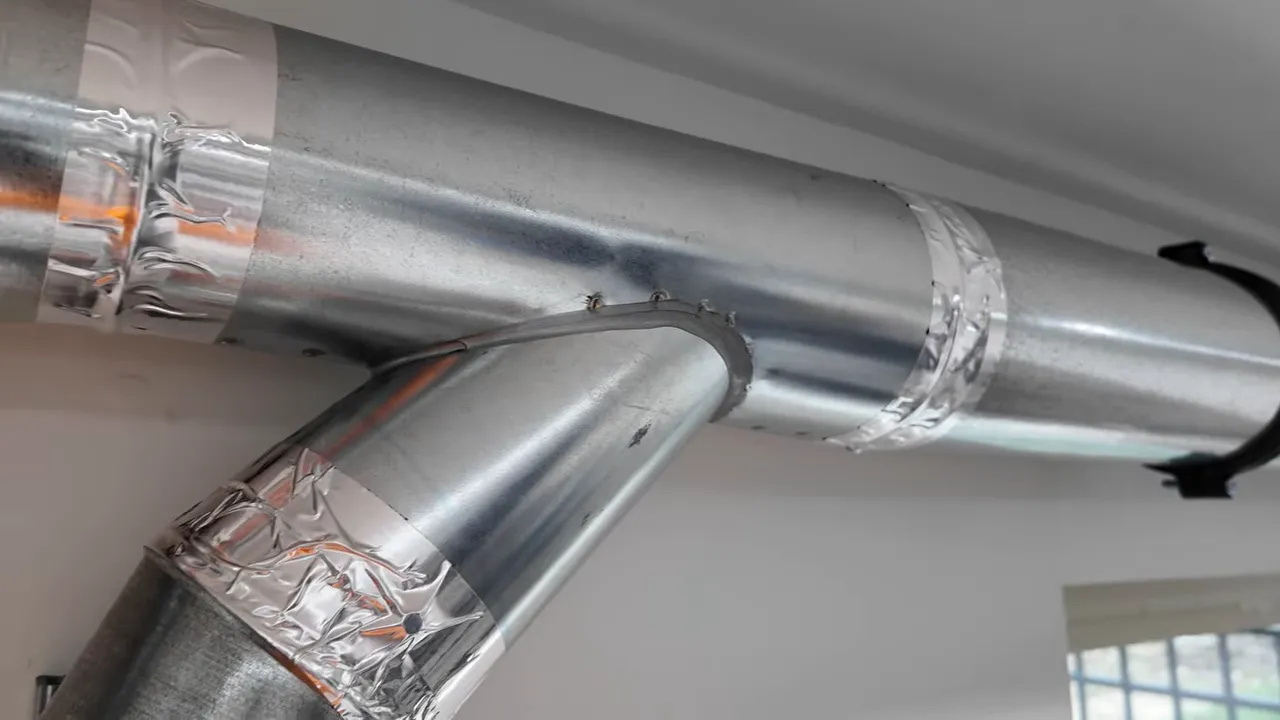
Inspect connections while the system runs and seal leaks with foil tape or appropriate silicone. A suitable smoke leak test can help reveal inward airflow, but avoid introducing an ignition source around wood dust.
5. Evaluate the separator
A separator reduces the material reaching your filter and makes emptying easier. It also introduces resistance.
The large cyclone on my Oneida is designed as part of that collection system. For a shop vac, a suitably sized cyclone such as a Dust Deputy can provide a useful balance between separation and airflow.
I have also used Dust Right separator buckets. They are convenient, although in my experience they do not separate as much material as the small cyclones.
Very compact, low-profile lid separators deserve particular attention when troubleshooting weak suction. Their tight airflow path can create a significant penalty. Saving space is useful, but not if the separator consumes too much of the performance your vacuum needs.
For me, the reduced filter maintenance and easier emptying usually justify using a separator. The trick is choosing one that suits the machine rather than assuming they all have the same effect.
6. Improve capture at the tool
Good ducting cannot collect dust that never enters the hood or chute.
I added a Harvey Shark S-10 overarm collector to my table saw to capture dust above the table. Its connection transitions from a 4-inch line toward the smaller pickup, and the accessory targets dust that the cabinet connection alone does not catch.
Whether it is an overarm table saw pickup or a better miter saw chute, source capture is part of the system, not an afterthought.
What Dust Collection Setup Does a Shop Actually Need?
For a shop with both large stationary machines and small-port tools, my default recommendation is two complementary systems:
- A high-flow dust collector for the large dust ports.
- A shop vac or dust extractor for the small ports and restrictive handheld tools.
That does not have to mean an elaborate central installation. A low-cost WEN mobile dust collector paired with a good shop vac can cover the two basic jobs without a massive investment.
My own shop uses the Oneida V-System 3000 for the large-port tools, a dedicated extractor under the miter saw, another mobile extractor, and a shop vac built into the workbench. That arrangement fits how I use the space. It is not a minimum shopping list.
A hybrid option: Oneida Supercell
The Oneida Supercell is an interesting exception to the usual two-system approach. I have researched it, but I have not personally used one.
It combines a 4-inch inlet with an array of smaller vacuum-style blowers rather than one conventional large impeller. Its stated pressure capability is roughly eight to ten times that of a traditional dust collector, while still providing airflow for larger-port tools.
That combination makes it a promising hybrid for a small shop with the budget for it. The greater pressure capability also makes typical restrictions less punishing than they are for a conventional low-pressure collector. Still, a less expensive two-machine arrangement remains a perfectly sensible option.
Shop Vac vs. Dust Extractor: What Does the Extra Money Buy?
Both belong to the low-flow, high-pressure family. But their intended jobs are different.
A shop vac is a general cleanup machine. Depending on the model and configuration, it handles chips, debris, and wet messes. A dust extractor is designed around capturing dust from a connected tool and maintaining useful performance while doing it.
Fine dust filtration
Many dust extractors come with HEPA filtration. Standard shop vac cartridge filters vary, but basic filters may be rated in a much coarser range, around 5 to 30 microns. Fine dust that passes through the filter can return to the room through the exhaust.
HEPA filtration is evaluated at the much smaller 0.3-micron size. The EPA’s explanation of HEPA filters provides useful context for what that designation means.
You can buy HEPA filters for compatible shop vacs, but that adds cost, and filter maintenance still matters.
Automatic filter cleaning
Many dust extractors offer automatic filter cleaning. The machine periodically dislodges accumulated dust from the filter, helping it maintain airflow longer between manual cleanings.
That is especially useful during fine-dust work, when filter loading can become the limiting factor.
Tool-triggered operation
Dust extractors commonly include an onboard tool outlet that automatically starts the extractor when the connected tool runs.
It is a convenience feature, but a useful one. A collection system you do not have to remember to switch on is easier to use consistently.
Price
A dust extractor typically costs about two to four times as much as a shop vac. You are paying for a dust-focused machine, often with better filtration, automatic cleaning, and tool integration.
If the budget allows, those features are worthwhile. If not, a good shop vac with an appropriate HEPA filter is a practical lower-cost option for small-port tools.
Get the Match Right Before Buying More Equipment
Most dust collection frustration comes from asking the wrong kind of machine to overcome the wrong kind of resistance.
Start by matching the collector to the tool. Then keep the air path short, smooth, sealed, and appropriately sized. Check the filter, close unused branches, measure performance, and improve the hood or chute where the dust is created.
You need enough air volume to capture the material, enough velocity to carry it, enough pressure capability to overcome resistance, and enough filtration to keep the fine stuff from returning to the shop.
That is the whole system. No math required. Now make some chips, with a plan to collect them.


