Lower cabinet doors are black holes for tools. You put something behind a few other things, close the door, and apparently agree never to see it again.
That is not the storage system I want in my new shop.
I already have a perfectly serviceable set of plywood cabinets in the garage. I built them about seven years ago, and they have survived multiple moves. But rather than move them again, I’m leaving them as garage storage and treating the new workshop as a blank slate.
The plan is wall-to-wall shop cabinets with three priorities:
- A ton of drawer storage. This is nonnegotiable.
- Upper cabinets that are simple to build and more useful than ordinary cupboards.
- A finished setup that looks awesome. Shop furniture is still furniture I have to spend time around.
The layout also needs an integrated miter saw station. Not another temporary stand propped up on whatever happens to be lying around, but a proper station that works with the storage on either side.
Key Takeaways
- Shallow drawers make lower cabinet contents easier to see and retrieve than deep shelves behind doors.
- Vertical and double-sided pull-outs bring the same visibility advantage to upper shop cabinets.
- Decorative laminate creates a uniform cabinet finish without painting, but adhesive timing and trimming setup matter.
- Test basic shop furniture before adding features to catch clearance problems and impractical layouts early.
Table of Contents
- Why Drawers Beat Doors for Lower Shop Cabinets
- Build or Buy the Drawer Cabinets?
- A Black Compact Laminate Countertop
- Simple Birch Plywood Upper Cabinets
- Finish the Cabinets Without Painting Them
- Make Upper Cabinets Work More Like Drawers
- Build the Miter Saw Station Around Dust Collection
- Test the Basic Build Before Adding Every Feature
- A Better Foundation for Shop Organization
Why Drawers Beat Doors for Lower Shop Cabinets
My preference for drawers is not exactly a secret. But there is a useful way to explain it beyond “I hate digging around on my knees.”
A cabinet’s capacity tells you how much stuff fits inside. It does not tell you how easily you can find that stuff. Those are very different things.
The retrievability index
Here is the simple model I’m using:
Retrievability index = visible surface area ÷ storage volume
This starts with three assumptions: we tend to choose the easiest option, visibility is related to the area we can see, and comparable cabinets with doors or drawers have roughly similar overall storage volumes.
Think about a sheet of paper. Looking straight at it gives you a lot more information than looking at its edge. Storage works much the same way: the more of the contents you can expose, the less effort it takes to find something.

For a basic cabinet with doors, you see the contents through the front opening. If its internal dimensions are height, width, and depth, the simplified relationship is:
- Visible front area: height × width.
- Storage volume: height × width × depth.
- Visible area divided by volume: 1 ÷ depth.
In other words, making the cabinet deeper adds capacity without improving your view into it. You can make that ratio better by making the cabinet shallower, but eventually you end up with some very strange lower cabinets.
A drawer changes the viewing direction. Pull it out, and you look down into it. The visible area becomes its width multiplied by its depth, while the storage volume also includes its height.
For an individual drawer, that simplified ratio becomes 1 ÷ drawer height. A shallow drawer exposes a broad area of tools without giving them much room to disappear beneath other tools.

Is this a universal law of cabinet design? No. It is a useful model for the problem I’m trying to solve. Maximizing this ratio does not necessarily maximize storage capacity. It helps prioritize usable storage over theoretical storage.
For lower cabinets full of tools, that is a trade I’m happy to make.
Build or Buy the Drawer Cabinets?
Once I committed to drawers, I had two options: build a mountain of drawer boxes or buy cabinets that already had them.
I went back and forth on this. Building drawers is not especially mysterious, but building a whole wall’s worth takes a considerable amount of time. And once you add plywood, slides, hardware, and all that labor, buying starts to look a little less outrageous.
The problem was finding the right cabinets. My search seemed to jump straight from extremely expensive industrial drawer cabinets to cheap units I did not trust to hold up. The middle ground was surprisingly hard to find.
I eventually ordered heavy-gauge steel drawer cabinets from an overseas manufacturer. They took about two months to arrive, but I was genuinely impressed when I unpacked them.
- The drawers have high weight capacities.
- The dark gray powder coating closely matches the cabinets from my previous shop.
- The aluminum handles give the fronts a clean, finished appearance.
- The cabinets are something I can take with me if I ever move shops again, which I sincerely hope I do not.
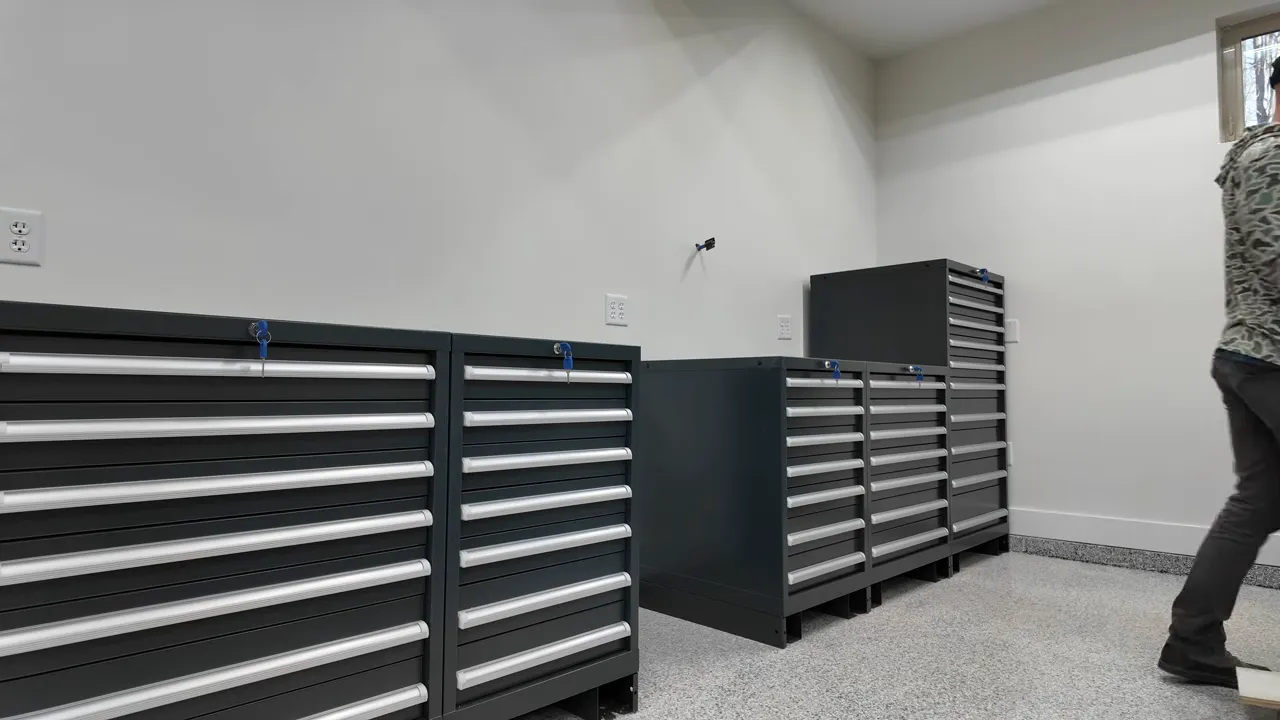
These were not cheap. I’m not going to pretend otherwise. Basic lower cabinets with doors would cost less. But for the drawer-heavy setup I wanted, the comparison between building and buying was closer than it might first appear.
The right answer depends on your budget, available time, and how you want to work. Buying the lowers let me put my building time into the custom upper cabinets and miter saw cart.
A Black Compact Laminate Countertop
Putting a basic sheet of MDF on top of those steel cabinets felt a little wrong. So I tried something new to me: Formica Compact.
This is a substantial phenolic panel, not the thin decorative laminate used later on the upper cabinets. It comes in a huge range of colors and patterns, including, hilariously, an MDF look. I resisted the opportunity to spend money making my countertop look like the thing I had just decided not to use.
I chose black.
I picked up two 5-by-10-foot sheets, along with the birch plywood for the rest of the build. Renting a trailer was necessary. Discovering just how heavy this material was happened immediately afterward.
Seriously, it felt like somebody had found a practical application for unobtanium.
Breaking the panels down made them more manageable, although even the 4-by-5-foot pieces set aside for another use were about all I could carry. The good news is that the material cut and routed nicely. I also rounded the exposed corners, and I may come back and add a small chamfer to the top edges.
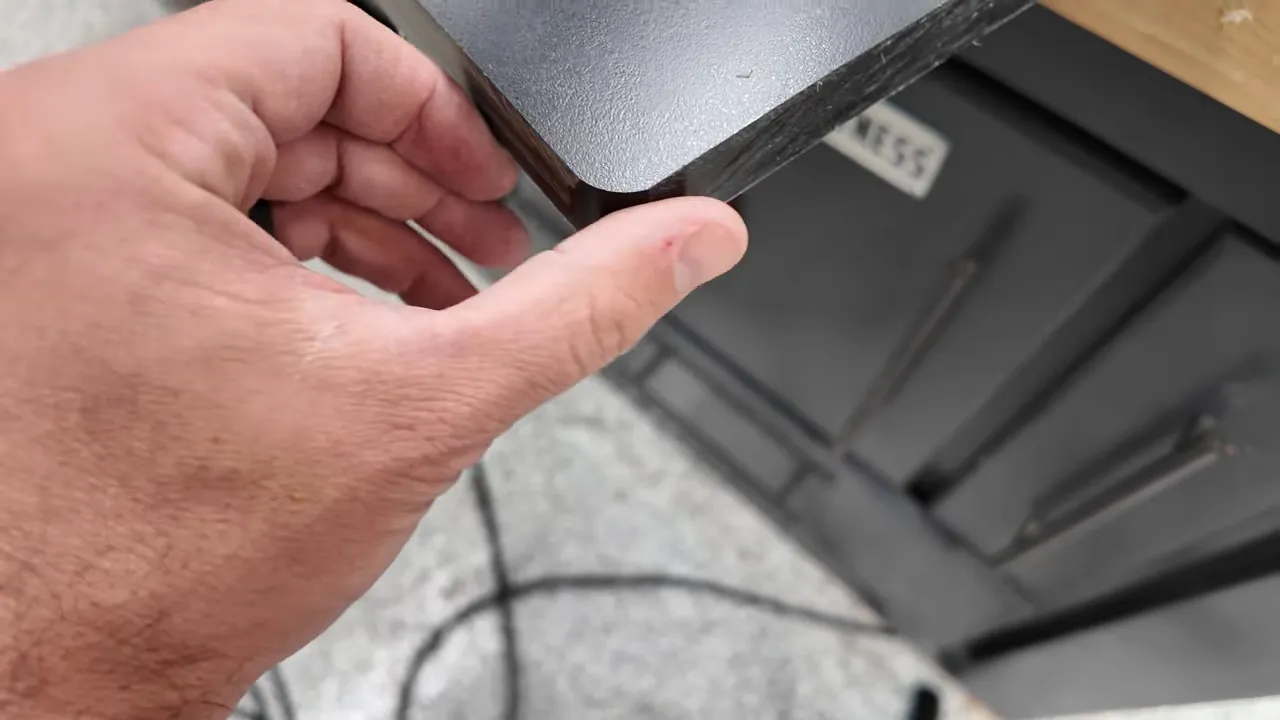
For now, the black tops give the lower cabinets a consistent work surface and establish the look for the rest of the wall.
Simple Birch Plywood Upper Cabinets
The upper cabinet boxes are intentionally straightforward. The goal is not to demonstrate the most complicated joinery I know. It is to build something approachable without making the finished shop feel like an afterthought.
Prep the parts before assembly
I broke down the birch plywood, cut the cabinet components to size, and labeled the parts before assembly. With this many similar-looking panels, a little painter’s tape saves a lot of confusion.
The table saw work was a good reminder of how much a functional shop matters. My Harvey saw and Big Eye fence made the cutting enjoyable, even though the permanent dust collection was not connected yet and the outfeed setup was still decidedly makeshift.
I also tried to handle the exposed edges while the parts were easy to reach.
Originally, I wanted to leave the plywood layers visible as a contrast against the gray faces. Then I filled some voids, and the filler dried an unpleasant orange. Not exactly the look I was going for.
Plan B was birch edge banding. It preserved the light wood contrast and gave the edges a cleaner appearance.
Butt joints, glue, and screws
The box construction could hardly be simpler: butt joints, glue, and screws. I used corner clamps to help align the parts, checked the boxes for square, and added the internal dividers and mounting rails needed for the different cabinet layouts.
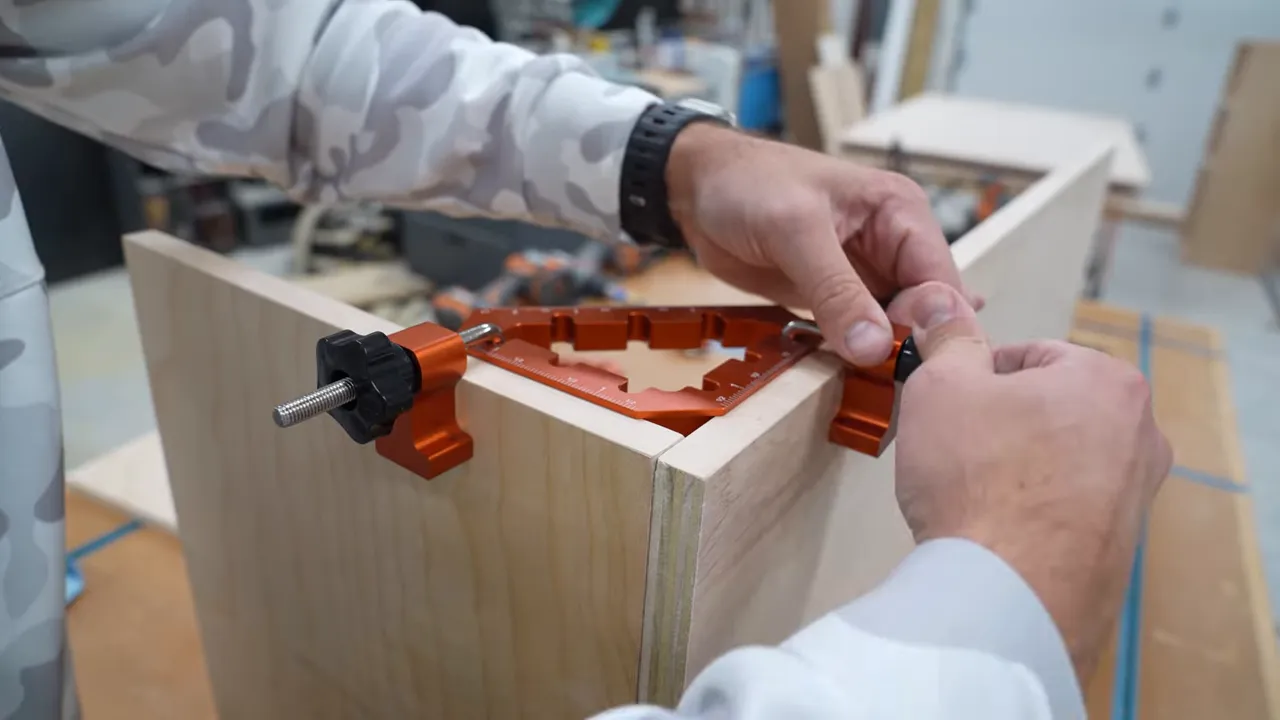
The fronts are designed for inset doors rather than the overlay doors I have used in the past. The light edge-banded edges will remain visible around the openings, while the other exposed exterior surfaces get a gray finish.
Simple construction does not have to mean a rough-looking result. A lot of the finished appearance comes from consistent edges, clean surfaces, and decisions made before assembly.
And shop projects are a great place to expand your skills. You get the benefit of learning something new, then get to use the result every time you work. There is nothing wrong with putting extra effort into the infrastructure that makes your other projects possible.
Finish the Cabinets Without Painting Them
I wanted the upper cabinets to have a uniform gray finish. I did not particularly want to paint them.
It turns out what I like about painted shop furniture is mostly the non-bare-wood appearance, not the actual process of applying paint. That distinction took me an embarrassingly long time to make.
The solution was matte gray Formica Fenix laminate. Unlike the thick countertop panels, this is a thin decorative sheet that bonds to the plywood.
If “Formica” makes you think exclusively of budget kitchen countertops, I get it. That was my association, too. But there are plenty of colors, textures, and patterns that make sense for shop furniture. The manufacturer’s material collections give a better sense of the options than that old mental picture does.
The application process
- Measure and cut the laminate. Score it deeply enough before separating the pieces. A timid score line does not do you any favors.
- Apply contact cement to both surfaces. Coat the back of the laminate and the plywood receiving it.
- Let the adhesive tack up. For the cement and conditions I was working with, that meant about 15 to 20 minutes. Follow the directions for your adhesive.
- Position the laminate and press it down. I used a long-handled roller to apply pressure across the surface.
- Flush-trim the overhang. Set up the router carefully so the bit does not damage an adjoining finished face.
I learned two of those details the annoying way.
First, joining the surfaces too soon left me with a peeling corner. Contact cement is not an invitation to skip the waiting period.
Second, I set the flush-trim bit too low and shaved the adjacent laminate near an edge. Protective tape on that face and raising the bit corrected the setup.
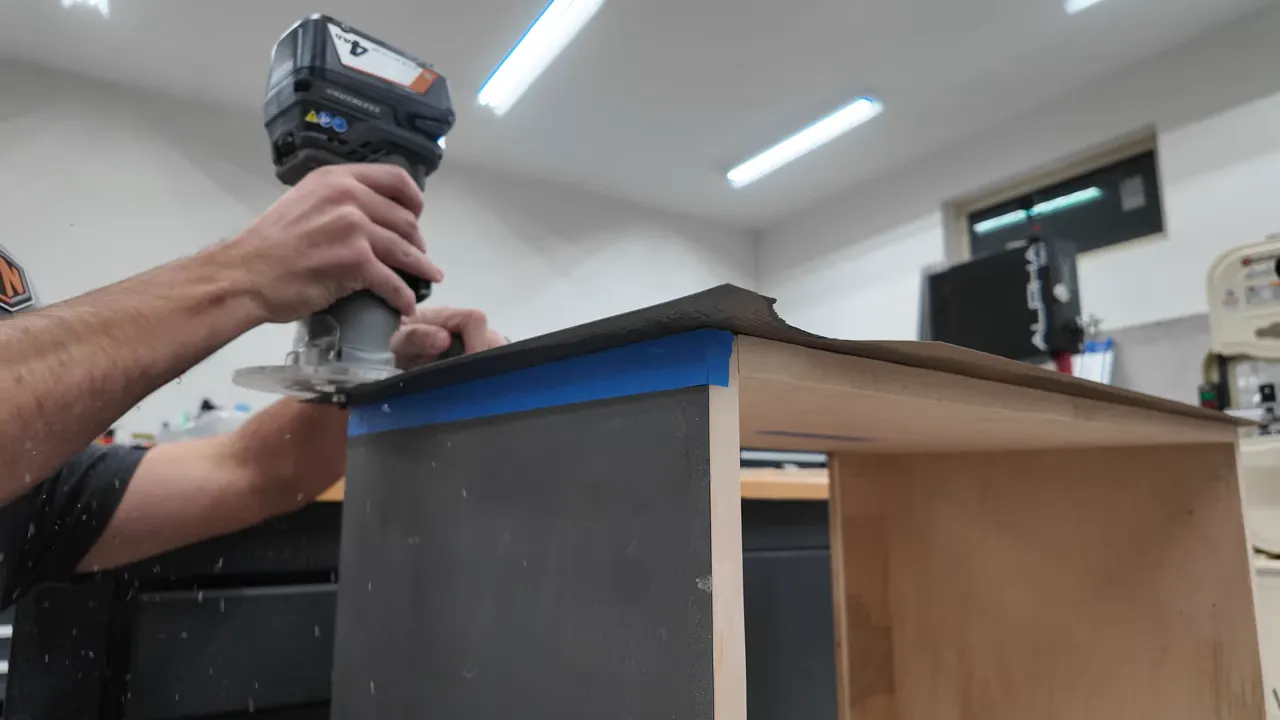
I applied the same matte gray laminate to the exposed upper cabinet sides and bottoms. The natural birch-colored front edges remain as the contrast, without requiring a full paint-finishing operation.
Make Upper Cabinets Work More Like Drawers
Drawers are great below a countertop because you can look down into them. Put the same drawer above your head and that advantage disappears pretty quickly.
But the underlying idea still works: bring the contents out of the cabinet and expose more of their storage surface.
Vertical pull-out tool walls
At one end of the upper cabinet run, I built three narrow openings for vertical pull-out tool organizers. Think of them as three small hanging tool walls stored next to one another.
Instead of reaching through a narrow front opening into a deep cavity, I’ll be able to pull each organizer out and access its broad side. That uses the cabinet depth without turning it into a tool burial ground.
Double-sided shallow shelves
Four other openings, mirrored across the layout, are planned for double-sided pull-outs with shallow shelves.
The inspiration came from John at Lincoln Street Woodworks and his “drawerbinets.” The appeal is exactly what the retrievability model describes: replace a narrow, deep opening with several exposed storage faces. In this arrangement, the idea is to roughly quadruple the visible surface area.
The remaining six cabinet openings will get more traditional doors, with additional organization features still to come. Doors are not forbidden. I just want more happening behind them than a deep shelf full of things hiding behind other things.
The mounting-height mistake
Once the boxes were on the wall, I discovered a limitation that no surface-area formula was going to fix: some of this storage is really high.
I’m six feet tall, and I can barely reach the tops of the main uppers. The small center cabinets are worse. I raised those to make room for the miter saw, and I may have gotten a little carried away.
Those openings will need to hold things I rarely use. It is a useful reminder that storage is only convenient if you can physically reach it. A cabinet can look great in a layout and still be awkward in daily use.
Build the Miter Saw Station Around Dust Collection
The center opening between the lower cabinet banks is for a mobile miter saw cart. Its design starts with the dust extractor, because controlling miter saw dust is an obsession I have apparently decided to make everyone else’s problem.
I chose a 14-gallon Bosch dust extractor and designed the cart around its size.
The intended layout was simple:
- The saw’s work surface aligns with the countertops on either side.
- Leveling casters allow precise height adjustment while preserving mobility.
- The extractor sits inside the cart, eventually concealed behind a door.
- A small offcut bin fits beside it, at least in theory.
Why use a dust extractor?
For this miter saw setup, the two characteristics I prioritized were suction pressure and container capacity.
Sealed pressure, often discussed as static pressure, is commonly expressed in inches of water column. It describes suction in terms of how high a pressure difference can support a column of water.
That is different from airflow, measured in CFM. Large tools such as table saws generally lead us to think about moving a lot of air. With the smaller dust passages and chute on this miter saw, I’m prioritizing the pulling power of an extractor rather than choosing a collector purely for a high airflow number.
The second priority is less technical: a larger container means emptying it less often. Less emptying, more building. I can support that.
Why make the cart mobile?
I have an upcoming backyard deck project, and I like the option of rolling the saw outside rather than bringing all that treated lumber cutting into the shop.
Will the cart actually move after I park it between the cabinet banks? Maybe not. I am entirely comfortable admitting that possibility. But having the option still matters to me.
The cart follows the same visual approach as the upper cabinets: light birch edges and gray laminate on exposed surfaces, with a black top to fit the rest of the station.
Test the Basic Build Before Adding Every Feature
One habit I’m trying to improve is using shop furniture before I finish every last detail.
At this stage, the miter saw cart has no door and is missing several planned features. That is intentional. I wanted to test whether it fit the opening, whether the extractor fit inside, and whether the complete arrangement actually worked.
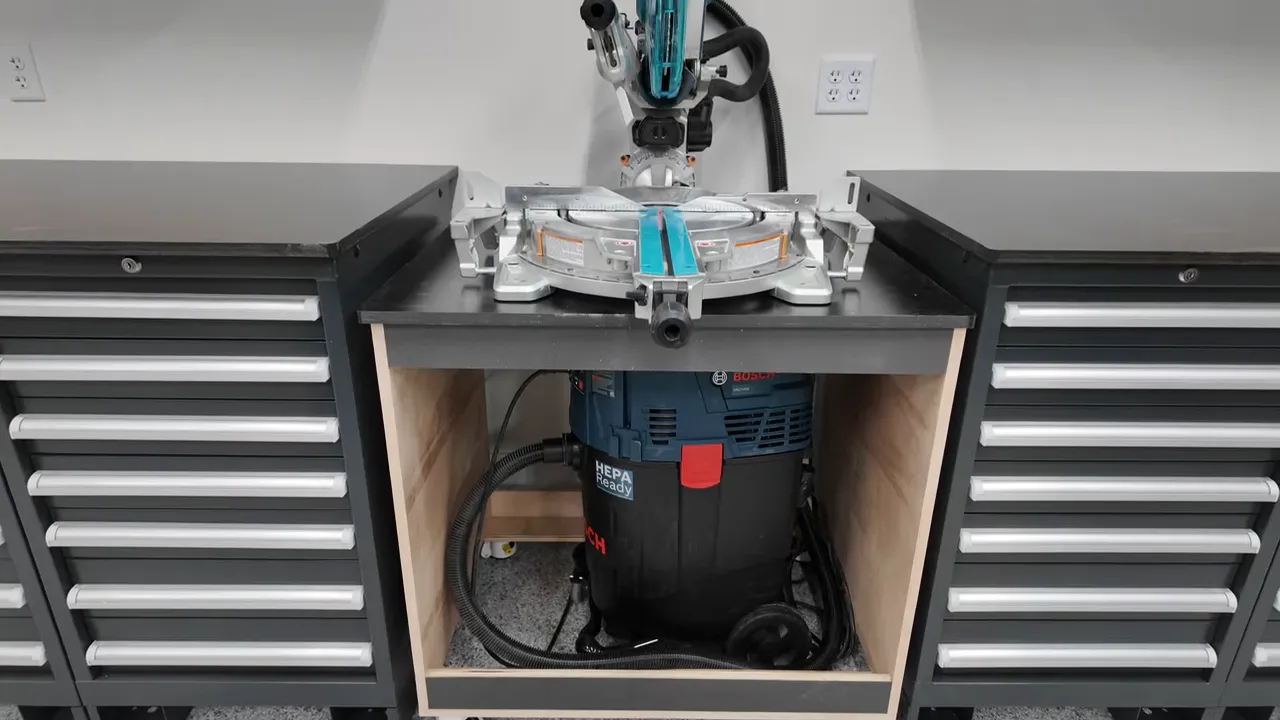
The cart fit. The extractor fit, although getting the tall unit inside required an awkward tilt. The offcut bin did not make the cut.
Once the hose, power cord, and extractor were all in place, the remaining space was too crowded. It worked on paper, but not well enough in practice. Better to find that out now than after building a lovely little bin that nobody can use.
A small leak made a big difference
I also initially thought the extractor’s suction was disappointing. Then I discovered that removing its rear handle had exposed a small hose that the original plastic assembly had sealed.
Once I restored that seal, the performance improved dramatically.
That is a good troubleshooting lesson: before deciding a vacuum is underpowered, check for unintended air leaks, especially after changing or removing parts.
Paired with our Makita miter saw dust chute, the extractor makes a substantial difference. It does not eliminate every speck of sawdust, but it cuts down the mess considerably. We offer chutes for specific saw models, so compatibility matters.
|
A Better Foundation for Shop Organization
The cabinet wall is now at a useful stopping point: the steel drawer cabinets are placed, the black countertops are installed, the upper boxes are mounted, and the miter saw has a functional home.
I have also installed the drawer slides in the upper openings that will receive pull-outs. The organizers themselves, the inset doors, and the rest of the finishing details are the next phase, not completed features of this build.
There is one other deliberate gap in the layout. The router table temporarily sitting at the left end is not staying there. That spot is reserved for a utility sink, with plumbing already roughed in behind the wall. The plan is to keep the sink below counter height so long workpieces can extend over it when using the miter saw.
Still ahead are the exposed tool wall, 3D-printed organization pieces, and custom copper labels cut on the water jet. All of it builds on the same principle: make things easier to find, easier to retrieve, and easier to put away.
Building the shop itself involved insulation, electrical work, and plenty of freezing days. Getting to the point where I can organize it feels pretty great.
The goal is not simply more cabinets. It is a shop that makes you want to get out there and build something.


