There’s something in your shop that’s been annoying you for months. A pile you’ve learned to step around. A tool with nowhere to live. A workbench that requires moving three other things before you can actually work.
Usually, the first response is to ignore it. We’re busy. We have better stuff to build.
Eventually, something snaps, and out comes the construction lumber. A few cuts, a handful of screws, and congratulations: another vaguely rectangular shop contraption.
Before you do that, put down the 2x4. Pick up a pencil instead.
The problem isn’t construction lumber. It’s building shop furniture as a reaction instead of designing it with intention. Your shop is the biggest tool you own. How you set it up can either support your creativity or quietly get in its way every time you walk through the door.
A Better Shop Is Not the Same as More Expensive Tools
Let’s get one thing straight: your skill as a maker is not determined by the quality of your shop or the price of your tools. A mountain of premium tool cases, fancy aluminum accessories, and impressive machinery will not build anything cool by itself. That part is still on you.
What matters here is intention.
I believe the infrastructure around you affects your mindset. A thoughtfully arranged workspace makes work more efficient, sure. But it can also give you more mental room to experiment, solve problems, and enjoy making things.
If the shop is constantly asking you to find something, clear something, or move something, it’s competing for the same attention you need for the project.
That’s why shop furniture deserves more consideration than “Will this hold the thing?”
The Three Jobs Every Piece of Shop Furniture Should Do
Before building a cabinet, cart, bench, or storage unit, sketch what you need. Think through what it must do, why it needs to do it, and what else it could reasonably accomplish.
My minimum requirements are pretty simple:
- Perform a specific task. Start with a clearly defined purpose, not just an empty spot that could hold a cabinet.
- Use its volume efficiently. Consider the space inside the furniture, not only the footprint it occupies.
- Make your life easier. The finished piece should remove obstacles from using your tools and doing your work.
That last one is a bigger deal than it sounds.
I understand the objection: you don’t want to spend your shop time building shop furniture. You want to make cutting boards, furniture, or whatever brought you into the shop in the first place.
We’re after the same thing. If you’re already stopping to solve a shop problem, spend a little more time making the solution genuinely pleasant to use. There’s a meaningful difference between checking a box and building something that keeps paying you back.
Designing a Laser Cutter Cart Around the Entire Job
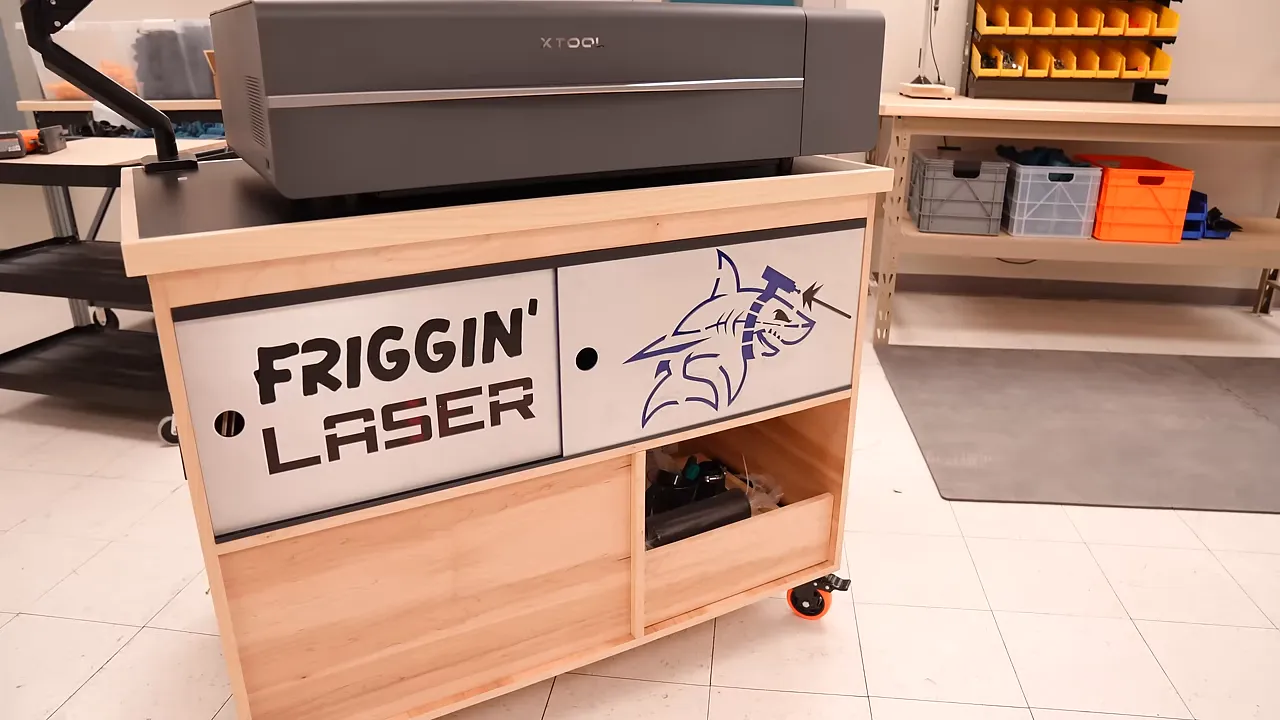
My own problem was an xTool P2 laser cutter sitting on a makeshift workbench. The setup consumed a bunch of space without being particularly organized. Those are two things I’m not a fan of.
The machine is also awkward to move alone. Having to relocate it to avoid a water leak made the case for a mobile cart pretty convincing.
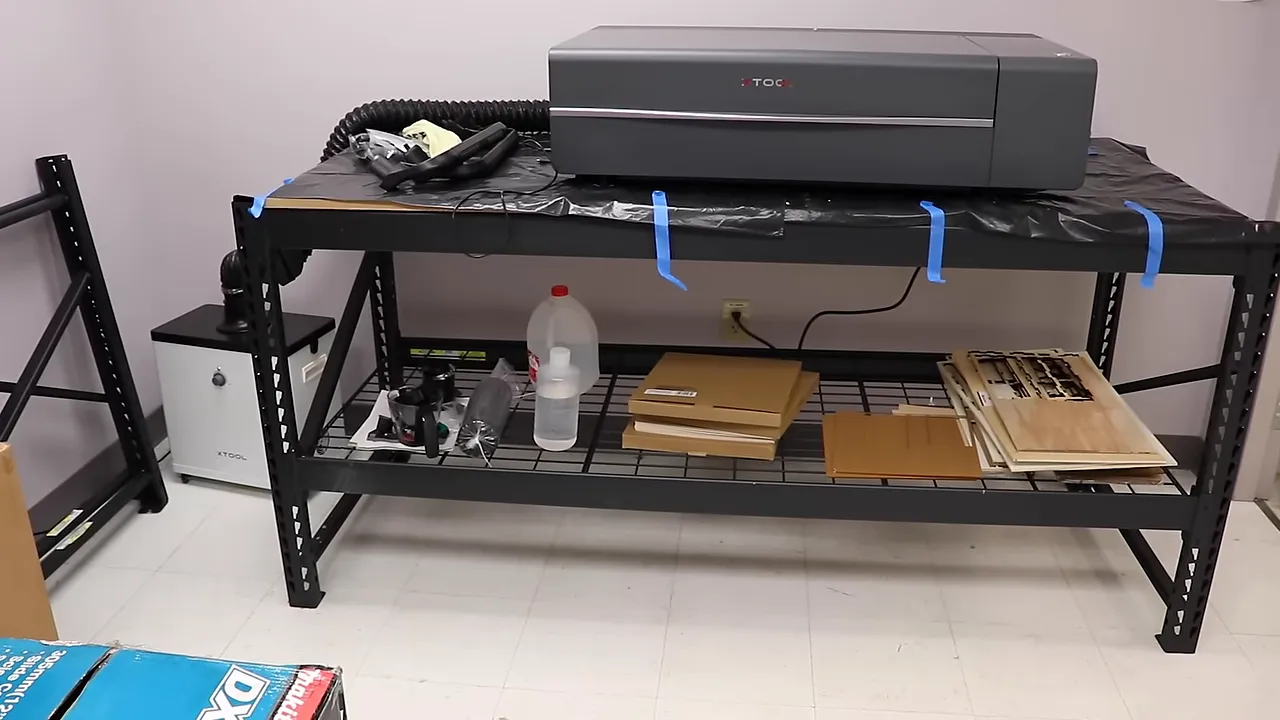
I could have built a shelf on wheels and stopped there. It would hold the laser. Technically, problem solved.
But that’s shop okayness.
To make the cart useful, I first laid out everything associated with operating the machine:
- The laser cutter itself.
- The smoke purifier and its hose.
- Laser materials in several different sizes.
- Distilled water for the laser tube.
- Antifreeze and other maintenance supplies.
- Small accessories that are useful to keep nearby.
Now the design problem wasn’t simply “support a machine.” It was “create a compact station that keeps the machine and its supporting equipment together.” That’s a much better starting point.
Decide What Needs to Be Immediately Accessible
Drew Witt at Wittworks discusses a useful distinction in tool storage: first-order and second-order retrievability.
- First-order storage: The item is out in the open, visible, and immediately accessible.
- Second-order storage: The item lives inside something, such as a cabinet or drawer.
For this laser station, I didn’t have many items that needed to remain out in the open. Most of the supplies could live inside the cabinet without making the tool harder to use.
That decision matters. Open storage isn’t automatically better, and putting everything behind a door isn’t automatically organized. The right choice depends on what you need to reach and how you actually work.
Build the Structure Around the Space You Need
I approached the cart more like a cabinet than a lumber-framed stand. That let me preserve interior space and divide it around the features I had planned.
The cabinet received shelves and partitions, with casters underneath so the whole station could move. Instead of letting the structure dictate whatever storage happened to remain, the storage requirements helped shape the structure.
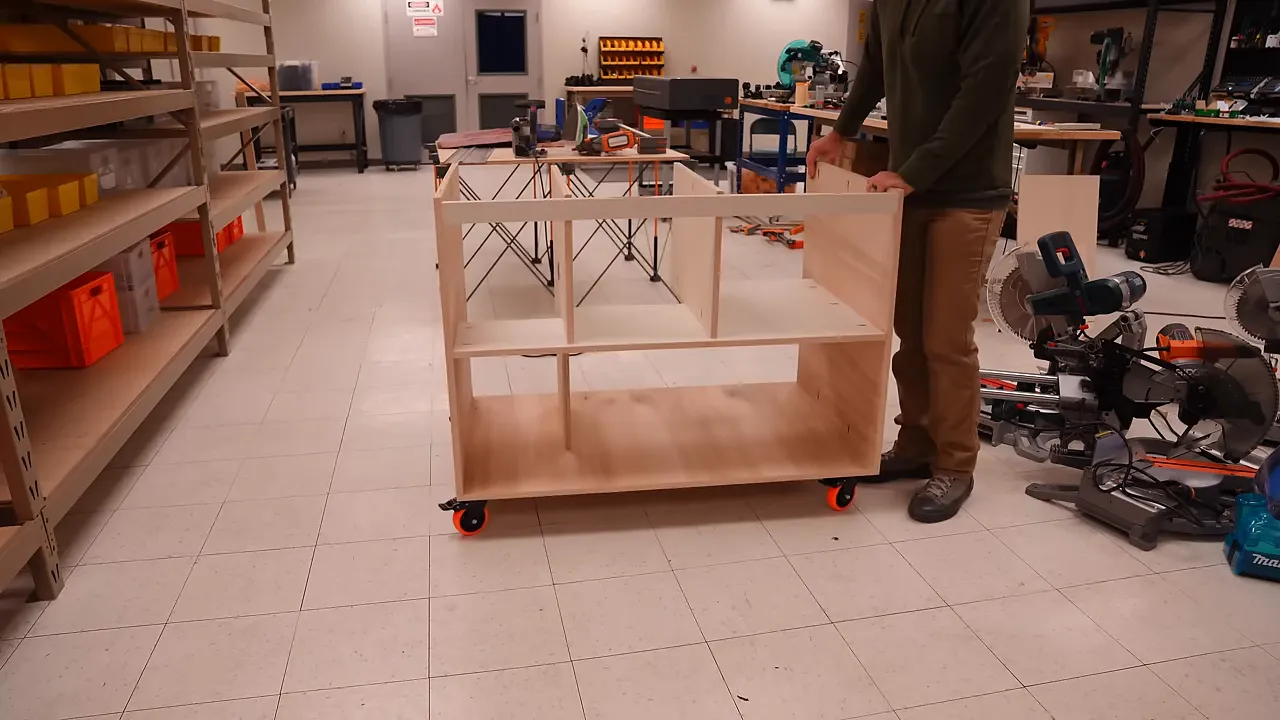
This project also came with a practical challenge: I built part of it in my home shop and part in the commercial space where it would eventually live. The commercial space didn’t have the same tool capabilities, so I had to adapt my approach, including using a portable work support and track saw.
That’s another reason to have a plan. You can think through not only what you’re building, but also how you’ll build it with the equipment available.
Building organically can be fun. It can also produce a steady stream of frustrations and compromises that become permanent features of the finished piece. A little planning makes the actual building smoother and more enjoyable.
And if that planning leads you right back to construction lumber? Great. Use it. A 2x4 chosen intentionally is not the problem.
Stop Treating Appearance Like a Wasted Effort
Most people get to the appearance of shop furniture and skip right over it. It’s going in the shop. Why bother?
Because you’re passing up two pretty good opportunities.
Shop Furniture Is a Low-Pressure Place to Practice
Want to get better at applying finish? Try a new coating? Dial in your paint sprayer? Here’s your chance.
A shop cabinet gives you a real project to practice on without the same consequences as experimenting on a customer’s piece or a gift. It still needs care, but a less-than-perfect result becomes a lesson rather than a crisis.
I also wanted this cart to be an excuse to try details I wouldn’t normally use. Even if an experiment didn’t work out, I’d learn something. That’s a perfectly worthwhile outcome for a shop project.
You Have to Spend Time in This Space
A nice-looking piece of shop furniture can make you proud of your workspace. For me, that pride translates into energy. I want to be in the shop, and I want to use the things I’ve built.
Does a clear finish make a cabinet hold tools better? No. Are extra design details necessary for basic utility? Also no.
But for a lot of us, the shop is more than a utility room. It’s an outlet, a stress reliever, even a sanctuary. There’s nothing silly about making it a place you enjoy.
Convenience Helps Protect Your Creative Flow
Making your life easier isn’t just about saving a few seconds.
When a tool is convenient to use, you can transition into using it without interrupting your train of thought. When it isn’t, the shop starts handing you little side quests.
Find the accessory. Move the stack. Clear the surface. Shuffle the machines.
So much for being in the zone.
I think one of the most useful things you can do for creative flow is build an environment that makes the work feel frictionless. That means considering both how the shop functions and how it feels to spend time there.
Sanding is a good example. It’s not exactly everybody’s favorite activity. In my setup, pairing a 3M sander with Xtract mesh abrasives and a dual-HEPA-filter dust extractor makes sanding faster and cuts the cleanup dramatically. The task still exists, but the parts I used to dread don’t have to dominate it.
The same thinking applies to the laser cart. Keeping the purifier, materials, and accessories with the machine means fewer interruptions between having an idea and doing something with it.
I’m not arguing that you should overbuild everything. I’m arguing that underbuilding your shop infrastructure has a cost, too. The time saved today can turn into repeated inconvenience for years.
The Details That Made This Cart Worth Building
Once the basic cabinet was together, it was time to put the idea into practice. Some choices were practical. Others were a little ridiculous. That was part of the fun.
A Black Melamine Top
My first thought was a checkerboard-style MDF glue-up. Instead, I chose black melamine for the top.
It gave me the more durable surface I wanted compared with leaving plywood or MDF bare, and it looked great against the wood cabinet. Most of it would be covered by the laser anyway. Occasionally, practicality wins.
Clear-Finished Maple Plywood
I normally paint shop furniture to match the rest of my setup. This time, I used maple plywood that was expensive enough to make me wince, but too good-looking to cover up.
A clear finish let the wood show and gave me another chance to do something outside my usual routine.
Thin Material Dividers and a Pullout Tray
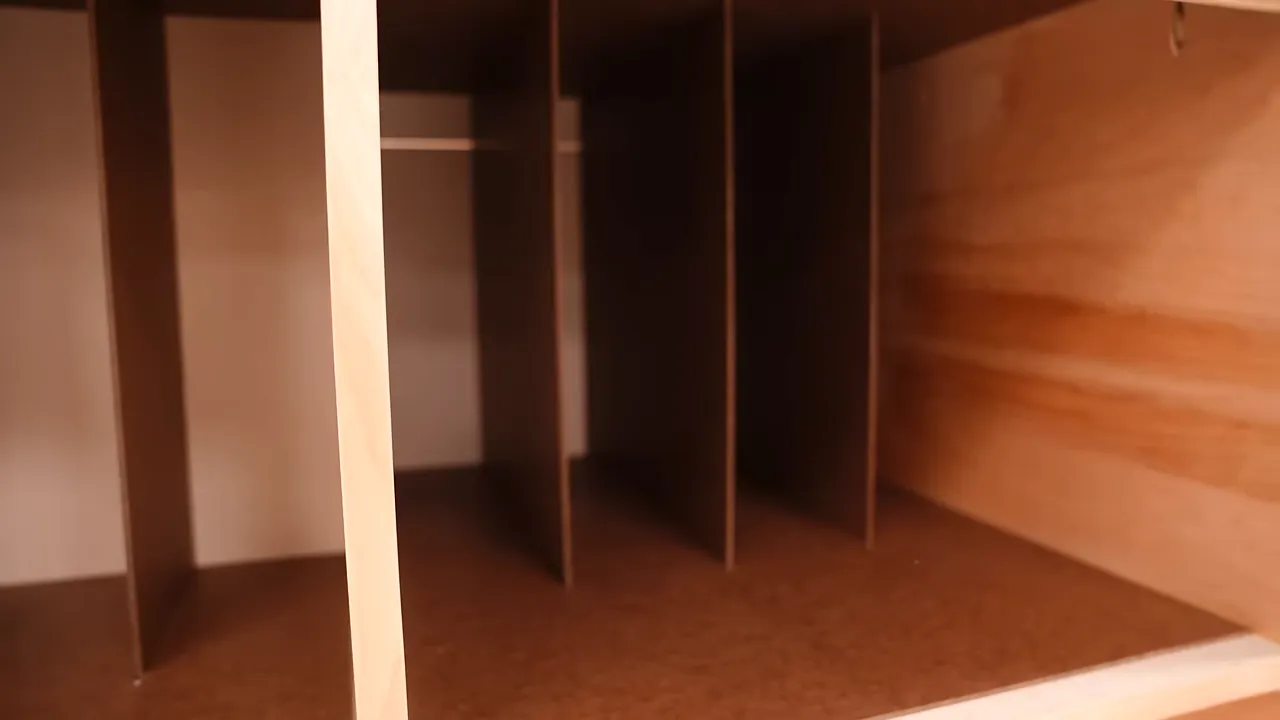
The material storage areas received simple dividers made from 1/8-inch hardboard. They organize sheet materials without using much of the cabinet’s interior volume or adding a lot of work.
A lower pullout tray on drawer slides provides another accessible storage area, while the smoke purifier fits into its own compartment.
Custom Aluminum and Acrylic Doors
Plain doors would have worked fine. Naturally, I went another direction.
I designed aluminum doors with laser-cut graphics and acrylic backing in Autodesk Fusion, then had SendCutSend cut the parts. The finished doors give the cart a personality that standard panels simply wouldn’t.
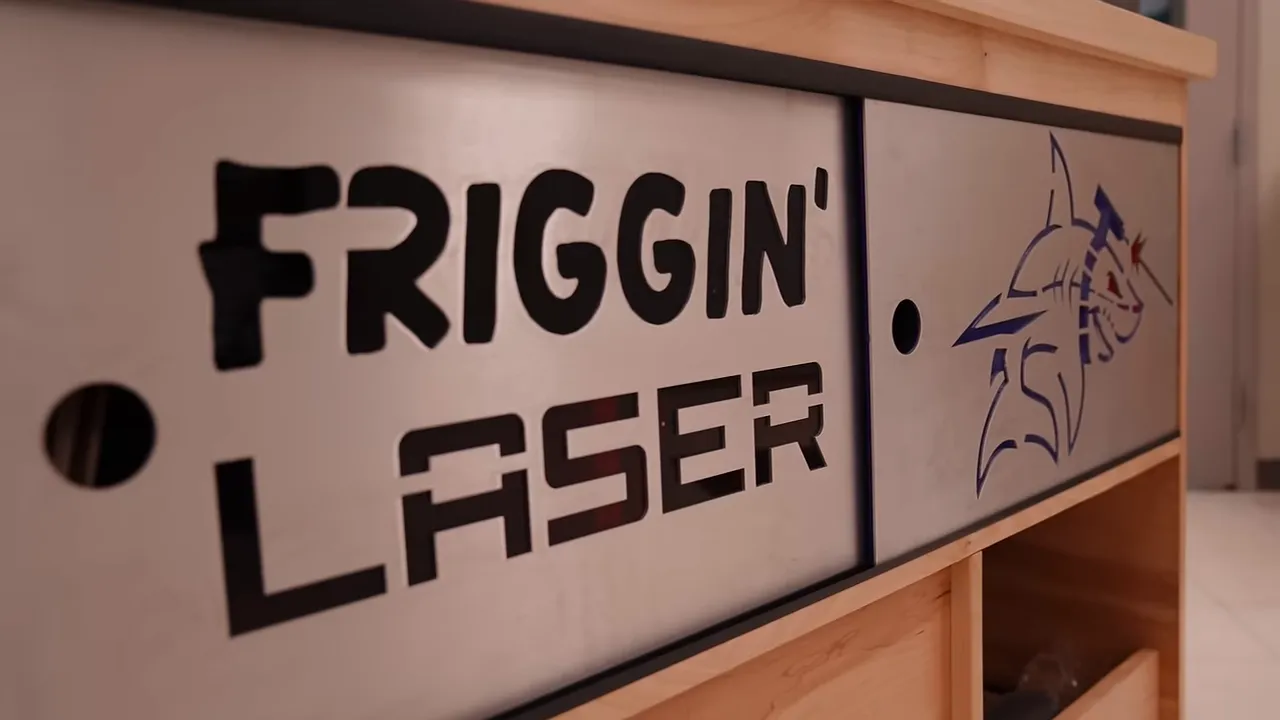
That’s a useful option to remember: a project can include custom fabricated details even when your own shop doesn’t have the equipment to make those parts.
3D-Printed Finishing Touches
Of course there were going to be 3D-printed accessories. This is still my shop.
The printed details included a round side fitting and a fitted guide around the hose where it passes the edge of the top. They helped tie the machine, hose routing, and cabinet together.
Necessary? Not every detail. Cool? Absolutely.
Shop Greatness Is a Pursuit, Not a Finished Room
With the cart complete, I finally had a good spot nearby for a giant acrylic Shop Greatness sign made by Bad Dog Signs. The back wall put it in plain sight across the building.
That phrase has been my mantra for years. To me, shop greatness means continuously improving the space where you create.
It isn’t a destination. I’m not going to finish every improvement, step back, and declare the shop permanently done. Neither are you.
The useful questions are smaller:
- What could I improve to make creating more enjoyable?
- What keeps interrupting my work?
- How could this space help me feel clear-headed and energized?
Start there. Sketch the solution. Give it a purpose. Use the space well. Make it easier to do the thing you love.
And then, if the answer is still a 2x4, go get the 2x4.
A Convenient Lunch for Busy Shop Days
Factor sponsored this project, and it fits the same idea of removing unnecessary friction from a busy day. I use its fresh, never-frozen prepared meals for lunch. They stay in the fridge and heat in the microwave in about two minutes.
The service offers weekly meal choices, preferences such as keto, vegan, Calorie Smart, and Protein Plus, and extras like protein shakes. Orders can be adjusted, and weeks can be skipped when you’re away or need a break.
The promotion shared with this project offers 50% off a first Factor box with code SHOPNATION50.


