A shop can have a ridiculous number of drawers and still be a disaster zone. Ask me how I know.
My new cabinet setup gave me 37 drawers, a little over 30 square feet of potential tool wall, upper cabinets, and a miter saw cart that still needed some attention. That was a great foundation, but empty cabinets do not magically organize a shop. You have to be intentional about what goes where and, more importantly, how you get it back out.
The goal wasn't just to hide the mess. It was to build a workspace that makes tools easy to find, easy to grab, and easy to put away. Getting there involved pull-out cabinet inserts, carefully fitted doors, a plywood tool wall, a quick-release cart dock, and a healthy serving of mistakes. Apparently, those come standard.
Key Takeaways
- Prioritize visible, reachable storage rather than simply maximizing how much fits inside a cabinet.
- Organize tools around common tasks and give frequently used items the easiest access.
- Use temporary labels and flexible organizers while you refine your shop layout.
- Leave space for future tools and account for the clearance needed to remove them.
Table of Contents
- Building Upper Cabinet Storage You Can Actually Use
- Fitting Inset Cabinet Doors Without Losing Your Mind
- A Birch Plywood Backdrop That Does More Than Look Good
- Making a Mobile Miter Saw Cart Feel Built In
- 11 Shop Organization Ideas That Make the Storage Work
- Build a Shop That Helps You Make Things
- Project Sponsor: Thrive Market
Building Upper Cabinet Storage You Can Actually Use
Traditional upper cabinets are great at holding a lot of stuff. They're not always great at letting you find it. Everything in the front row is visible, while whatever lands behind it might as well have entered another dimension.
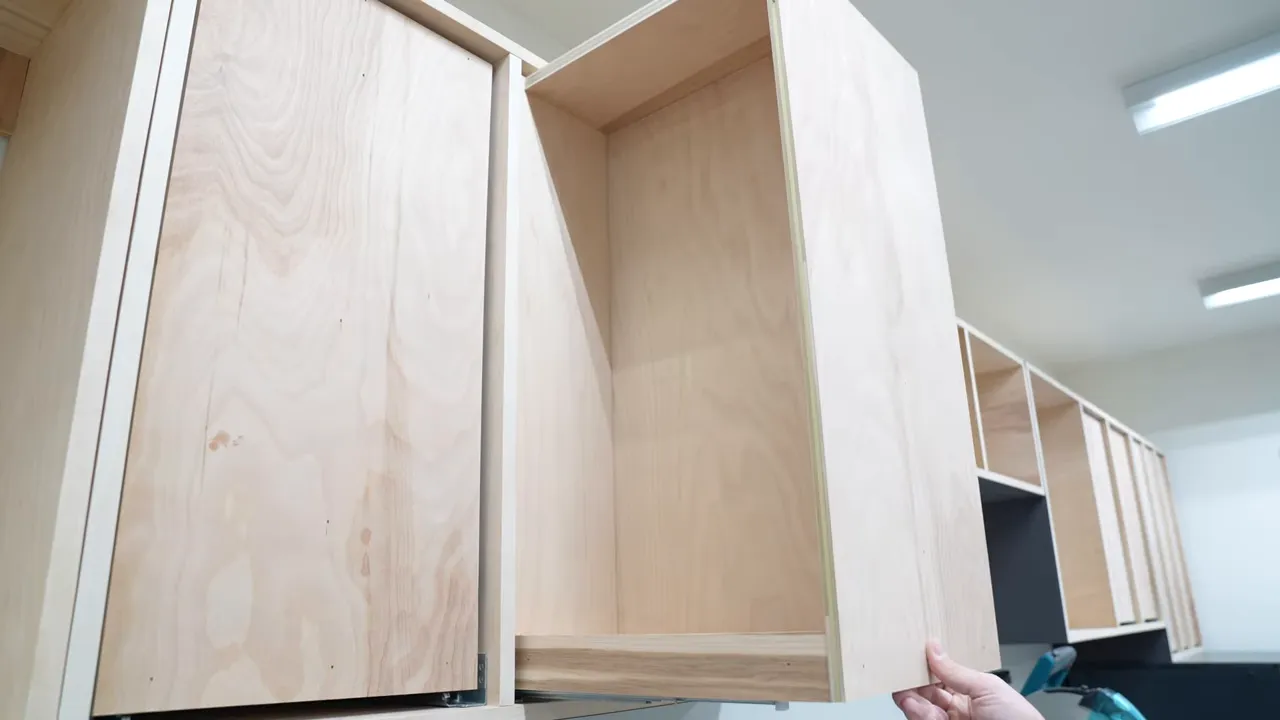
To fix that, I built seven pull-out inserts: four larger storage inserts and three tall, shallow tool-wall-style pull-outs above the tall toolbox.
Trade deep storage for accessible surface area
For the four larger inserts, I divided the interior down the center. That created two shallow storage pockets, accessible from opposite sides when the insert is pulled out.
I call the thinking behind this the retrievability index. It's my way of describing how much accessible surface area you get from a given storage volume. This isn't about cramming the maximum amount of stuff into a box. It's about being able to see and retrieve what you put there.
Test the fit before committing to a batch
This was my first time using undermount drawer slides, so I made a small test drawer before breaking down all the plywood. Sensible, right?
Then I somehow made the actual inserts half an inch too big.
After correcting one insert and confirming that it fit, I repeated the adjustment on the other six. The useful lesson isn't that a test piece is pointless. It's that you still need to verify the dimensions of the actual assembly before batch-building everything else.
If you finish a project with a pile of thin strips beside the table saw, you either made some excellent shims or had a measuring problem. Mine were not intentional shims.
Not every insert improves a cabinet
I also tried making the end insert accessible from only one side because the nearby wall seemed like it would make two-sided access awkward.
That was a worse use of the space than leaving the cabinet alone.
The one-sided insert reduced the usable opening and the storage depth, then made me reach into it from an awkward angle. I had added complexity while making access worse. Impressive, but not in the way I wanted.
I rebuilt it to match the other two-sided inserts. Just because you can add a pull-out doesn't mean you should. Evaluate the actual opening, reach, and usable storage space, not just whether the mechanism looks clever.
Tall pull-outs may need extra stabilization
The four larger inserts were surprisingly solid on the bottom-mounted slides. The taller, narrower pull-outs had more side-to-side movement.
My proposed fix was a runner down the center to help keep each pull-out centered as it moves. If you're building something similarly tall, plan for the possibility that the slides alone won't provide all the lateral stability you want.
Fitting Inset Cabinet Doors Without Losing Your Mind
I wanted inset door fronts with a consistent reveal, which is a pretty unforgiving way to discover that your cabinet openings aren't perfectly square.
Initially, some openings looked terrible when checked with a square. Closer measurements revealed that slightly bowed vertical dividers were contributing to those readings. The cabinets weren't quite as bad as I thought, but each door still needed individual fitting.
A perfectly square door doesn't automatically produce an even gap inside an imperfect opening. I worked each front to suit its particular cabinet rather than assuming one set of dimensions would work everywhere.
Laminate placement is not the time to wing it
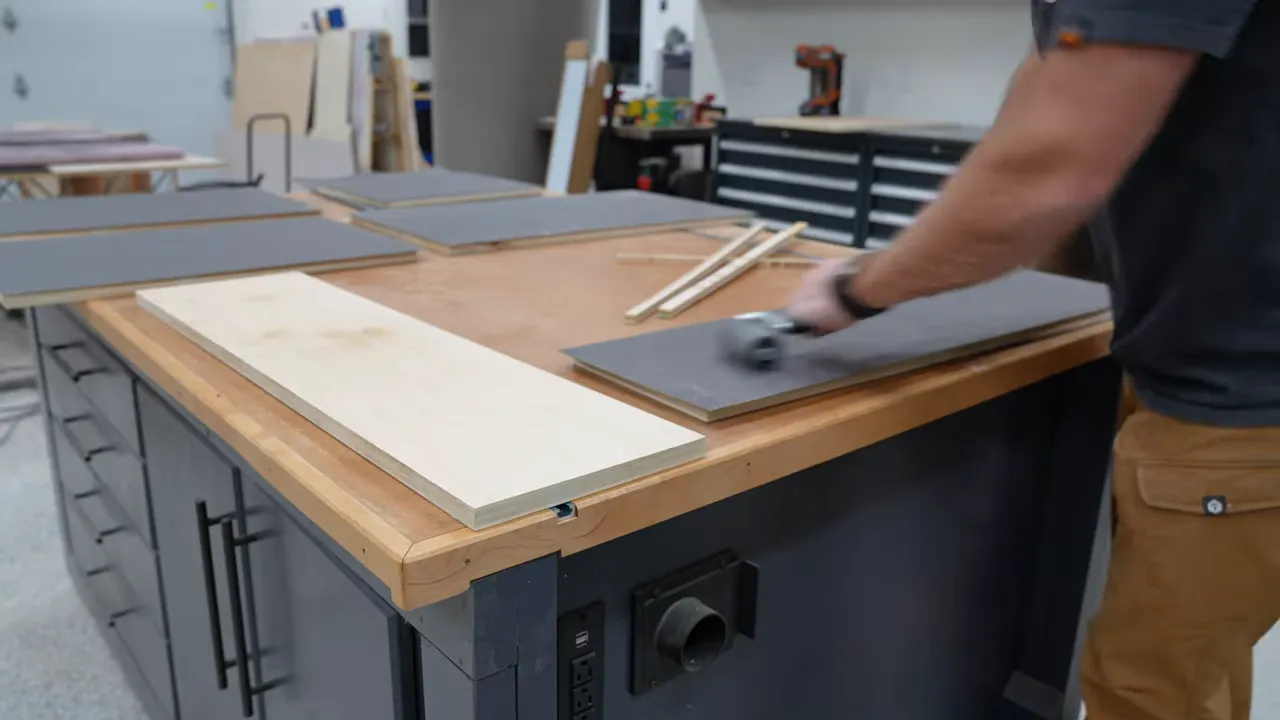
Once the fronts fit, I covered them in the same gray Formica used elsewhere in the cabinet setup. I tried spray adhesive this time and found it much nicer to work with.
Unfortunately, enjoying the process made me a little too confident. I placed one sheet badly and learned just how unwilling those tacky adhesive-coated surfaces are to separate once they touch.
For the remaining fronts, I used spacers to hold the laminate above the substrate while positioning it, then progressively brought the surfaces together. After rolling the laminate down, a flush-trim bit cleaned up the edges.
Use the alignment method that actually works
Attaching the inset fronts to the pull-outs took more head-scratching than I'd like to admit. I first tried stacks of playing cards to establish equal spacing, followed by double-sided tape to hold each front in place.
I couldn't consistently maintain the roughly 1/16-inch reveal I wanted.
What finally worked was less fancy: measure the required spacing, transfer it to the back of the front, align the insert to those marks, and drive a couple of screws. Most needed a few attempts, but the results were good.
Then came the hardware lesson. On one door, I thought I'd installed the handle in the wrong place. I drilled new holes and moved it, only to realize that the handle had been right the first time. The hinges were on the wrong side.
So now that door has bonus holes. Before modifying a finished front, check the entire assembly and its orientation, not just the part that looks wrong.
None of this means you shouldn't build cabinets. My first cabinet was junk, and the next one was better. Trying, failing, and trying again is how intimidating projects become things you can actually do.
A Birch Plywood Backdrop That Does More Than Look Good
The wall behind the miter station could have stayed plain white. Instead, I faced it with half-inch birch plywood to match the exposed wood around the cabinet edges and contrast with the gray surfaces.
The bigger benefit was functional: a continuous wood mounting surface for the small tools and accessories that would eventually live there.
I measured around the electrical outlets and airline, predrilled the stud locations, and fastened the panels to the wall. Black screws added a little contrast against the birch veneer.
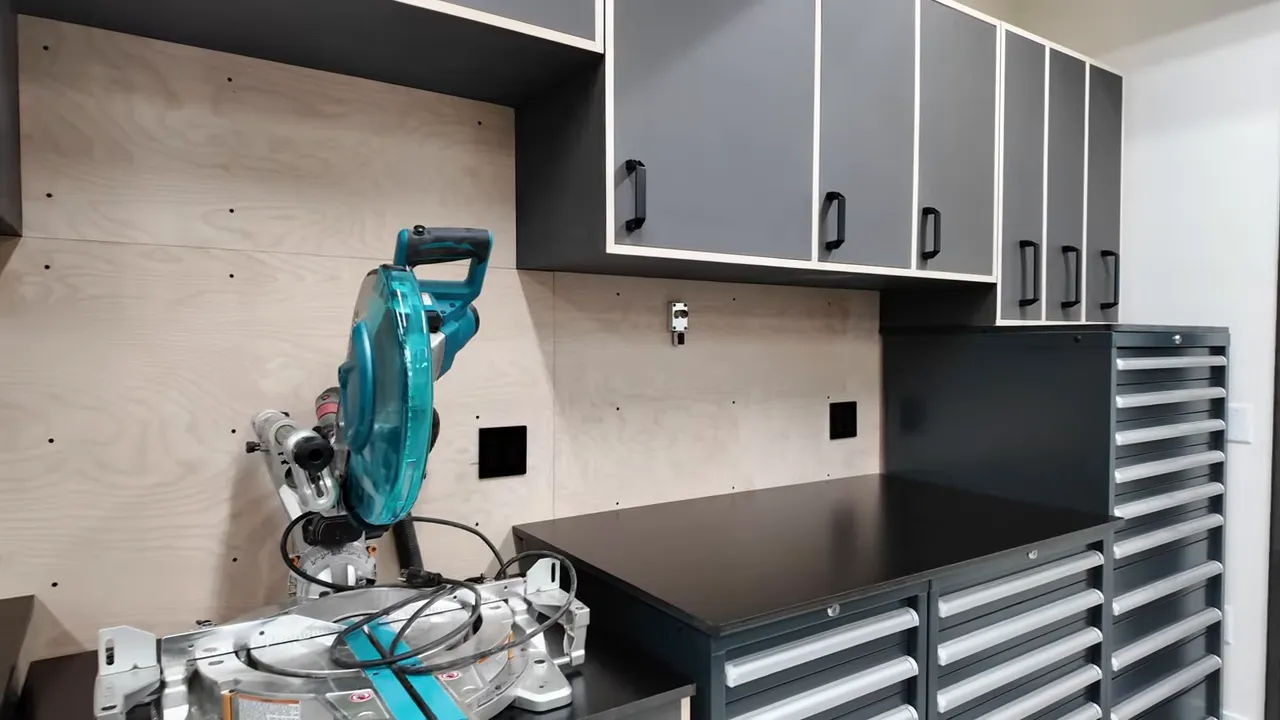
The finished combination briefly made me think of Chipotle. Apparently, my shop now comes with the visual suggestion of guacamole.
Still, it did exactly what I wanted. The birch broke up the gray and black, and it created a flexible mounting surface without requiring a new drywall anchor for every little holder. I chose half-inch plywood for the odds and ends planned here, not for hanging jackhammers.
Making a Mobile Miter Saw Cart Feel Built In
The miter saw cart needed to do two seemingly opposite things: roll away when necessary and feel rigid when parked between the cabinets.
First, I secured the heavy Formica Compact top to the cart. Its weight kept it from moving easily, but weight alone wasn't a good enough reason to leave it unattached on a mobile cabinet.
Then I built a simple wall dock.
- Position the cart. Set it in its parked location between the surrounding cabinets.
- Adjust the height. Use the leveling feet on the casters to bring the saw's working surface into alignment with the adjacent support surfaces.
- Fit the docking pieces. Locate the parts so the cart returns to the same position.
- Drill matching pilot holes. Establish the connection points through the cart-side and wall-side components.
- Add threaded nuts behind the wall piece. Reinstall that piece using the same mounting holes to preserve its position.
- Enlarge the cart-side holes. Allow the male threaded knobs to pass through and engage the nuts.
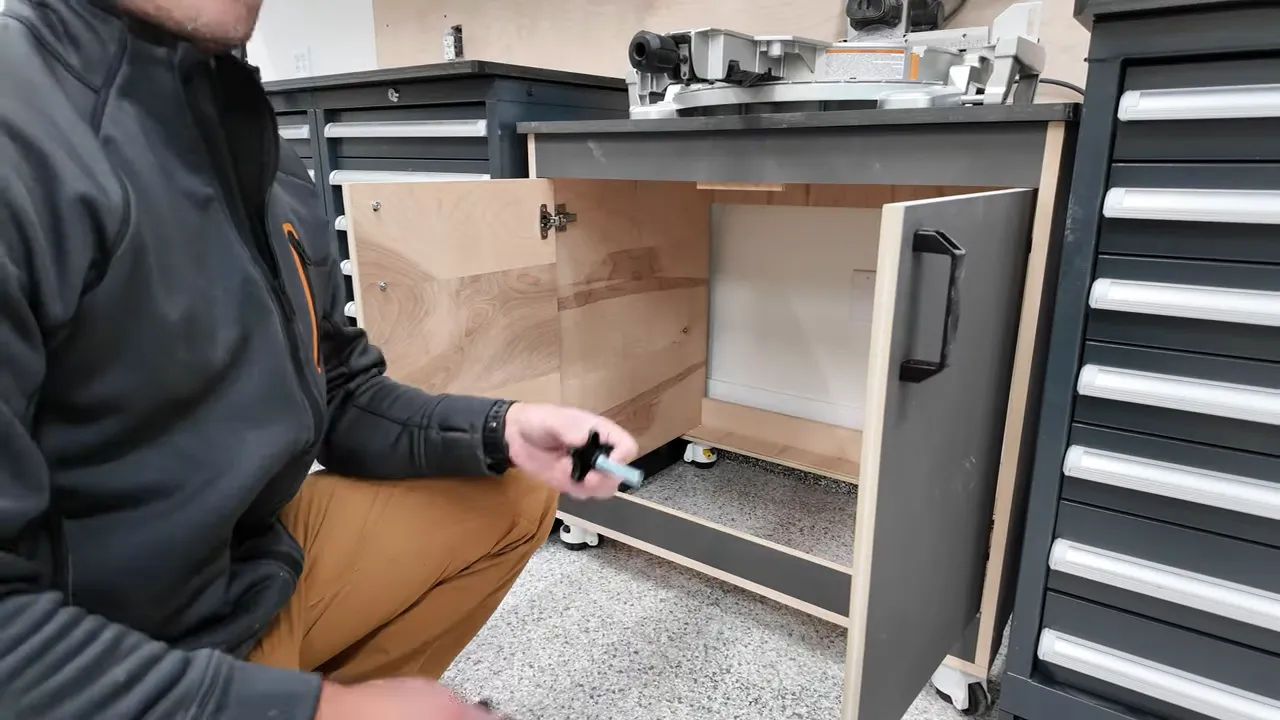
With the cart located in the dock and both knobs tightened, the whole setup felt super solid. Unscrew the knobs when it's time to move it. That was exactly the combination I wanted: mobile when necessary, rigid when parked.
11 Shop Organization Ideas That Make the Storage Work
Once the cabinets and cart were ready, the real work began: deciding where everything should live. These are the rules I used, and they apply just as well to an existing garage shop as a brand-new cabinet installation.
1. Take bite-size chunks
Organizing an entire shop can feel overwhelming, especially when every work surface is already covered.
Start with a manageable portion rather than trying to fix the whole place in one sitting. A small win builds momentum. Trying to do everything at once is a great way to burn out halfway through and end up with more piles than you started with.
2. Gather, separate, and assign
My basic process has three steps:
- Gather: Bring related tools and accessories into one visible area.
- Separate: Sort them into useful groups and consolidate unnecessary duplicates where it makes sense.
- Assign: Give each group a specific home.
The gathering stage can take longer than expected. Drilling accessories, for example, have a remarkable ability to migrate into every nook and cranny of a shop.
But getting everything out in the open matters. You can finally see what you own before deciding how much space it needs.
3. Give your most-used tools the best drawers
Not all drawers are equally convenient. Top drawers are prime real estate because they're easy to reach. Lower drawers take more effort to access.
Put frequently used items such as pencils and layout tools near the top. Reserve lower drawers for larger items or less frequent tasks, such as hole saws if you only reach for them occasionally.
This doesn't have to be perfect on the first pass. Make a realistic guess based on your habits, then adjust.
4. Label early, then make it pretty
I can forget what's in a drawer almost immediately after closing it. Multiply that by several dozen drawers and labels become pretty appealing.
Start with painter's tape. It's quick, inexpensive, and easy to change while you're figuring out the arrangement. Temporary labels also save time during the organizing process itself.
Once the layout settles down, upgrade if you want. I used multicolor 3D printed labels for a more finished look. These toolbox label files are one option for doing something similar.
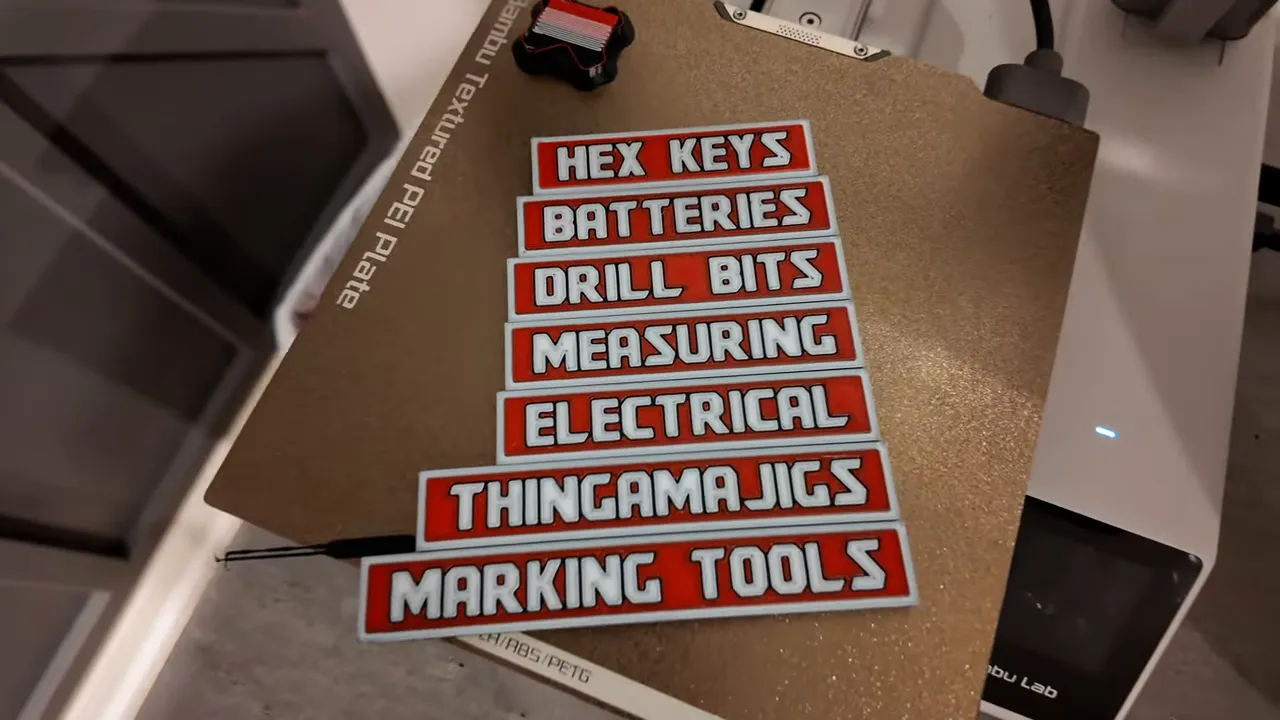
Fancy labels are optional. Knowing which drawer to open is the important part.
5. Think tasks, not just tools
This is probably the biggest improvement you can make to a shop storage layout: organize around the work you're doing, not just the category a tool belongs to.
Some drawers will naturally hold similar tools. A drill-bit drawer makes sense because that's where I'll go when I need to drill a smallish hole.
Other drawers benefit from a task-based mix:
- Cabinet building: Jigs, related supplies, and playing cards for reveal spacing.
- Driving screws: Driver bits, countersinks, and right-angle adapters.
- Marking and measuring: Pencils alongside the measuring tools used with them.
The goal is to avoid opening three different drawers to complete one ordinary task. Store the things you use together, together.
6. Add drawer organization that matches your commitment level
Putting related tools in one drawer is a good start. Keeping them from becoming a rolling pile is the next step.
You don't need the most elaborate system available. There are several useful options:
- Repurposed plastic bins: A simple way to divide a drawer into smaller zones.
- Off-the-shelf foam organizers: Not necessarily custom-fit, but helpful for keeping tools separated and in place.
- Sliding upper trays: A multi-level arrangement that reveals the lower layer when the top tray moves aside.
- Kaizen foam: A more committed, tool-specific layout, best reserved for tools unlikely to change soon.
- Gridfinity: A modular 3D printed organization system with a huge range of available designs.
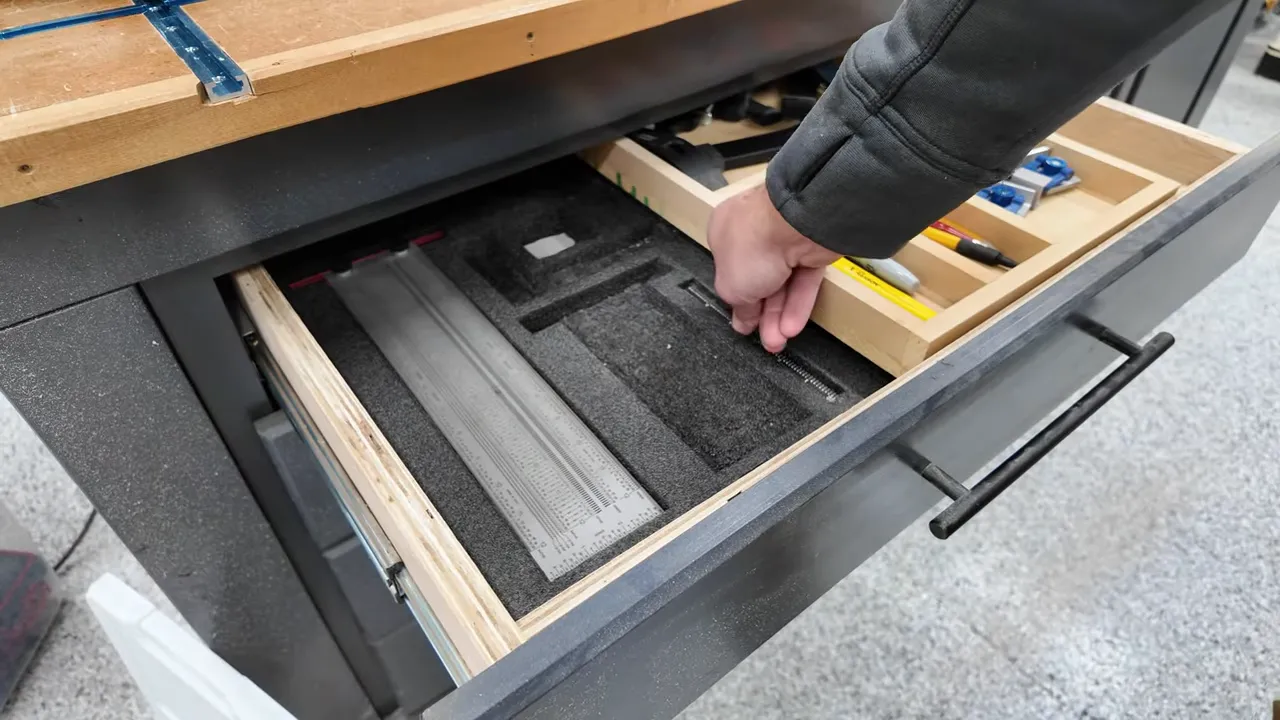
Foam can look fantastic, especially in contrasting colors, but it's less flexible once you've cut tool-shaped pockets into it. Modular bins are a better fit while your layout is still changing.
And fair warning: Gridfinity can become a project all by itself. There's a lot you can do with it. Try to remember that the goal is organizing the shop, not postponing every other project until every last bit has a custom bin.
7. Make upper cabinets shallower in practice
You don't have to rebuild your upper cabinets with pull-outs to improve them. The basic goal is to create more visible, reachable storage surface within the existing volume.
Door-mounted shelves borrow some interior space when the door closes, then bring their contents out into the open when it swings out. I used that approach for spray paint in my previous shop.
Tiered storage and custom shelves can also keep supplies visible instead of stacking everything behind the front row.
For the new pull-outs, I'm applying the task-based approach again. Nailers and staplers go along the bottom where they're easy to grab, with their fasteners stored in thin bins above. Drills and drivers get a similar arrangement, although I haven't decided what belongs above them yet.
The three tall pull-outs are candidates for small quick clamps and larger layout tools. Those assignments are still evolving, but the shallow access makes otherwise awkward space above the tall toolbox much more useful.
8. Keep the tool wall selective
Hot take: I've never been a huge believer in tool walls.
They can get cluttered, and exposed tools collect dirt. But I've come around to the idea that they work very well for the items you reach for constantly.
My wall focuses on frequently used layout tools, screwdrivers, and other everyday essentials. The birch plywood makes attaching holders straightforward, and I prefer its clean, flat appearance behind the miter station. French cleats are another good option if that approach suits your setup.
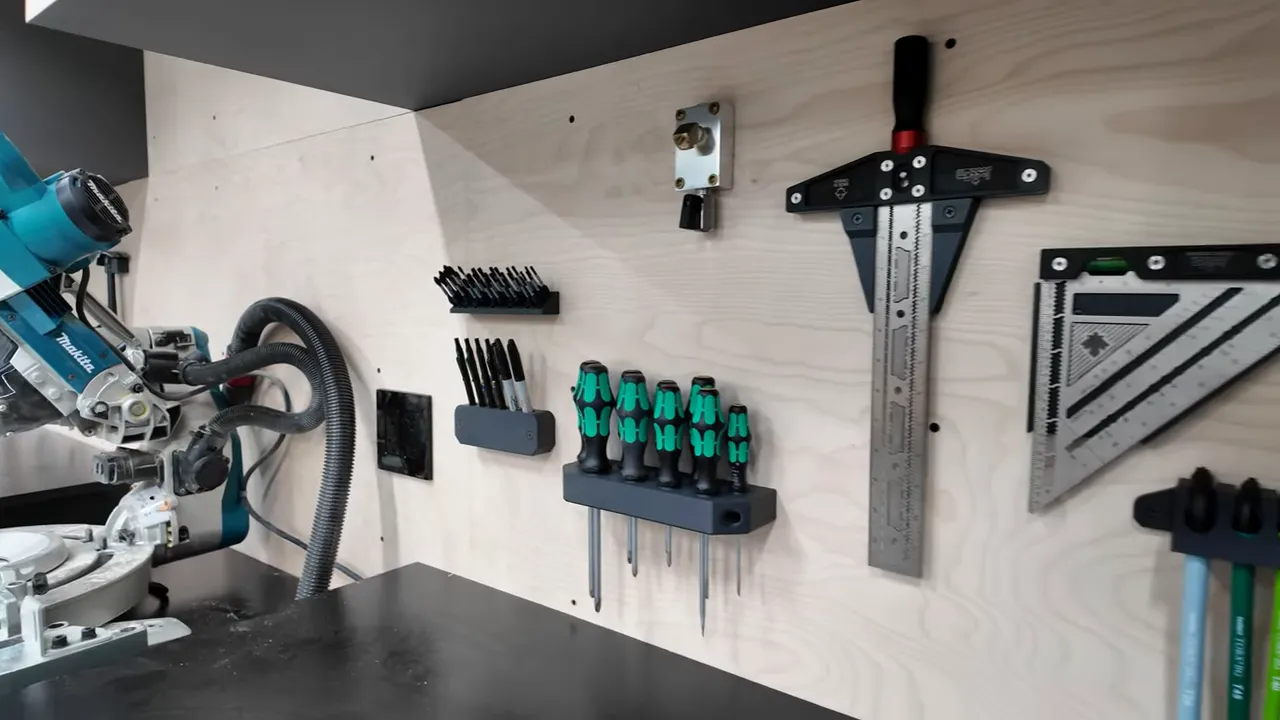
One detail matters more than making everything look evenly spaced: leave room for the motion required to remove each tool.
A screwdriver sitting in a hole needs clearance above it so it can lift straight out. A layout square that pulls directly away from the wall doesn't need the same overhead space. Plan around retrieval, not just the outline of the tool while it's stored.
9. Use 3D printing where it helps
A 3D printer is one of my favorite tools for shop organization. Between modular drawer systems, labels, and custom tool holders, there are seemingly endless useful things to make.
You also don't need to know how to model parts. Plenty of designs are available to download for free. If you do enjoy designing, you can tailor a holder to your exact tool and mounting location.
I printed custom holders because I like their consistent appearance and the ability to customize them. Scraps of wood can accomplish the same basic job. Don't let the lack of a printer stop you from getting organized.
If you're curious about the process, this 3D printing introduction for woodworkers is a useful starting resource.
10. Leave room for growth
Those open spots on the tool wall are intentional. So is the unused space in some drawers.
Don't pack every available inch just because you can. You'll probably add another tool, change how you group things, or realize that a particular arrangement isn't working.
Empty space gives your organization system room to adapt. That's a feature, not unfinished work.
11. Go the extra mile on one finishing detail
The bonus step is to add something that makes the whole setup feel finished.
For this project, lighting was part of that final push. Under-cabinet illumination brings the birch tool wall and work area together, turning a useful storage installation into a place I actually want to spend time.
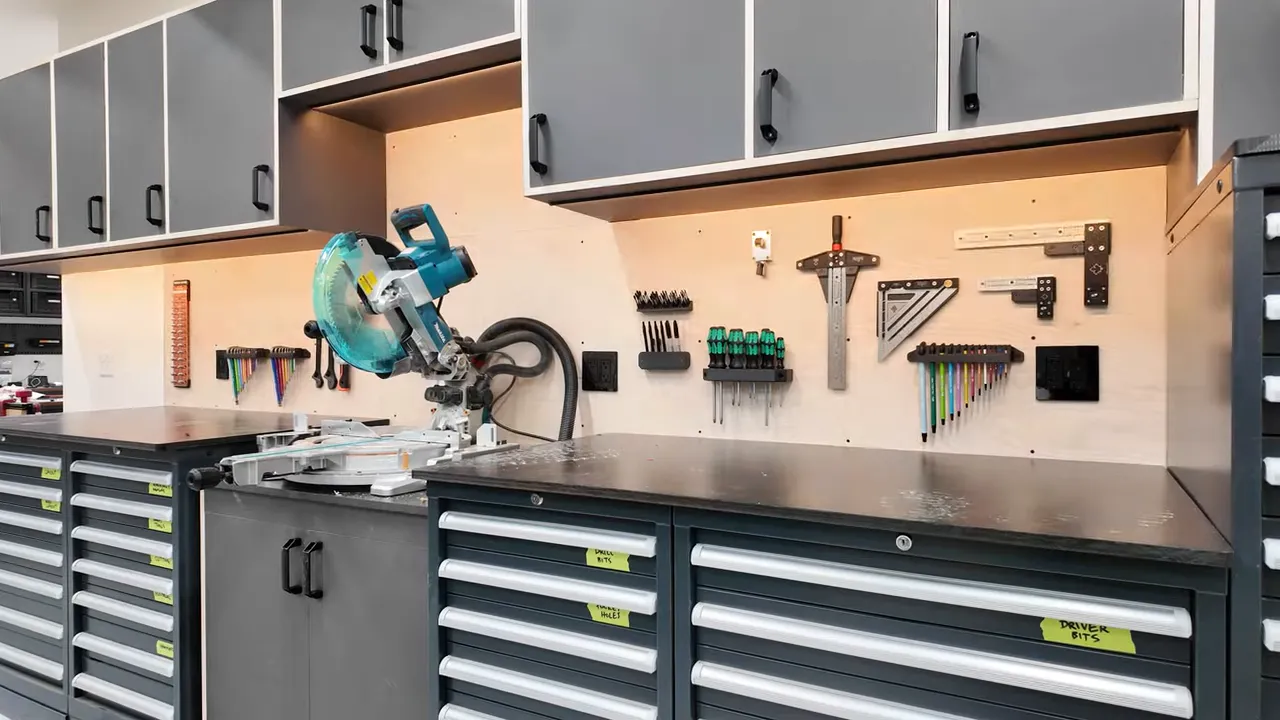
Your extra detail doesn't need to match mine. The point is to care about the space beyond simply making the mess disappear.
Build a Shop That Helps You Make Things
After more than a year of working in a shop that felt temporary, having this cabinet wall in place feels huge. It's finally a command center: a place for tools, supplies, and the everyday things that used to live wherever I last set them down.
There's still plenty left to do. Some storage assignments will change, a few holders still need to happen, and one cabinet door has a couple of extra holes that I'd prefer not to discuss.
But perfection was never the requirement. Better access, clearer homes for tools, and room to evolve are what make shop storage useful. Start with one manageable area, organize it around how you actually work, and keep pursuing shop greatness.
Project Sponsor: Thrive Market
Thrive Market sponsored this project. My family has used its membership-based online grocery service for years, starting with snack alternatives for the kids and eventually expanding to the rest of us. Keeping options like Builders protein bars and Chomps within reach makes it easier to grab something we enjoy during a busy day.
The offer shared with this project is 30% off your first order plus a free gift when you join.


