A camphouse without a campfire is really just a shed with an identity crisis. Mine needed a proper fire pit, and while I was at it, I figured college football by the fire sounded pretty good, too.
Ohio weather had other plans for the roof. Three rounds of snow in a couple of weeks, plus wet and occasionally icy metal roofing, brought that part of the project to a halt. I can tolerate a fair amount of construction mediocrity, but getting on an icy roof is where I draw the line.
So I shifted to three upgrades I could actually finish: a smokeless fire pit with a stone surround, a swing-out TV enclosure behind the shed window, and cedar tongue and groove soffit under the porch. The roof might still be unfinished, but the place is finally starting to earn its name.
Table of Contents
- Choosing a Fire Pit Location and Preparing the Base
- Why I Chose a Breeo Smokeless Fire Pit
- Building the Stone Fire Pit Surround
- A Swing-Out TV Enclosure Behind the Shed Window
- Finishing the Porch With Cedar Tongue and Groove
- What These Camphouse Upgrades Cost
- The Payoff: A Campfire, Football, and a Cooking Station
- Project Sponsor: Building My Online Store With Shopify
Choosing a Fire Pit Location and Preparing the Base
The fire pit location involved some extremely sophisticated calculations. Mostly, I picked a spot that worked with the trees rather than centering it perfectly on the shed.
That slight offset was intentional. Overhead branches mattered more than symmetry with the front door. For your own installation, follow the fire pit manufacturer’s clearances, local burning rules, and guidance such as Smokey Bear’s campfire safety recommendations. A good-looking location is not automatically a safe one.
I excavated a circle roughly one foot wider than the stone surround would need. The extra room gave me space for the foundation and a finished transition around the outside. Rather than haul the dirt away, I used it to build up the area beside the shed where I eventually plan to store firewood.
My drainage and foundation layers
I did not want the fire pit turning into a birdbath after every rainstorm. My approach was to create a layered base:
- A deeper center section: I dug out the middle and added a couple of bags of river rock, with the intention of helping drainage.
- Pea gravel across the footprint: I spread this over the excavated area and got it roughly level.
- About one inch of paver base: This provided a compactable top layer for the stone ring.
- Foundation pavers beneath the insert: I adjusted these to create a flat, level support surface.
That is what I built, not a claim that I have suddenly become a drainage engineer. The river rock and pea gravel were my attempt to keep water moving rather than collecting beneath the pit.
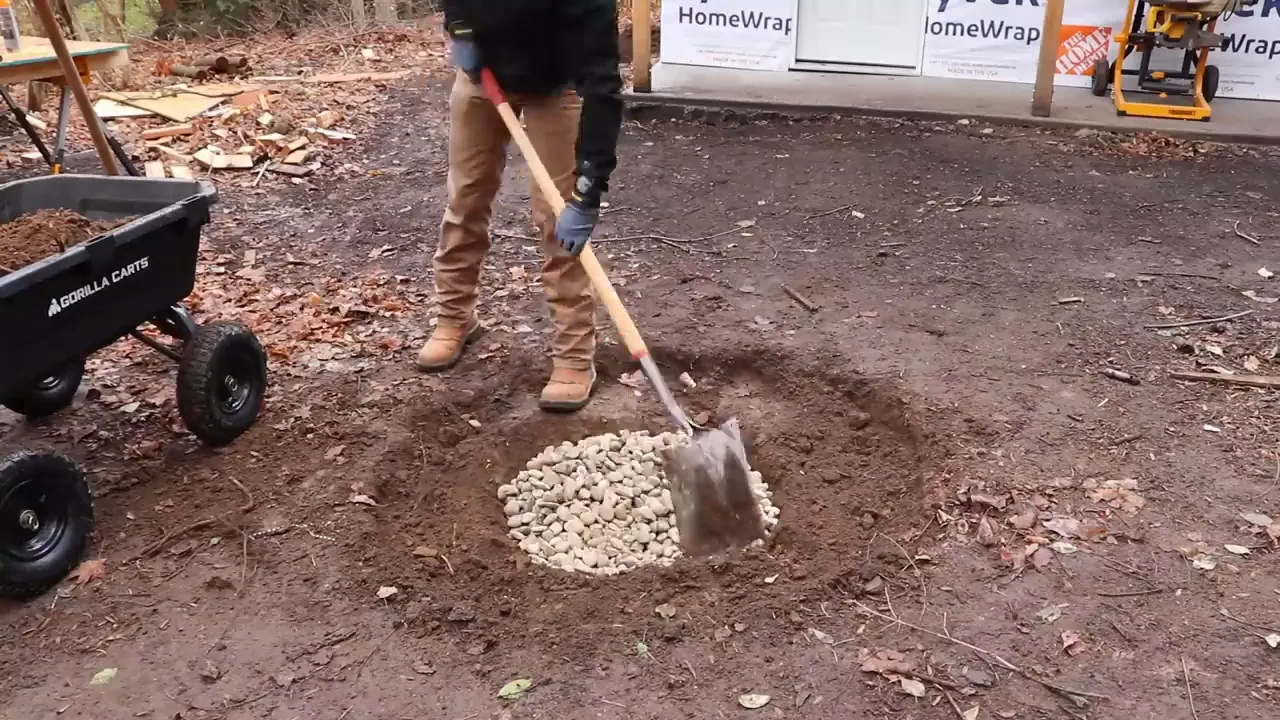
I leveled and compacted the top layer before setting the stones. And yes, I appreciate the irony of spending this much time on a little fire pit foundation after being considerably less meticulous with the shed foundation.
Why I Chose a Breeo Smokeless Fire Pit
I knew early on that I wanted a smokeless fire pit. Fewer complaints about smoke in the kids’ eyes and clothes that smell like a campfire seemed like a worthwhile upgrade.
My original plan was to build the smokeless portion myself. That is a legitimate option, and Fix This Build That’s DIY smokeless fire pit project does a good job of explaining a backyard version.
Instead, I used a Breeo X30. Breeo sent me the unit free of charge after learning about the camphouse project. They did not pay for the review or ask for a particular opinion. That absolutely helped a project that was already way over budget, but it also introduced me to an option I might have regretted overlooking.
How the smokeless design works
The basic idea is a double-wall fire pit that brings in fresh air, heats it, and introduces it near the top of the fire. That hot air supports a secondary burn, burning off much of the smoke that would otherwise drift out into the seating area.
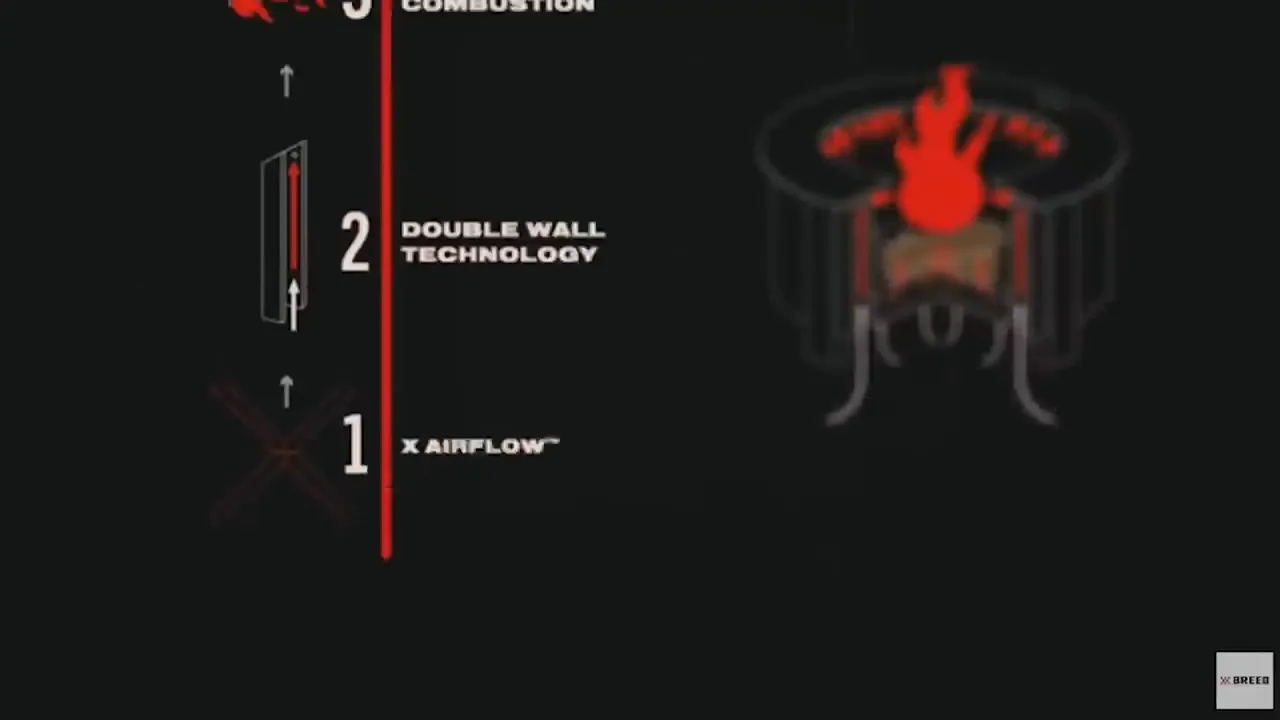
There is one important catch: the fire pit has to get hot enough for that secondary combustion to work. Smoke during startup does not mean the smokeless fire pit is broken. It means the system has not reached its operating temperature yet.
The construction and material options also appealed to me. Breeo makes these fire pits in the USA, with stainless steel components and a choice of exterior finishes. Mine has the Corten steel exterior, which develops a patina over time. A stainless exterior is another option.
You can use the fire pit on its own in a suitable location or integrate it into a traditional stone surround, which was the look I wanted. It costs more than a DIY solution, but the engineered combustion system and cooking attachments were meaningful advantages for this project.
Building the Stone Fire Pit Surround
I chose tumbled Allegheny stones from Lowe’s. They also had a reasonably priced fire pit kit, but I did not love the appearance of the included stones.
Before committing to the layout, I arranged a sample circle to match the inside diameter I needed. My surround called for:
- 16 smaller stones per course.
- Four courses of smaller stones.
- 14 larger matching stones for the top ledge.
Those quantities worked for my insert and layout. They are not universal dimensions for every smokeless fire pit.
The first course determines the shape of the whole surround. I spent extra time making that circle symmetrical before building upward. I also leveled the foundation pavers supporting the fire pit, discovering along the way that a dead blow hammer can apparently become Thor’s hammer if you get a little enthusiastic. One paver did not survive.
With the base sorted, I brushed the stones with a stiff nylon brush and applied landscaping adhesive between courses. I bought six tubes and used every bit of them.
The cold weather gave me time to revisit individual stones and tighten up the layout before the adhesive set. That was useful on this build, although adhesive temperature and curing requirements are something to check on the product you use.
I briefly considered a more elaborate stacked-stone look. Then I priced it at roughly five times the cost and decided these stones looked just fine.
The insert ring I should have installed earlier
Everything was looking good until I started fitting the larger top stones. That was when I realized I had forgotten the metal insert ring that fits beneath the fire pit’s lip and bridges the opening to the stone surround.
Excellent timing. The approximately 100-pound fire pit was now sitting inside a mostly completed ring of glued-together rocks.
I ended up lifting it out with an improvised ladder-and-rope arrangement, finishing the stonework underneath, fitting the insert ring, and lowering the unit back into place. It solved my problem, but the useful lesson is not to copy the improvised lifting setup. It is to check the full assembly sequence before enclosing a heavy insert. Get help or use properly rated lifting equipment if it needs to come back out.
For the cap course, I adjusted the spacing around the circle until the last opening was exactly one stone wide. That let me use 14 whole stones without cutting a narrow filler piece.
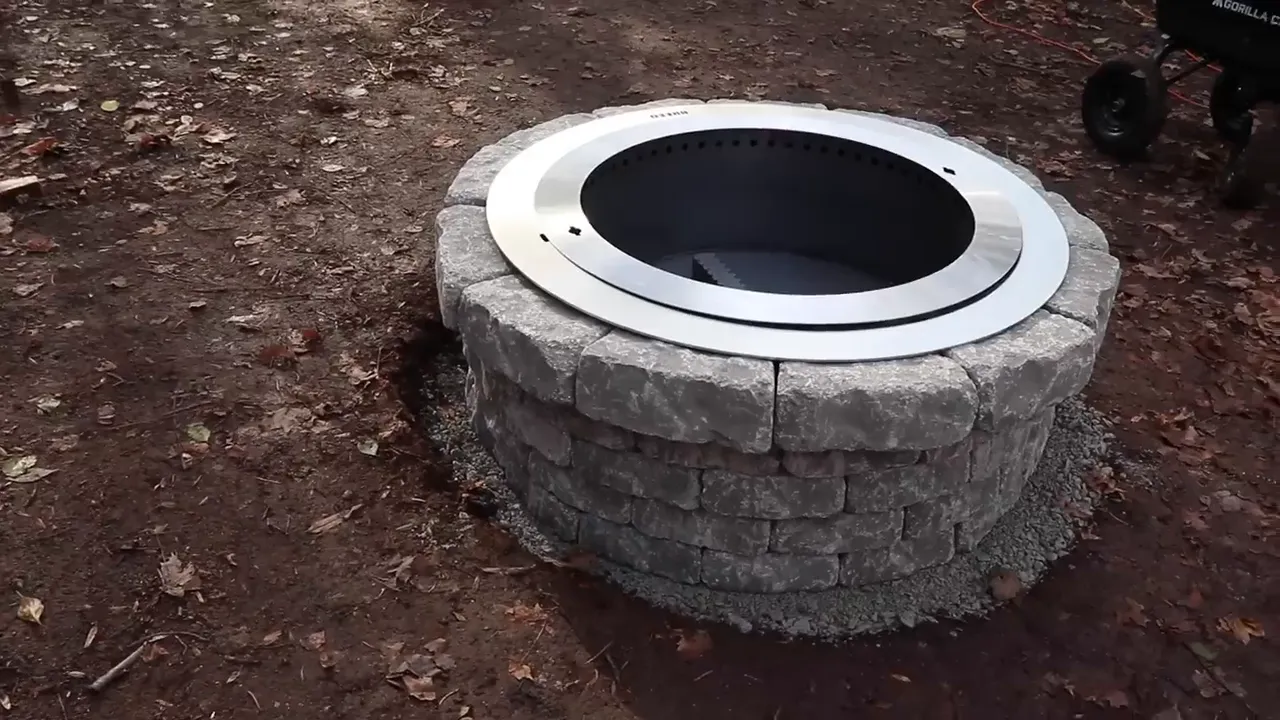
After a final level check, I graded down a nearby high spot to soften the drop toward the pit. A few more bags of river rock around the outside covered the exposed paver base and made the transition look intentional.
I also added a stainless steel lid for when the pit is not in use. Keeping rain out should help avoid that delightful mixture of water, ashes, and regret.
A Swing-Out TV Enclosure Behind the Shed Window
With the caveman TV finished, it was time for the actual TV.
I wanted a 43-inch television behind the front window, enclosed in a shallow box that swings inward from the wall. The box had two jobs:
- Shield the television from activity inside the shed.
- Block light from the shed so the screen had a dark background when seen from outside.
The second point is why I painted the inside black. Without that dark enclosure, light and the interior of the shed would remain visible around the screen.
Building and hanging the box
The enclosure itself was straightforward: a shallow framed plywood box, a couple of coats of black paint inside, and a simple TV mount attached to the back panel.
I added rubber gasket material around the open perimeter where the box meets the window. My primary goal was to stop light from sneaking through the cracks, not to claim I had built a certified weatherproof TV cabinet.
A temporary ledge supported the enclosure while I fastened heavy-duty gate hinges to the shed framing. Once attached, the whole box could swing away from the window for access.
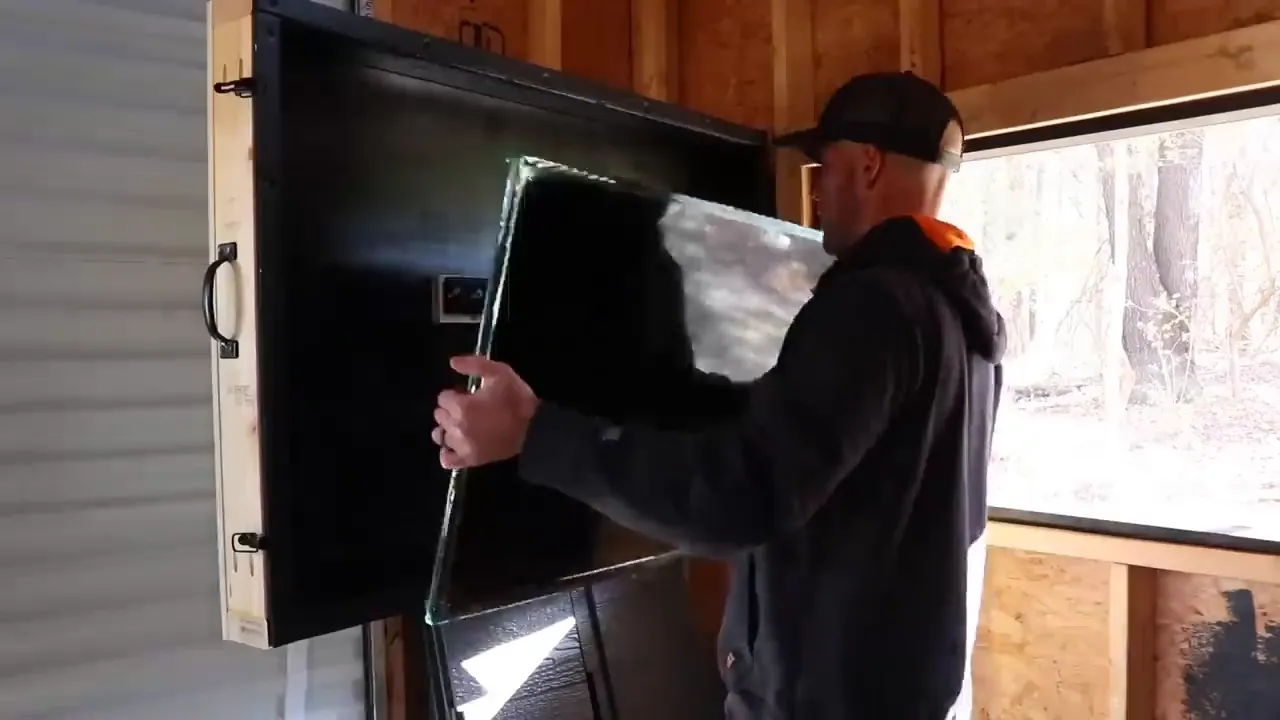
There were two small adjustments that made a big difference:
- Level the TV mount with the enclosure closed. I initially checked it with the box open, then realized the position that mattered was the one it would occupy in use.
- Correct the screen’s tilt. The TV leaned down slightly, so I added a spacer at the bottom to hold it parallel to the window.
A handle and a couple of simple latches finished the enclosure.
There was a bonus inside the shed, too. The closed box creates a large flat back panel where I could potentially hang lightweight items. I recovered some usable surface area instead of leaving an exposed television occupying that part of the wall.
Picture, lights, and sound
I was concerned the Plexiglas window would make the image difficult to see. In practice, the little 43-inch TV was bright and clear enough for me to see from across the seating area.
And because apparently a DIY project is not complete without colored LEDs, I added two inexpensive color-changing lights beside the TV. They were about $10 at Walmart, so I was willing to experiment. Whether they would be bright enough to make much difference outside was still an open question.
The long-term audio plan is a pair of outdoor speakers connected to the TV. For now, turning up the television’s own speakers made it audible outside, which was good enough to get started.
Finishing the Porch With Cedar Tongue and Groove
Before settling in by the fire, I wanted to cover the exposed framing beneath the porch roof. A cedar soffit seemed like a small finishing detail. It turned out to make a huge visual difference.
First, I had to correct an earlier framing mistake. Some supports extended below the intended soffit plane, so I trimmed them flush before installing the paneling.
The material is quarter-inch cedar tongue and groove paneling, the kind primarily sold as decorative wall covering. It gave me the cedar appearance I wanted for considerably less money than the full-size cedar planks I had originally considered.
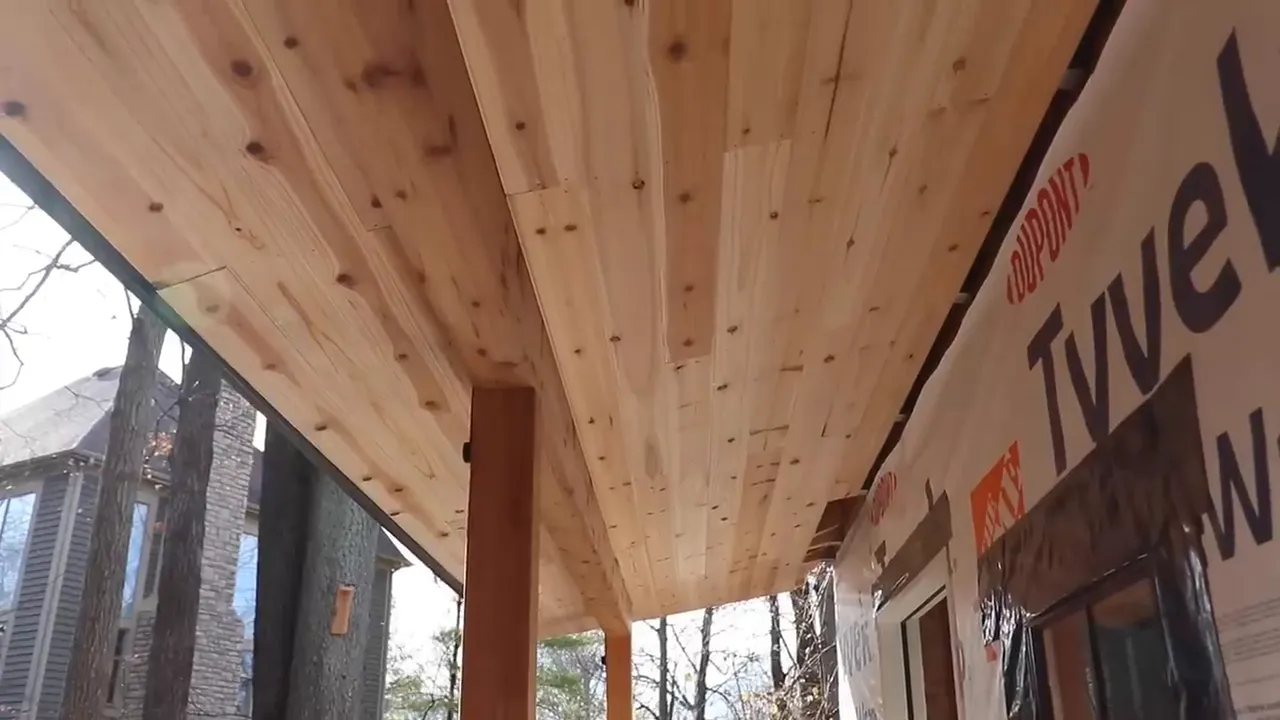
I fastened it with 16-gauge galvanized finish nails. My plan is to coat the cedar with a waterproofing sealant intended for decks as well.
I left the soffit unfinished around the wall corners because trim still needs to go in there. That is deliberate unfinished work, which feels much better than the accidental kind.
What These Camphouse Upgrades Cost
Here is the cost breakdown I recorded for this stage of the shed build:
- 43-inch TV and mount: $323.
- Fire pit rocks and stones: $278.
- TV enclosure materials: $150, helped along by one painfully expensive sheet of plywood.
- Cedar porch soffit materials: $136.
- Standard steel fire pit insert allowance: $122.
That brought this stage to $1,009 and the running shed project total to $11,813.
That total does not represent the cost of buying the Breeo setup. Since Breeo supplied my fire pit, I used a standard steel insert allowance in the project accounting. If you want the same smokeless system, price the appropriate fire pit, insert ring, lid, and accessories separately.
The Payoff: A Campfire, Football, and a Cooking Station
A campfire makes a cold day better. College football does not hurt either. My only real complaint was that I finished this toward the end of the season rather than the beginning. Go Vols.
The fire pit also has another job available. The Breeo Outpost grill attachment turns it into a live-fire cooking station. The setup has attachment positions on either side, and the grill can swivel over or away from the fire.
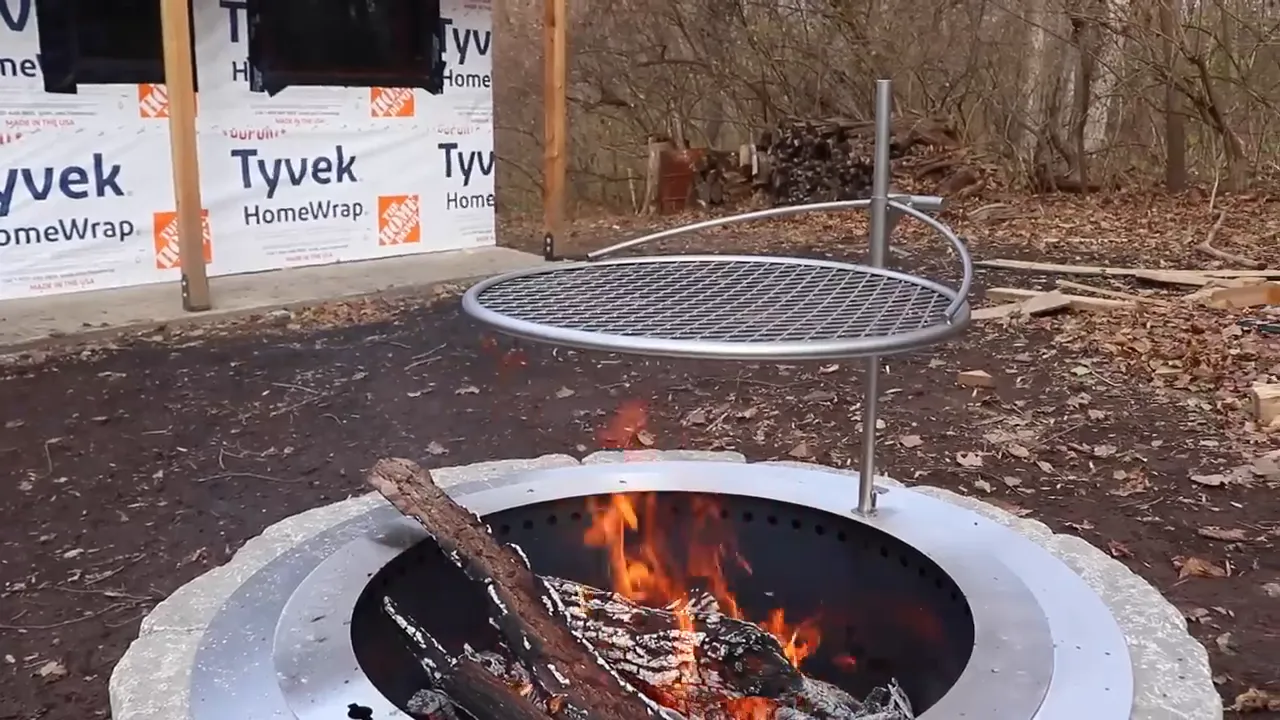
Adjusting the grate height changes its distance from the heat, making it useful for steaks, burgers, vegetables, or whatever else sounds good. Other attachments let you suspend a pot over the fire, in case the evening calls for chili and feeling like a cowboy.
There is still plenty left on the shed: finish the roof when the weather cooperates, then move on to siding, paint, and the remaining trim.
The ground around the fire pit is another unresolved detail. I originally liked the idea of leaving it as dirt for that natural, in-the-woods feeling. Unfortunately, it currently feels more like a mud pit. Pavers or gravel may be the next practical improvement, because little kids and mud are not helping my case.
But even with those jobs unfinished, the camphouse now has a reason to gather outside. That feels like actual progress toward shed greatness.
Project Sponsor: Building My Online Store With Shopify
Shopify sponsored this stage of the project, and I have also been using it to build my own online store. I started with a paid theme to establish a consistent look, then brought in a Shopify expert to help finish the site when it became clear that the shed was consuming my available web-design time.
The features I am especially interested in are print-on-demand integrations for merchandise without holding inventory, plus product bundles and options. One possibility is offering a physically printed, spiral-bound set of project plans alongside the downloadable PDF. Having those options together in one store is the goal.
If you are building an online business or side hustle, the sponsor offer is a free trial through my Shopify link.


