Sometimes the shop upgrade you need is not another tool or a bigger cabinet. It is simply putting the things you use all the time within reach.
The end of my workbench had been waiting for exactly that kind of attention. I had intentionally left a recessed area there for storage, but I did not want to fill it with organizers just to fill the space. After actually working at the bench for a while, I finally knew what belonged there: my custom router fence, two dust collection hoses, and a handful of small F-style clamps.
Nothing crazy. Just a few simple holders that would save me from searching around the shop every time I needed something.
Key Takeaways
- Let actual shop use determine which tools deserve the most accessible storage.
- Use existing hardware and reusable holders to keep custom organizers simple.
- Store frequently used accessories near their work area rather than elsewhere in the shop.
- Check unused spaces before building another bracket, shelf, or hanger.
Start With Your Workflow, Not With an Empty Wall
When I built this workbench, one deliberate design choice was leaving room for organization on the ends. Instead of having a flat face with no particular purpose, I had a recessed area I could customize around the way I work.
The important part was waiting to find out what that actually looked like.
We all have an idea of how a shop is going to function. Then we start building projects, and our real habits turn out to be a little different. That is why I think understanding your workflow is the most important part of shop organization.
Before making holders, ask yourself:
- What am I constantly reaching for at this workstation?
- What do I keep walking across the shop to retrieve?
- What is taking up convenient storage space even though I rarely use it?
- How many of each item do I actually need close by?
For me, three storage problems kept coming up.
- The router fence: I use it regularly, but it was living in a corner instead of near the router table built into the workbench.
- The hoses: One connects the router fence to the bench’s built-in dust collection. The other is a smaller hose I use for cleanup and small handheld tools.
- The clamps: My small F-style clamps were hanging from the edge of a butcher-block counter elsewhere in the shop.
I did not need every clamp I owned at the bench. Four to six would cover what I wanted close at hand. That distinction matters: the goal was useful storage, not maximum storage.
Lay Out the Actual Tools Before Building Anything
My starting plan was to mount the router fence horizontally near the bottom of the recess, hang the smaller vacuum hose vertically on the right, and put a compact clamp rack near the upper left.
That arrangement made good use of the different shapes involved. The fence is long and shallow. The hose needs room to loop downward. The clamps can hang in a row from a short shelf.
Holding the actual items against the bench helped establish the layout before I committed to it. It also left room for the existing dust collection connection and switch.
I care about how my shop looks, too. A couple of nails might have gotten some of these things off the floor, and there is nothing wrong with that approach. But my preference is to make the organizers look like they belong with the workbench.
Build a Router Fence Holder With Scrap T-Track
The router fence already uses T-bolts to attach to the workbench. Rather than inventing a completely different way to hold it, I could use that existing hardware for storage as well.
The basic idea was a laminated plywood bracket with short pieces of T-track positioned to capture the fence’s T-bolts. The fence could slide into place and be secured with its existing knobs.
I started with half-inch plywood and used the fence itself to work out the bracket’s proportions and track positions. This is a custom-fit organizer, so the relationship between the holder and the hardware matters more than a universal set of dimensions.
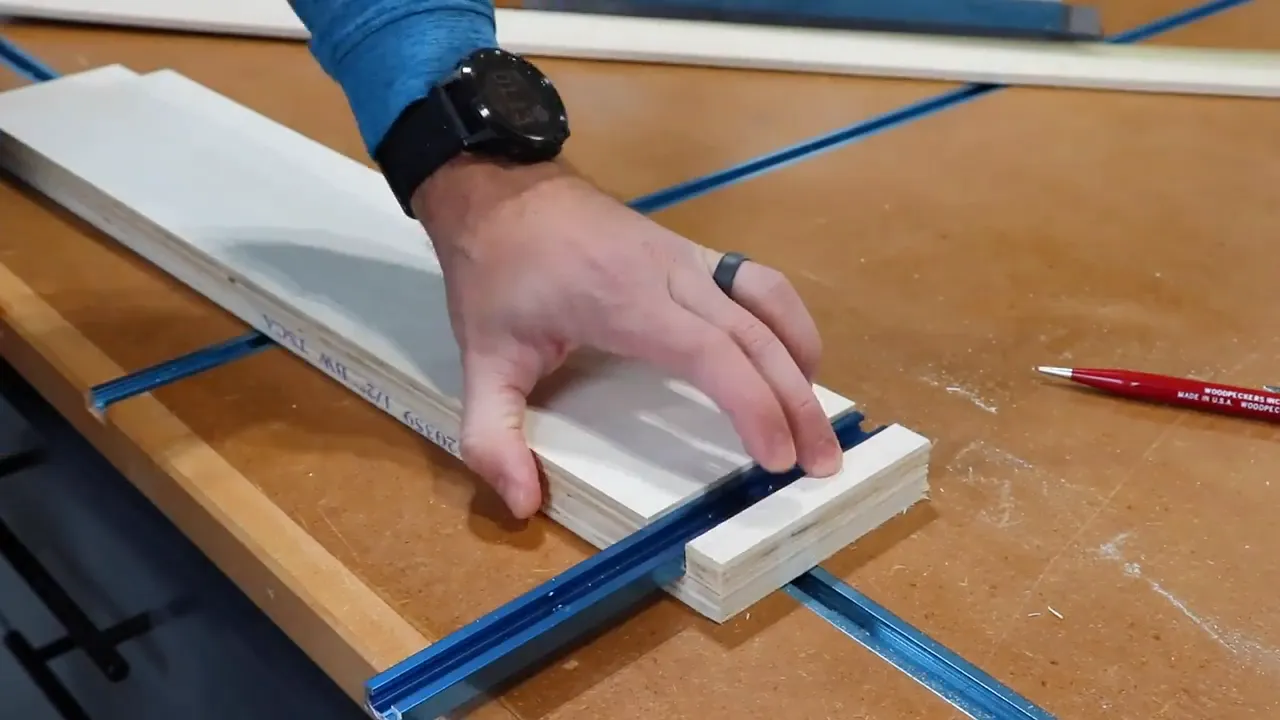
The construction followed a straightforward sequence:
- Size the plywood pieces around the fence. Lay out the holder using the fence’s mounting points as the reference.
- Build up the laminated bracket. Assemble the plywood layers and spacers, leaving room for the short track sections.
- Glue and clamp the assembly. Keep the layers aligned while the glue sets.
- Cut the T-track to length. Only short sections are needed to engage the mounting bolts.
- Finish the wood, then install the track. I painted the bracket black before completing the hardware installation.
- Mount and test the holder. Position it on the bench, check it for level, secure it, and test the fence in place.
The result gives the fence a dedicated home directly below the surface where I use it. It is no longer leaning in a corner, and the same mounting hardware serves both working and storage duties.
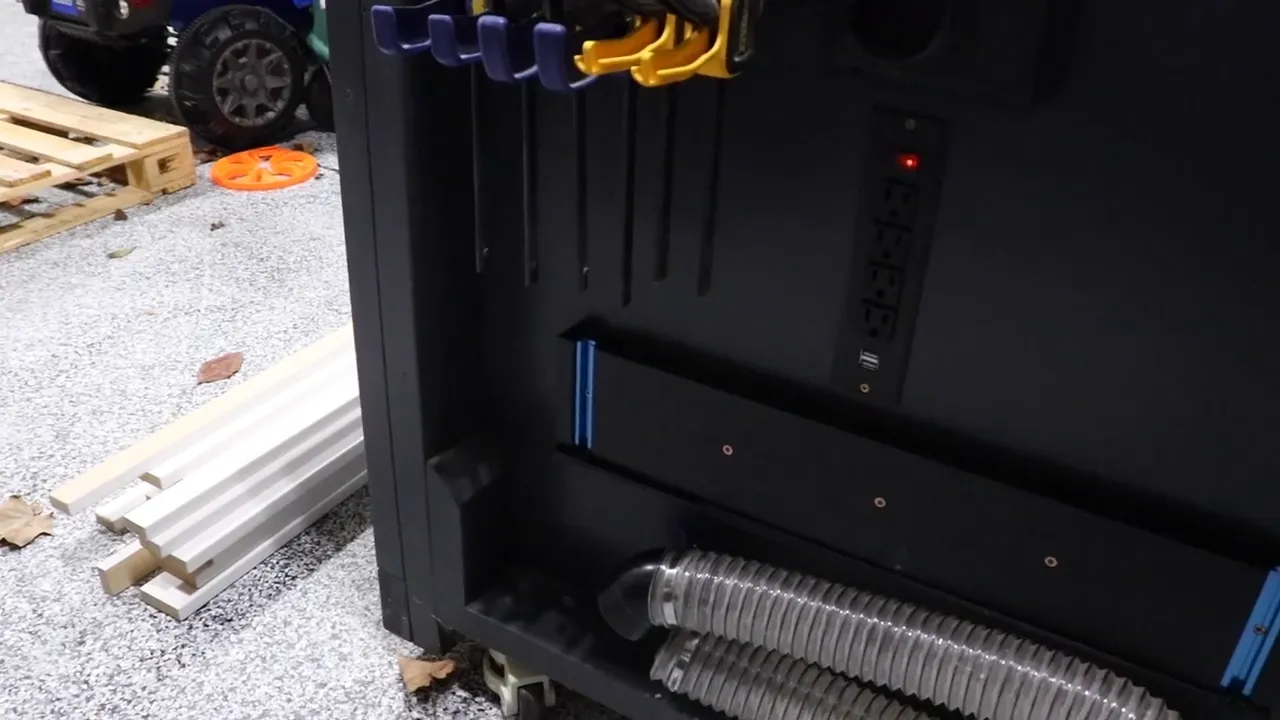
If you are interested in the fence itself, I have a separate custom router fence build covering that project, including machining it with a woodworking router.
Reuse a Hose Hanger That Already Works
For the smaller vacuum hose, I did not need to build anything new. I already had a 3D-printed hose hanger on my sanding cabinet, and I was no longer using it to hold a hose.
So I stole it. From myself. Very economical.
The hanger has a curved saddle that supports the hose’s loop and a front lip that helps keep it in place. I mounted it near the upper-right corner of the workbench recess, allowing the hose to hang vertically below it.
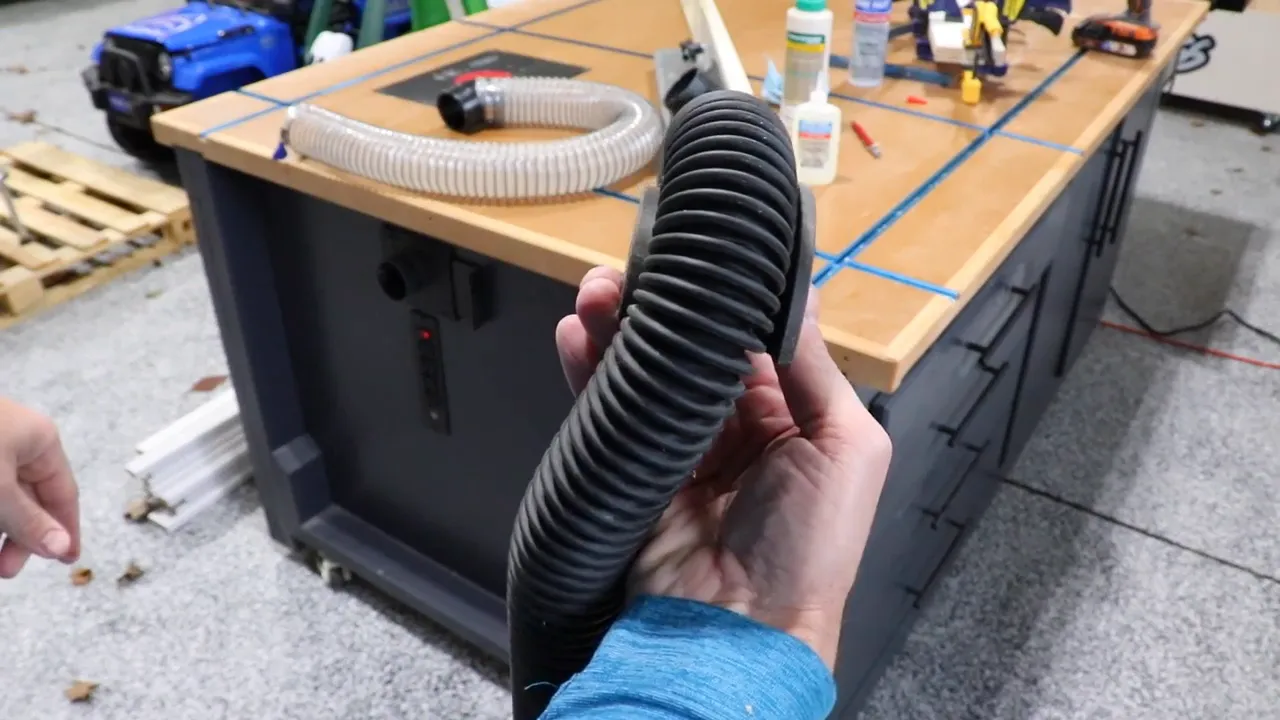
I like 3D printing, so using a printed part made sense for me. A 3D printer is not a requirement for this project. You could make a hanger with the same basic shape from another material. The useful part is giving the hose a secure place to hang, not the process used to make the holder.
Make a Simple Shelf for F-Style Clamps
The clamp rack is about as uncomplicated as shop storage gets: a little shelf that the clamps can clamp onto.
I tested the idea with a strip of wood and an actual clamp before cutting the parts. That established how far the shelf needed to project and how much space the clamps would occupy.
The finished rack uses a horizontal shelf attached to a vertical back, with small triangular supports underneath. After assembling it, I painted it to match the router fence holder.
For installation, I used a clamp to hold the rack in position while I checked it with a level and fastened it to the bench. Then the F-style clamps went straight onto the shelf.
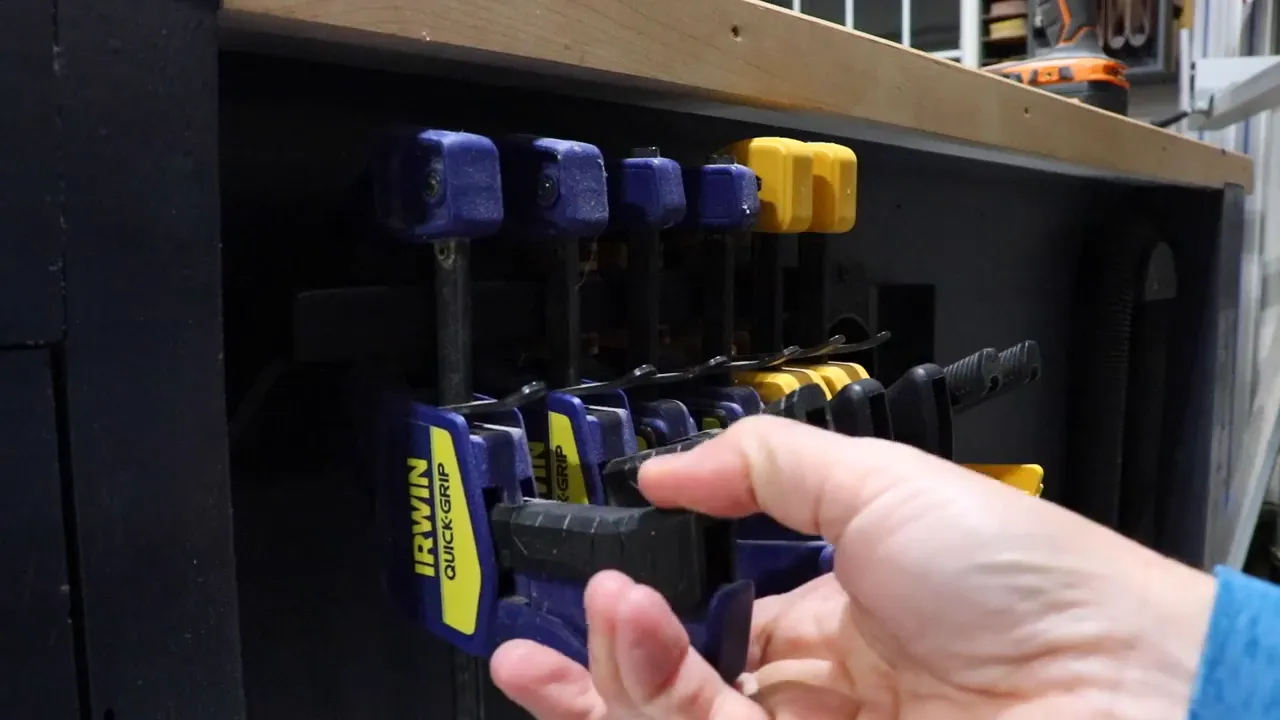
There are no individual slots or complicated mechanisms here. The clamps’ own jaws hold them in place. Now I can reach down from the workbench and grab one instead of walking over to the other counter.
Use the Remaining Space Before Making Another Organizer
The clear router-fence hose was the last item without a home, and initially I was scratching my head over it.
Then I tried folding it into the space below the mounted fence. It fit almost perfectly.
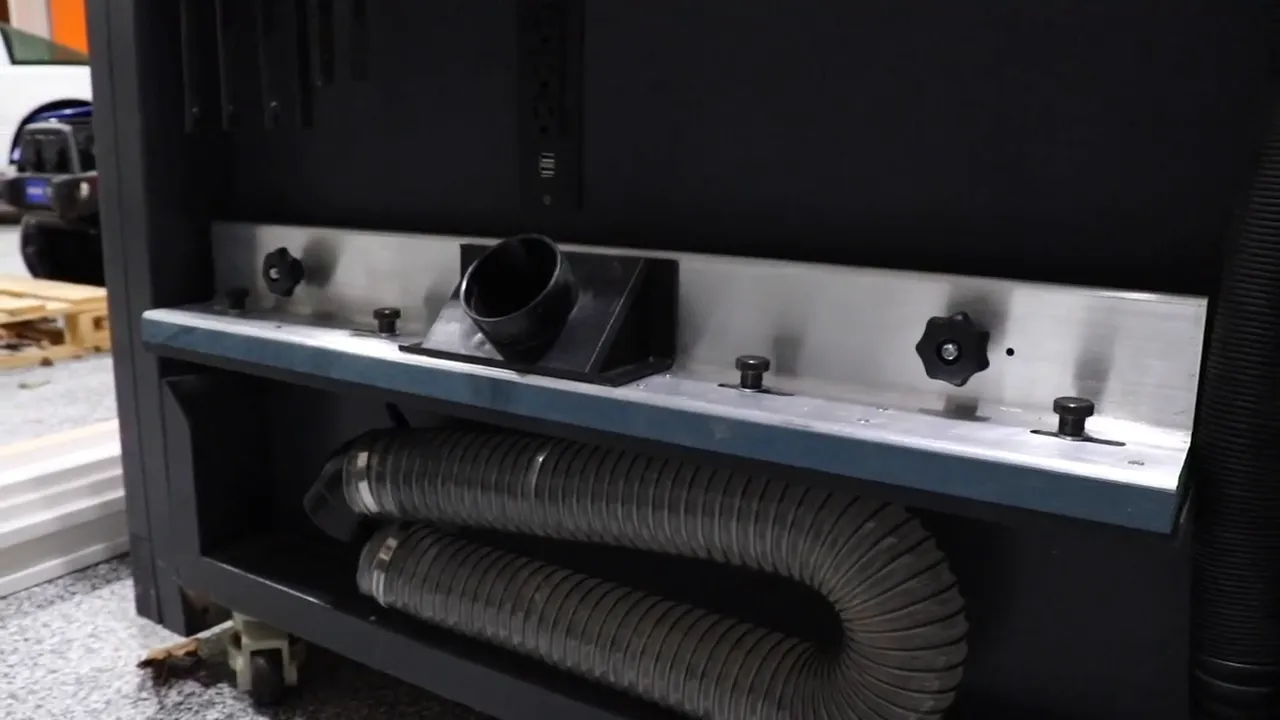
That was good enough. It used an otherwise empty area, kept the hose with the equipment it serves, and did not require another part.
I can always improve that arrangement later. Not every storage problem needs a custom-designed solution immediately, especially when the simple option already works.
Keeping these hoses nearby also makes them convenient to retrieve when setting up the router fence or cleaning up. For broader safety guidance beyond storage, OSHA’s woodworking resources provide additional information on workshop hazards and dust control.
Paint Is Optional. A Better Workflow Is the Point.
You absolutely do not have to paint little organizers like these. You do not even have to make them particularly pretty for them to do their job.
For me, though, the appearance of the shop matters. I take pride in the space, and having things look intentional helps get my creative juices flowing. Painting the plywood parts black tied them into the workbench instead of leaving them looking like unrelated scraps attached to the side.
That is a personal preference, not a prerequisite.
Without the painting process, I think this is the kind of project you could knock out in about an hour. A little plywood, some scrap T-track, a reused hanger, and a basic shelf accomplished quite a bit.
The fence is where I need it. The clamps are within reach. Both hoses have a home. Most importantly, I no longer have to search around the shop for things I use at this end of the workbench all the time.
That is what makes a small shop organization project worthwhile: a modest amount of effort that makes the next project easier.
Keep pursuing shop greatness.
A Thank-You to the Sponsor
Hone sponsored this project. Its at-home assessment process includes blood-sample collection supplies and a return label, followed by lab analysis and a consultation with a physician to review the results. When appropriate, a personalized treatment subscription includes ongoing monitoring. I am not a medical expert, so those decisions belong with a qualified clinician.
The promotion offered an at-home assessment and doctor consultation for $45 for a limited time. Check Hone for current pricing and availability.


